Numbness and Tingling in Your Hands: What It May Mean
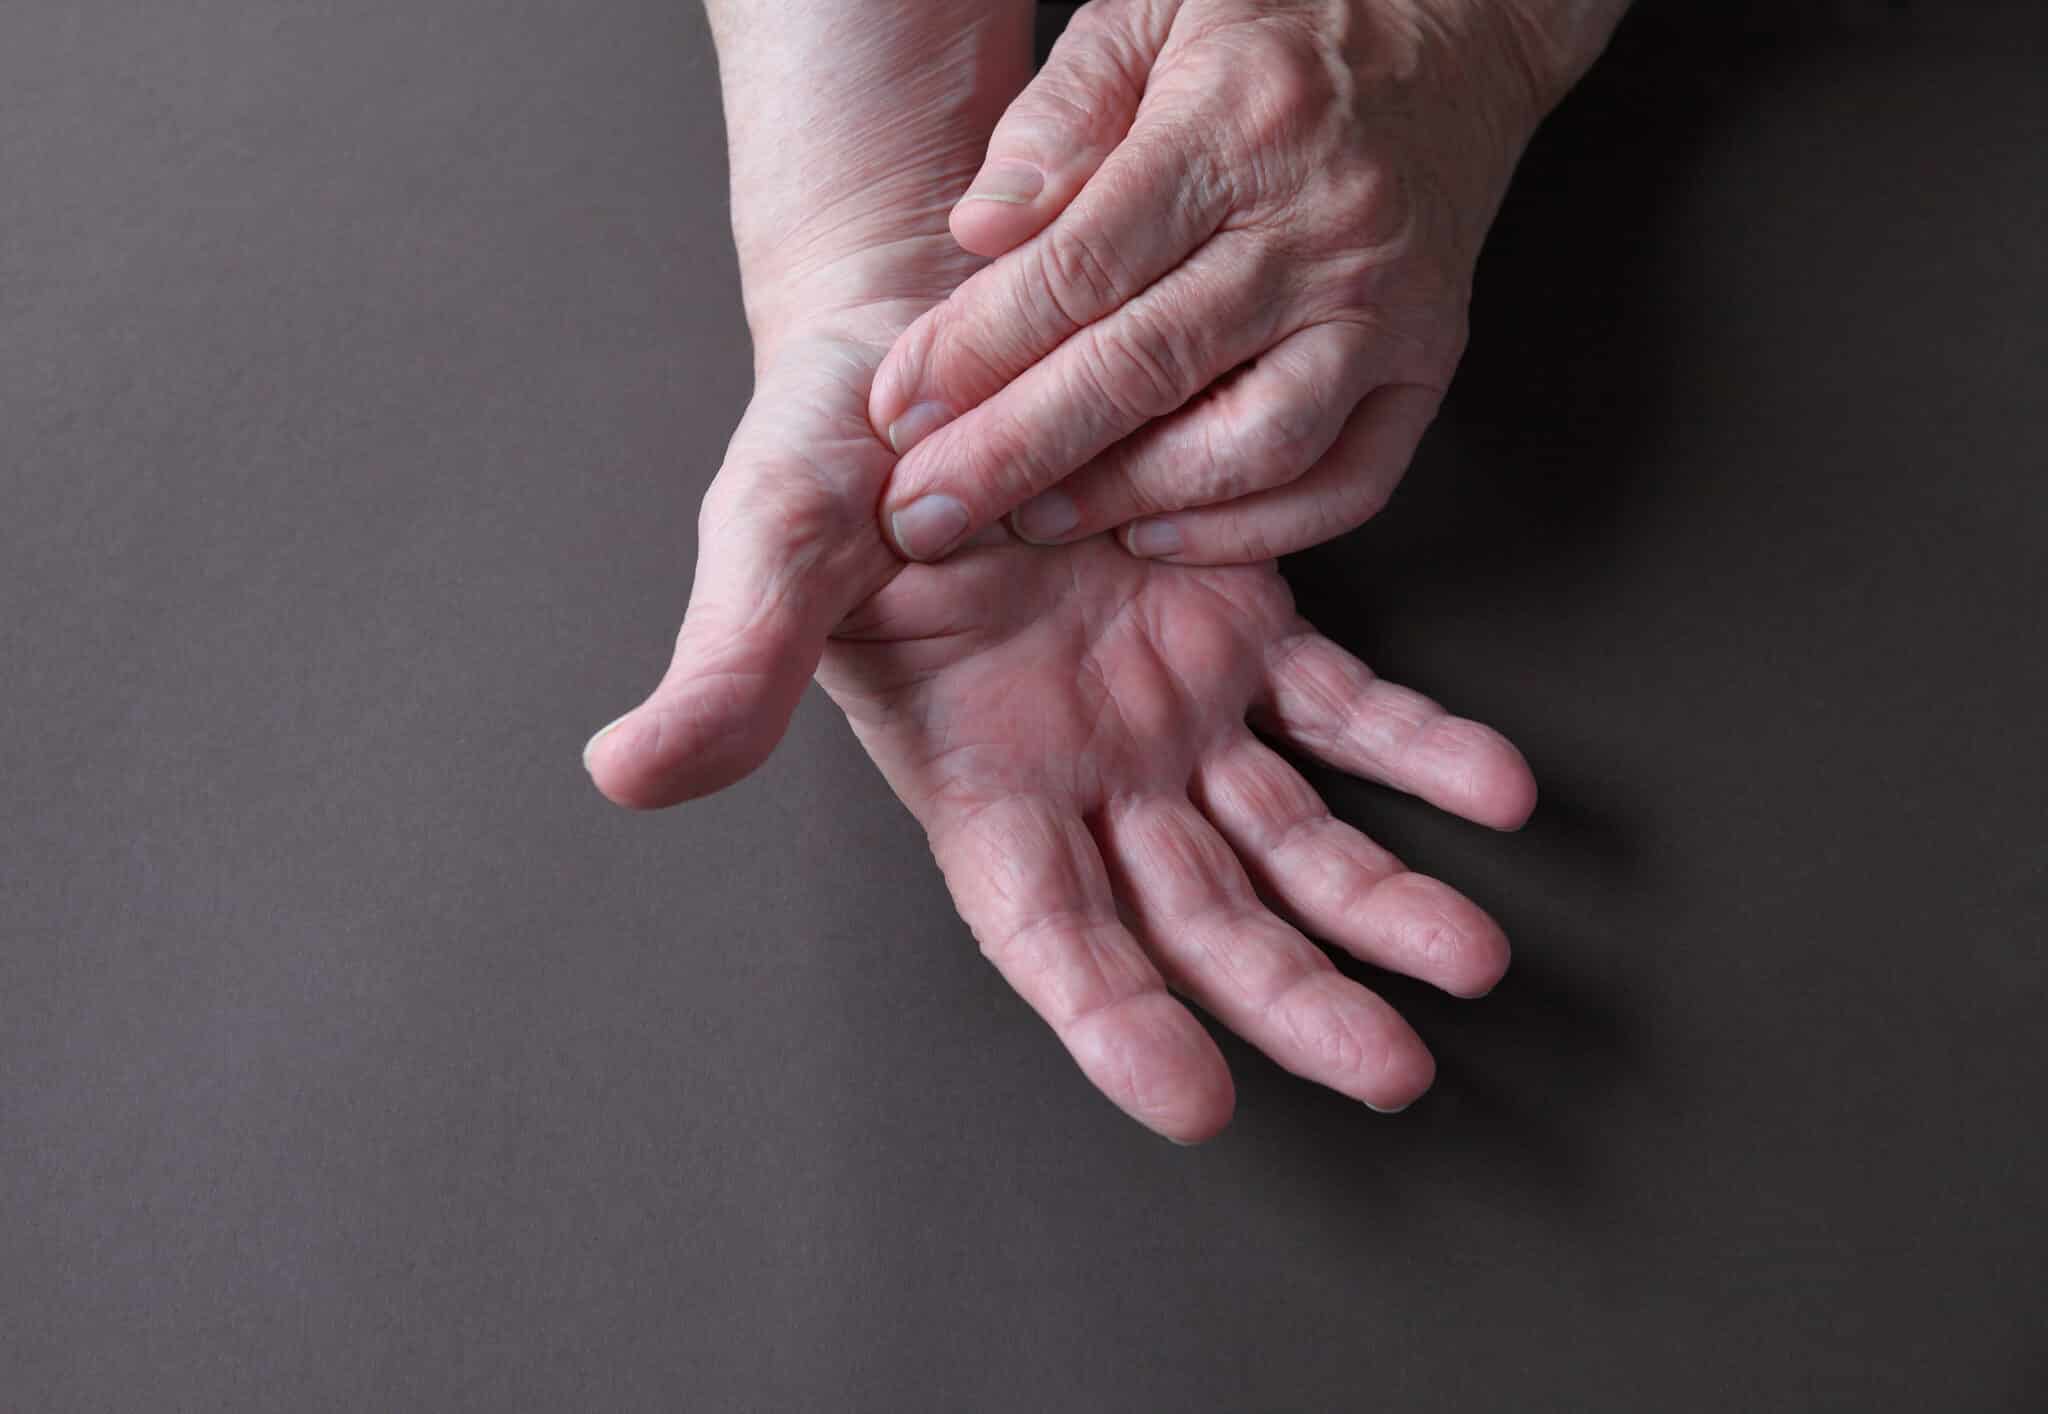
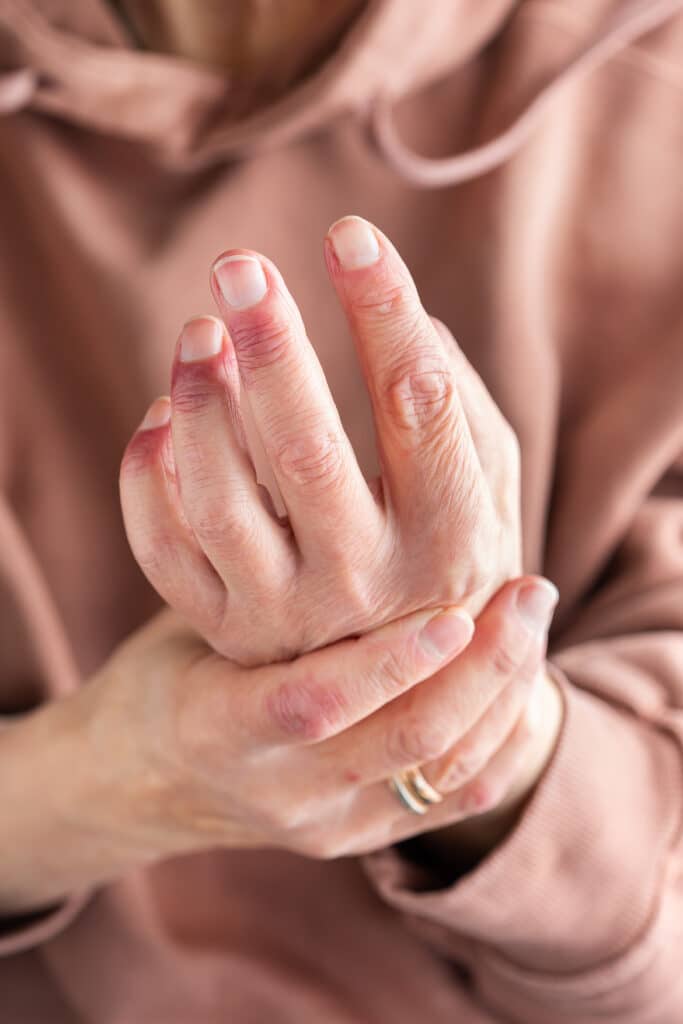
Numbness and tingling in your hands can be easy to ignore at first, especially if they come and go. When it keeps returning, wakes you up at night, or starts affecting your grip, it may mean a nerve is being irritated or squeezed. Knowing common causes can help you decide when to get medical care.
You may notice pins and needles while driving, typing, reading, or holding your phone. Some people also report burning pain, hand weakness, or discomfort that spreads into the wrist, forearm, or elbow. These details can help sort out where the problem may start.
Similar symptoms can come from different problems. That is why it helps to get an exam instead of guessing. A clinician can check where the nerve signals seem to be changing, then guide you to the treatment that fits the likely cause.
#image_title
Common Reasons Your Hands May Feel Numb or Tingly
What You Should Know
Numbness and tingling often happen when a nerve is under pressure somewhere between your neck and your hand.
Carpal tunnel syndrome is a common cause, but it is not the only one.
Cubital tunnel syndrome can affect the ring and small fingers, especially when your elbow stays bent for long periods.
Symptoms may show up during sleep, computer work, driving, or repeated hand use.
Weakness, dropping objects, or trouble with fine tasks can suggest the nerve is affected more than before.
Some people feel symptoms in all fingers, while others notice it in certain parts of the hand.
Neck problems can also cause numbness or tingling that travels down the arm into the hand.
Getting help early may reduce irritation before lasting nerve changes develop.
Splints, activity changes, therapy, medicines, or surgery may be considered based on the cause.
When symptoms keep returning, it is safer to get them checked rather than waiting for them to worsen.
Why These Symptoms Happen
Nerves send signals between your brain, spinal cord, and the rest of your body. When a nerve becomes irritated, inflamed, or compressed, the signals it sends can change. That change may lead to tingling, numbness, burning pain, or weakness.
Where you feel symptoms often gives clues. The exact fingers involved, the time of day, and whether you also have neck, wrist, or elbow pain can help point to the area where the nerve may be affected.
In many cases, the cause is nerve compression. This means pressure is building on a nerve as it moves through a tight space in the body. But compression is not the only possibility, so evaluation still matters.
Carpal Tunnel Syndrome
Carpal tunnel syndrome is a common reason for numbness and tingling in the hand. It happens when the median nerve is compressed as it passes through the carpal tunnel, a narrow space in the wrist.
This condition often affects the thumb, index finger, middle finger, and part of the ring finger. At first, symptoms may come and go. Over time, they can start to happen more often.
Numbness or tingling in the thumb, index, and middle fingers
Symptoms that are worse at night or when you first wake up
Discomfort during driving, typing, or holding a phone or book
Hand weakness or trouble gripping objects
Occasional dropping of items unexpectedly
Because carpal tunnel syndrome may slowly worsen, it is a good idea to seek care if symptoms are becoming more frequent or if weakness begins. Early steps may help reduce irritation.
Cubital Tunnel Syndrome
Cubital tunnel syndrome affects the ulnar nerve, which runs along the inner side of the elbow. Some people notice it as the nerve area that feels like a quick electric shock when you hit your “funny bone.”
When the ulnar nerve is irritated or compressed, numbness and tingling may show up in the ring finger and small finger. Symptoms often become more noticeable when the elbow stays bent for a long time, such as during sleep or desk work.
Tingling in the ring and small fingers
Symptoms that show up when sleeping with the elbow bent
Numbness during phone use or desk work
Hand weakness, especially with pinch or grip tasks
Clumsiness with fine motor tasks
Could the Problem Be Coming From Your Neck?
Not all nerve symptoms in the hand start in the hand or wrist. In some cases, a nerve root in the cervical spine, meaning the neck area, becomes irritated. Then signals can travel down the arm and into the hand.
This is sometimes called cervical radiculopathy. Along with tingling or numbness, you may also feel neck pain, shoulder discomfort, or pain that radiates along the arm. These clues can help guide the right evaluation.
Common Patterns of Hand Numbness and Tingling
Possible Cause
Where You May Feel It
Common Clues
Carpal tunnel syndrome
Thumb, index, middle, and part of the ring finger
Often worse at night, during driving, typing, or gripping
Cubital tunnel syndrome
Ring finger and small finger
Often worse with a bent elbow, sleep, or phone use
Neck-related nerve irritation
Can travel down the arm into the hand
May happen with neck pain, shoulder pain, or radiating arm symptoms
Other Symptoms to Watch For
Numbness and tingling can be an early warning sign, but they are not always the only symptoms. As nerve irritation continues, other problems may appear and can help show how much the nerve is being affected.
Burning or aching pain
Weakness in the hand or fingers
Difficulty gripping, pinching, or buttoning clothing
Dropping objects more often
Symptoms that wake you from sleep
If you are noticing weakness or losing hand control, it is especially important not to wait too long for an evaluation. That can help reduce the chance of lasting problems.
How We Evaluate Hand Numbness
An exam usually starts with listening to your symptoms and checking your neck, shoulders, elbows, wrists, and hands. The pattern of numbness, what triggers it, and how long it has been happening can help guide next steps.
Your clinician may also check strength, feeling in the skin, and reflexes. If needed, more tests may be suggested to confirm which nerve is involved and how severely it is being affected.
#image_title
Treatment Options
Treatment depends on the cause of your symptoms, how long they have been present, and whether nerve weakness is involved. Many people improve with non-surgical care, especially when treatment starts sooner.
Activity changes to reduce pressure on the nerve
Bracing or splinting, especially at night for certain conditions
Anti-inflammatory medication for pain or swelling when it is appropriate for you
Physical therapy or occupational therapy to improve movement and function
Surgery for ongoing compression or progressive weakness in selected cases
Anti-inflammatory medicines may help with pain or inflammation. They do not necessarily fix the nerve compression itself, and they should not replace a proper diagnosis. Carpal tunnel symptoms can improve for some people, but medicine alone may not be enough.
Safety: When to Get Emergency Help
Get emergency medical care if numbness or weakness in the hand or arm happens suddenly, especially on one side of the body. Seek help right away if numbness or weakness comes with facial drooping, trouble speaking, confusion, dizziness, loss of balance, a severe headache, chest pain, or shortness of breath.
These symptoms can point to stroke or other urgent problems and need fast treatment. If you are unsure, it is safer to call emergency services or go to the nearest emergency department.
Note: Not All Hand Numbness Comes From Nerve Compression
Hand numbness can have medical causes beyond pressure on a nerve. Possible causes include diabetes-related neuropathy, vitamin B12 deficiency, thyroid disease, medication side effects, alcohol-related neuropathy, inflammatory or autoimmune neuropathies, and circulation-related problems. A checkup can help sort out the right reason.
When It’s Time to See a Specialist
Consider scheduling an evaluation if symptoms keep coming back, interrupt sleep, or start affecting daily activities. Ongoing numbness and tingling should not be ignored, especially if they come with weakness or trouble using your hand.
Your symptoms keep returning
You wake up with numb or painful hands
You have weakness or trouble gripping objects
Your symptoms move up the arm or start in the neck
Daily tasks like typing, driving, dressing, or cooking are becoming harder
The right diagnosis can help you avoid making nerve irritation worse and can point you toward treatment that matches the true cause.
Don’t Ignore Persistent Hand Numbness
Frequent numbness, tingling, weakness, or pain may mean there is an underlying nerve issue that needs attention. Whether the source seems to be the wrist, elbow, or neck, early evaluation can help protect function and get you back to everyday activities more comfortably.
Consider an exam with Princeton Orthopaedic Associates if numbness and tingling in your hands are not improving or are starting to interfere with your routine.
This blog post is meant to be informative and should not act as a self-diagnosis tool. If you’d like to see one of our doctors, please contact us here.
Ice or Heat for Pain Relief: How to Know Which One to Use
When pain or soreness shows up, many people reach for an ice pack or heating pad without knowing which one will work better. Ice and heat can both help, but they do different things in the body. In most cases, ice is best for newer injuries with swelling, and heat is best for stiffness or muscle tightness.
Using cold or warmth the right way may help with pain control, swelling, comfort, and easier movement. It is also important to use each option safely. Get medical advice sooner if symptoms are severe, keep returning, or do not improve as expected.
Quick Differences Between Ice and Heat
Use Ice When You Want to Calm Things Down
Often best after a recent injury
May help reduce swelling
Can ease pain by temporarily numbing the area
Common choices for sprains, strains, and bruises
Use Heat When You Want to Loosen Things Up
Often helpful for stiffness and tight muscles
May increase blood flow to the area
May improve flexibility before movement
Common choices for chronic aches and muscle tension
How Ice Helps an Injured Area
Cold therapy can lower blood flow to the area and may help calm swelling and irritation after a sudden injury. It can also reduce pain by temporarily numbing sore tissues. Ice does not fix the cause by itself, but it can make it easier to rest and move more comfortably.
Ice is often used soon after a sprain, strain, or impact injury, especially when you notice swelling, warmth, bruising, or throbbing pain. A rolled ankle, a fresh knee sprain, or a hard bump that starts to bruise are common examples.
How Heat Helps Sore or Stiff Tissue
Heat therapy can relax tight muscles and may improve circulation to the sore area. This can make a stiff joint feel more comfortable and easier to move. For many people, warmth is most useful when pain feels achy and tight rather than sharp and swollen.
Warmth is often helpful for ongoing muscle soreness, tightness in the back or neck, and stiffness without clear swelling. Some people find heat useful before gentle stretching or light activity because it can help movement feel less stiff.
A Simple Way to Decide
If the problem is new and there is swelling, warmth, or a flare of pain, start with ice. If the main issue is stiffness, tightness, and aching with little or no swelling, heat is often a better choice. Watch how the area looks and feels and adjust with care.
This rule may not fit every body or injury, but it works for many common orthopedic aches and pains. When you are unsure, follow safe treatment steps and consider a clinical evaluation if symptoms are not improving.
When Ice Is Usually the Better Choice
Right after a sprain or strain
When a joint or muscle is swollen
For bruises or impact injuries
After activity if the area looks more inflamed
When pain feels sharp, hot, or throbbing
When Heat Is Usually the Better Choice
For muscle tightness or spasms
For stiffness in the neck, back, shoulder, or other joints
Before stretching or gentle exercise
For ongoing aches that are not swollen
When movement feels limited because tissue feels tight
Ice vs Heat at a Glance
Situation
Usually Try
Why It May Help
Recent sprain or strain
Ice
May help reduce swelling and numbing pain
Visible swelling
Ice
Cold can calm inflammation in the area
Bruise or bump
Ice
Often used early for pain and swelling
Muscle tightness
Heat
Warmth can help muscles relax
Joint stiffness
Heat
Heat can make movement feel easier
Soreness after activity with swelling
Ice
Often better when inflammation is present
Ongoing achiness without swelling
Heat
Warmth may improve comfort
Can You Alternate Ice and Heat?
Some people alternate cold and warmth, especially when symptoms shift from swelling to stiffness. For example, an injury may feel better with ice at first, and then heat may feel better later once swelling has settled and tightness is the main issue. Use safe timing and stop if symptoms worsen.
If you are unsure what stage you are in, look for clues. Swelling and warmth usually point more toward ice. Tightness and stiffness with little or no swelling often point more toward heat. When in doubt, choose the safer option and get advice.
How to Use Ice Safely
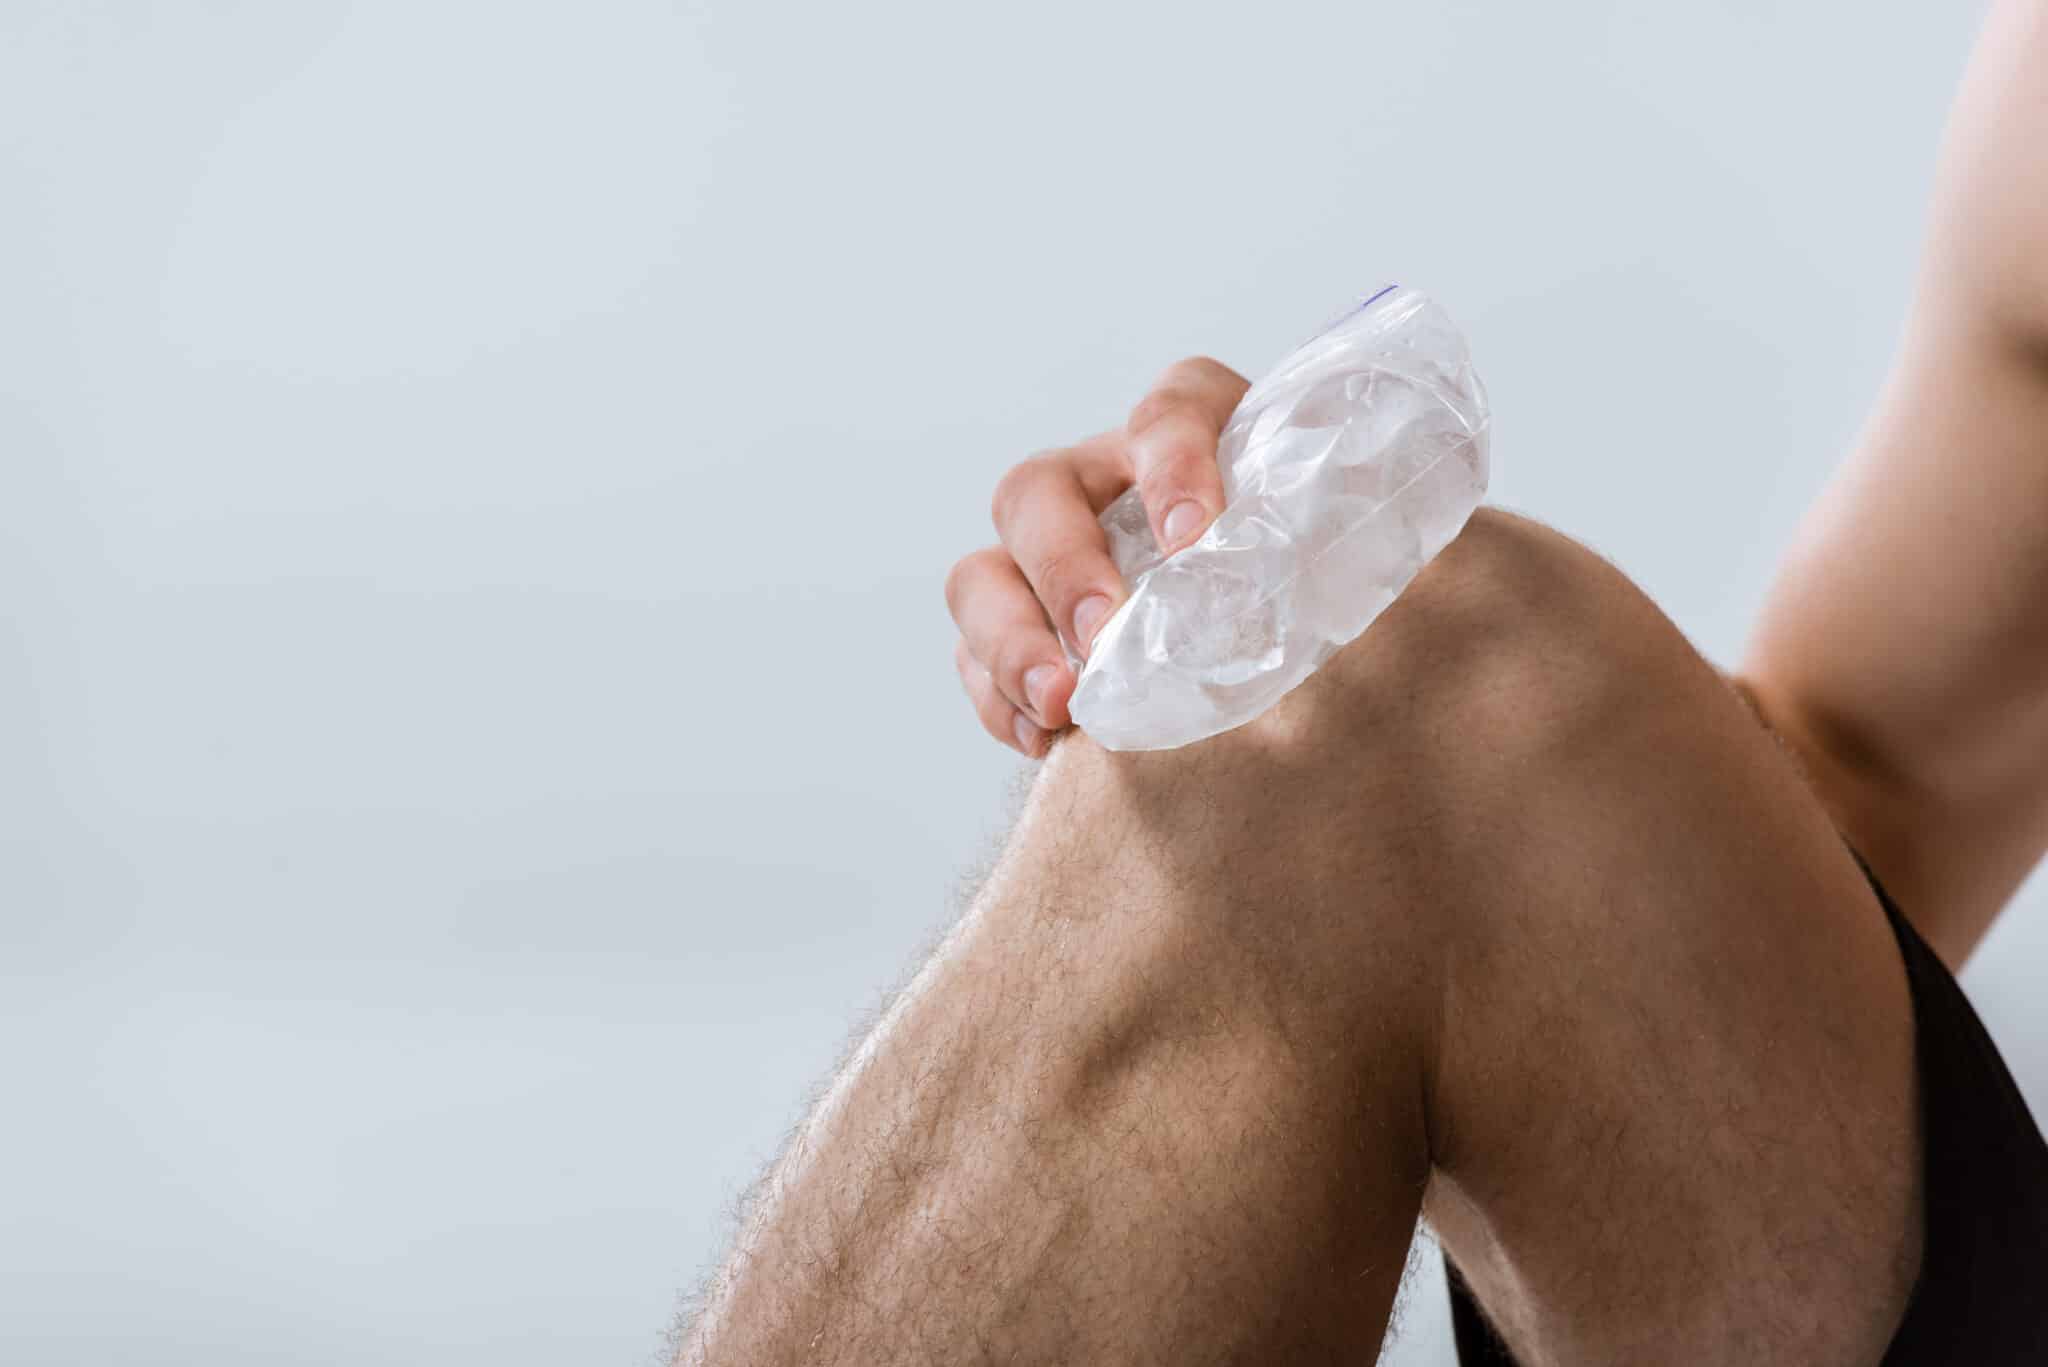
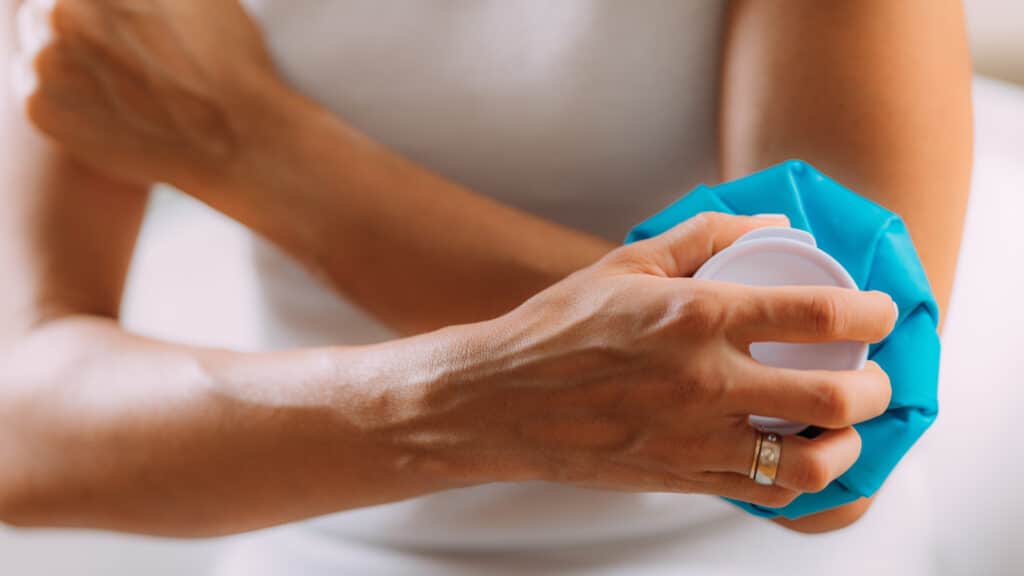
Wrap an ice pack or bag of ice in a towel before applying
Do not place ice directly on skin
Use for about 15 to 20 minutes at a time, then take a break
Check the skin during and after treatment
Stop if skin becomes painful, blotchy, white, blistered, unusually red, feels burned, or if the area stays numb after treatment
Do not use ice over broken skin or areas with poor circulation unless a clinician tells you to
How to Use Heat Safely
Use a warm heating pad, warm towel, or another gentle heat source
Heat should feel warm, not hot or scalding
Use for about 15 to 20 minutes at a time while checking the skin
Stop if skin becomes painful, blotchy, white, blistered, unusually red, feels burned, or if the area remains numb after treatment
Avoid heat on new injuries, active swelling, redness, warmth, infection, or bleeding
Avoid falling asleep with a heating pad on
When Heat or Ice Should Be Used With Extra Caution
Ask a clinician before using ice or heat if you have reduced sensation, neuropathy or diabetes related nerve problems, poor circulation, peripheral vascular disease, Raynaud’s disease, or trouble sensing temperature. Cold or heat can injure skin without you noticing, so extra safety steps may be needed.
Also avoid heat on areas that are red, hot, swollen, or clearly inflamed, especially after a new injury. If there is infection, bleeding, or a fever, do not use heat. If you have any open wounds or compromised skin, do not apply ice unless a clinician says it is okay.
When to Get Checked by an Orthopedic Specialist
Ice and heat can help with pain relief, swelling control, comfort, and easier movement, but they do not replace proper evaluation when there may be a more serious problem. Get checked if pain is significant, not improving, or changing for the worse, especially after a recent injury.
Go to urgent care or seek prompt medical help if you have warning signs such as deformity, suspected fracture, or you cannot bear weight. Also seek help for severe or worsening pain, new significant weakness, numbness or tingling, fever, or signs of infection.
Possible blood clot symptoms also need urgent attention. Watch for calf swelling, warmth, redness, and pain, especially if it happens in one leg or does not improve. If you notice these symptoms, do not wait and use heat or ice as a substitute for care.
Schedule an Exam if Pain Isn’t Improving
If you are not sure whether ice or heat fits your symptoms, or if your pain is not getting better, Princeton Orthopaedic Associates can help. A clinical evaluation can identify the cause of discomfort and guide safer treatment for your specific injury, activity level, and recovery goals.
This blog post is meant to be informative and should not act as a self-diagnosis tool. If you’d like to see one of our doctors, please contact us here.
Hip Pain While Sitting: Common Causes and Ways to Find Relief
Hip pain that shows up when you sit can make work, driving, meals, and downtime feel frustrating. Many causes involve irritated muscles, tendons, joints, or nearby nerves, and the pattern of your symptoms often gives useful clues about what is going on.
You may notice aching on the side of the hip, pinching in the groin, stiffness after getting up, or pain that spreads into the buttock or thigh. Some people improve with changes in posture and activity, plus careful home care. Persistent pain, or pain that is worsening, is best evaluated so the right treatment can start.
Key Points About Hip Pain During Sitting
What You Should Know
Pain while sitting may come from the hip joint itself or from muscles, tendons, bursae, or nerves around the hip.
The location of the pain matters. Groin pain often points toward the hip joint, while pain on the side or back of the hip may suggest another source.
Long periods of sitting can increase pressure on irritated tissues and tighten the muscles that help support the hip.
Simple steps, like changing position, standing up often, and using supportive seating, may help reduce symptoms.
Common causes include bursitis, arthritis, muscle or tendon irritation, a hip labral tear, nerve-related pain, and referred pain from the lower back.
Ice, gentle stretching, and changes in activity may help in early or mild cases.
Persistent pain, pain that affects walking, or pain accompanied by weakness, numbness, or catching should be evaluated by a specialist.
Treatment depends on the cause and may include physical therapy, medications, guided exercise, or other orthopaedic care.
Why Sitting Can Make Hip Pain Worse
When you sit for a long time, your hips stay bent. That position can increase pressure in and around the hip joint, and it can strain nearby soft tissues, especially if they are already irritated, inflamed, or stiff.
Sitting also reduces movement. If you stay in one posture for too long, the muscles around the hip may stiffen. Discomfort can then stand out more when you stand up, walk, or shift your weight.
Where You Feel the Pain Can Help Identify the Cause
The exact location of your pain can help narrow down possible causes. Hip pain is not always felt directly over the joint, and different structures tend to cause pain in more specific areas.
Groin or front of the hip: often linked with the hip joint, such as arthritis or a labral tear.
Outer side of the hip: often related to bursitis and/or irritation of the gluteal tendons, which is frequently grouped under greater trochanteric pain syndrome.
Buttock or back of the hip: may involve deep hip muscles, the sacroiliac area, or pain that travels from the low back.
Pain into the thigh or below the knee: can happen with nerve irritation or referred pain from the spine.
Common Causes of Hip Pain While Sitting
Many conditions can cause hip discomfort in a seated position. Some affect the joint itself, while others involve soft tissue around the hip. Some problems start in the lower back and are felt near the hip.
Hip osteoarthritis
Osteoarthritis is the wear and tear of the joint cartilage. It often causes stiffness and aching in the groin or thigh. Pain may feel worse after sitting for a while or when you first get up.
Hip bursitis
Bursae are small fluid-filled sacs that help reduce friction between moving tissues. When one becomes irritated, it may cause pain on the outer side of the hip, especially with sitting or lying on that side. Outer hip pain may also be due to irritation of the gluteal tendons, which is often grouped under greater trochanteric pain syndrome.
Muscle or tendon irritation
Tight or overused muscles and tendons around the hip can become sore, particularly after exercise, repetitive activity, or prolonged poor posture. This can lead to a deep ache, tightness, or a pulling feeling while seated.
Hip labral tear
The labrum is a ring of cartilage that helps stabilize the hip socket. A tear can cause groin pain, clicking, catching, or a sense that the hip is not moving smoothly. Sitting can increase discomfort for some people.
Sciatica or other nerve-related pain
If a nerve is irritated, pain may start in the buttock or low back and travel into the hip or leg. Sitting can worsen these symptoms, especially when numbness, tingling, or burning is also present.
Referred pain from the lower back
Hip pain does not always come from inside the hip. Problems in the lower spine can create pain that feels like it is centered in the hip, especially when sitting for long periods.
How Different Causes of Sitting-Related Hip Pain May Feel
Possible Cause
Common Pain Location
What You May Notice
Hip osteoarthritis
Groin, front of hip, thigh
Stiffness, pain after sitting, pain when first standing up
Hip bursitis
Outer side of hip
Tenderness, pain with pressure, discomfort when sitting or lying on one side
Muscle or tendon irritation
Front, side, or buttock area
Ache, tightness, soreness after activity or prolonged sitting
Labral tear
Groin or deep hip
Clicking, catching, pinching, painful sitting
Nerve-related pain
Buttock, hip, leg
Burning, tingling, numbness, pain that travels
Referred pain from low back
Back of hip or buttock
Sitting worsens symptoms, back pain may also be present
What You Can Do at Home to Ease Hip Pain
If your symptoms are mild and not related to a recent fall, injury, or other trauma, simple home steps may help calm the irritation. The goal is to reduce strain while keeping the hip from getting stiffer. Stop any home strategy if it makes pain worse.
Change positions often instead of sitting for long stretches.
Stand up and walk briefly every 30 to 60 minutes if you can.
Use ice for short periods if the area feels inflamed or sore after activity.
Try gentle stretching only if it does not increase pain. Stop if it worsens your symptoms.
Check your chair height and support so your hips and knees feel comfortable.
Avoid sitting on very hard surfaces if that clearly worsens symptoms.
If you use over-the-counter medicine, follow the label directions and any advice from your clinician. Ask for guidance before using anti-inflammatory medicines if you have kidney disease, a history of stomach ulcers or bleeding, take blood thinners, are pregnant, or have other medical conditions.
Helpful Sitting and Movement Adjustments
Small changes in how you sit and move during the day can help. These strategies may be most helpful when pain is related to posture, soft tissue irritation, or joint stiffness. If you notice worsening pain, scale back and consider getting evaluated.
Sit with your feet flat on the floor and avoid crossing your legs for long periods.
Keep your lower back supported so you are not slumping forward.
Use a cushion or supportive seat if hard chairs increase pain.
Break up long drives with standing or walking stops when possible.
Return to exercise gradually and avoid pushing through pain that is increasing.
When Hip Pain While Sitting Should Be Evaluated
Some hip pain improves with time and careful self-care. However, sitting-related hip pain is not always minor. Persistent symptoms, worsening symptoms, pain after trauma, or signs of nerve or other body-wide problems need evaluation so the cause can be identified and treated appropriately.
Pain lasts more than a few days or keeps coming back.
The pain is getting worse instead of improving.
You are limping or changing how you walk.
You notice catching, locking, or clicking in the hip.
You have numbness, tingling, or pain that travels down the leg.
The pain interferes with work, sleep, exercise, or daily activities.
When to seek more urgent care
You can’t bear weight on the leg.
The pain began after a fall or other injury.
Fever or chills are present.
You notice redness or warmth around the hip.
Inability to move the hip is present.
Visible deformity is present.
Severe pain at rest or at night is present.
Unexplained weight loss is present.
There is a history of cancer or a high risk of infection.
Loss of bowel or bladder control is present.
Saddle numbness is present.
Rapidly worsening weakness, numbness, or tingling is present.
You have significant weakness, sudden swelling, or severe pain.
How Orthopaedic Specialists Diagnose Hip Pain
Diagnosis usually begins with a detailed history and a physical exam. The goal is to identify where the pain is located, what movements trigger it, whether the back may be involved, and how well the hip is moving and functioning.
Depending on your symptoms, imaging such as X-rays or other studies may be recommended. These tests can help identify arthritis, structural problems, and other conditions that may not improve with home care alone.
Treatment Options for Ongoing Hip Pain
Treatment depends on the source of the pain. Many patients improve with non-surgical care aimed at reducing irritation, improving movement, and strengthening the muscles that support the hip.
Activity modification to reduce pain triggers
Physical therapy to improve flexibility, strength, and movement mechanics
Anti-inflammatory medication when appropriate
Image-guided injections for certain diagnoses
Further orthopaedic evaluation for structural hip problems or advanced arthritis
If symptoms are not improving, getting the right diagnosis early may help reduce prolonged pain and unnecessary limit setting.
Don’t Ignore Hip Pain That Keeps Returning
Hip pain while sitting does not need to be accepted as normal. Whether the cause is the joint, nearby soft tissues, or the low back, the way your symptoms behave can guide the next step toward relief. If pain lingers, worsens, or affects daily life, schedule an evaluation with Princeton Orthopaedic Associates.
This blog post is meant to be informative and should not act as a self-diagnosis tool. If you’d like to see one of our doctors, please contact us here.
Understanding Low Back Pain
Low back pain is one of the most common reasons people seek medical care. It can feel like a mild strain that improves quickly or a more persistent problem that affects sleep, work, exercise, and daily life. When you know what might be causing it and how to respond, the next steps can feel less confusing.
The lower back is a complex area made up of bones, discs, joints, muscles, ligaments, and nerves. Because many structures work closely together, pain can start for several different reasons. Sometimes the pain stays mainly in the back. Other times, it spreads into the buttock, thigh, or leg.
Most episodes of low back pain improve over time with non-surgical care. Even so, some symptoms should be checked sooner, especially when pain is severe, keeps returning, or comes with warning signs such as weakness, numbness, or other changes.
Key Facts About Low Back Pain
What You Should Know
Low back pain is very common and can affect people of all ages.
The pain may come from muscles, joints, discs, nerves, or a mix of structures.
Many cases improve with relative rest from painful activity, physical therapy, and guided exercise.
Pain that travels down the leg may point to nerve irritation, often called sciatica.
Good posture, core strength, and safe body mechanics may help reduce future flare-ups.
Low back pain can be acute, meaning short term, or chronic, meaning it lasts much longer.
Imaging such as X-rays or MRI is not needed for every patient, especially early on.
Loss of bowel or bladder control, numbness in the saddle or groin area, or new or worsening leg or foot weakness may signal a serious neurologic condition and needs emergency or same-day medical evaluation.
Most people do not need surgery, but some conditions do need specialist evaluation.
Early evaluation can help when symptoms are severe, keep coming back, or are not improving as expected.
What Causes Pain in the Lower Back?
Low back pain can start after a sudden movement, heavy lifting, repetitive strain, or no clear event at all. In many people, muscles and ligaments become irritated or overstretched. In others, the pain may come from the discs, facet joints, or nearby nerves.
Age-related changes can also play a role. As people get older, discs may lose water and height, joints may become arthritic, and the spine may be less flexible. These changes do not always cause pain, but they can contribute to symptoms in some patients.
Because several conditions can feel similar, a careful history and physical exam matter. The pain pattern, how long it has lasted, and whether it spreads into the leg can offer useful clues to help guide next steps.
Common Sources of Low Back Pain
Low back pain is often grouped by the structure that seems most involved. In some cases, more than one issue may contribute at the same time, which can change how symptoms feel and how they respond to care.
Possible Source
What It Means
Common Pattern
Muscle or ligament strain
Overstretching or irritation of soft tissues
Pain after lifting, bending, twisting, or overuse
Disc problems
The cushion between spinal bones becomes irritated or bulges
Back pain, sometimes with leg pain or numbness
Facet joint arthritis
Wear and tear in the small joints of the spine
Stiffness and pain with standing, twisting, or extension
Sciatica or nerve compression
A spinal nerve becomes irritated or pinched
Pain shooting into the buttock, thigh, calf, or foot
Spinal stenosis
Narrowing around the nerves in the spine
Leg pain or heaviness with walking or standing
Spondylolisthesis
One spinal bone shifts relative to another
Back pain, leg symptoms, or pain with activity
How Low Back Pain May Feel
The sensation can vary based on the cause. Some people feel a dull ache or tightness in the center of the lower back, while others notice sharp pain with certain moves. How pain changes during the day can also give clues.
Stiffness when getting out of bed or after sitting
Muscle spasms or a feeling that the back has “locked up”
Pain with bending, lifting, twisting, or standing upright
Aching that stays in the low back or buttock
Pain, tingling, numbness, or burning that travels down the leg
Weakness in the leg or foot in more serious nerve-related cases
When pain travels below the knee, especially with numbness or weakness, nerve involvement becomes more likely. That does not always mean the problem is severe, but it usually deserves a closer look from a clinician.
Acute Pain Compared With Chronic Pain
Doctors often describe low back pain based on how long it lasts. Using time frames helps guide care and sets more realistic expectations about recovery. It can also help decide when follow-up is needed.
Type
Time Frame
Typical Approach
Acute
Less than 4 weeks
Activity modification, pain relief, and a gradual return to movement
Subacute
4 to 12 weeks
Focused rehabilitation and closer follow-up if symptoms continue
Chronic
More than 12 weeks
A broader plan that addresses strength, flexibility, mechanics, and underlying causes
Acute pain often starts with a strain or flare-up and may improve more quickly. Chronic pain can be more complex and may involve deconditioning, arthritis, disc changes, or recurring nerve irritation. A long-lasting pattern often needs a plan that goes beyond just pain control.
When to Seek Medical Attention Right Away
Most low back pain is not dangerous, but certain symptoms can point to a more serious problem. These warning signs should not be ignored, because they may need emergency care or evaluation the same day.
Loss of bowel or bladder control
New or worsening weakness in the leg or foot
Numbness around the groin or saddle area
Fever, chills, or unexplained weight loss with back pain
Pain after a major fall, accident, or other trauma
History of cancer, infection, or other medical conditions that raise concern
Loss of bowel or bladder control, numbness in the saddle or groin area, or new or progressive leg or foot weakness may indicate a serious neurologic condition. These symptoms require emergency care or same-day medical evaluation. Other warning signs also call for prompt attention.
How Low Back Pain Is Evaluated
The evaluation usually begins with a discussion about when the pain started, where it is located, what makes it worse, and whether it spreads into the leg. A clinician will also check posture, range of motion, strength, reflexes, and sensation to see how the symptoms match possible causes.
Imaging can be helpful in some cases, but it is not required for every patient. It may be appropriate when red flags are present, after trauma, when neurologic symptoms are progressive, when infection, cancer, or fracture is suspected, or when symptoms do not improve over time.
Test
When It May Be Used
What It Can Show
X-ray
If fracture, alignment issues, or arthritis are concerns
Bone structure and spinal alignment
MRI
If nerve symptoms persist or serious causes are suspected
Discs, nerves, soft tissues, and spinal canal narrowing
CT scan
Sometimes used when more bone detail is needed
Detailed images of bone anatomy
Physical exam
Often needed to guide care
Strength, motion, nerve findings, and pain pattern
Non-Surgical Treatment Often Works Well
Most people with low back pain improve without surgery. Treatment depends on the cause of symptoms, how long they have lasted, and whether nerves are involved. The goal is to reduce pain while helping you move more safely and comfortably.
Short-term activity changes to reduce strain
Physical therapy focused on flexibility, posture, and core strength
Heat or ice, depending on what feels best and when symptoms began
Anti-inflammatory or other pain-relieving medication when appropriate
Guided exercise to restore movement and prevent recurrence
In some cases, spine injections for ongoing inflammation or nerve pain
#image_title
Helpful Early Steps at Home
If your pain is mild and there are no warning signs, a few simple strategies may help. “Rest” usually means relative rest from painful or aggravating activities, not staying in bed for a long time. Keeping your movement within a tolerable range can often be part of recovery.
Stay away from bed rest for long periods
Take short walks if walking feels comfortable
Use good lifting mechanics and avoid sudden twisting
Start gentle stretching or exercises only if they do not worsen symptoms
Seek care if pain is intense, persistent, or spreading into the leg
When Surgery May Be Considered
Surgery is not the first treatment for most low back pain. It may be considered when symptoms are linked to a specific structural problem and non-surgical treatment does not provide enough relief. Your clinician can help compare risks and expected benefits based on your exam.
Certain fractures, infections, or other serious spine conditions
If surgery becomes part of the discussion, the decision should be based on your diagnosis, nerve findings, level of disability, and response to other treatments. The plan should match your symptoms and overall health.
How to Lower Your Risk of Future Back Pain
You may not prevent every episode of low back pain, but daily habits can help. Many flare-ups connect to deconditioning, repeated strain, poor body mechanics, or long stretches of sitting without movement. Small changes over time can make a difference.
Keep your core and hip muscles strong
Stay active with regular walking or other low-impact exercise
Lift with your legs and avoid twisting under load
Change positions often if you sit for long stretches
Maintain a healthy weight when possible
Follow through with physical therapy exercises after symptoms improve
When It’s Time to See a Specialist
Consider an orthopaedic or spine evaluation if your pain is severe, keeps coming back, or is not improving with time and conservative care. A specialist can help identify whether your symptoms fit muscle strain, a disc problem, arthritis, spinal stenosis, or nerve compression.
Specialist care may also be needed if pain is changing the way you walk, limiting daily activities, or affecting your quality of life. When the cause is identified sooner, it can help you start a more targeted plan.
Find the Right Care for Low Back Pain
Low back pain can feel stressful, especially when it gets in the way of simple daily tasks. Many people improve with the right diagnosis, a careful non-surgical plan, and attention to movement, strength, and spine health. If symptoms do not settle, scheduling an evaluation can help clarify what is driving the pain and what options may fit best.
This blog post is meant to be informative and should not act as a self-diagnosis tool. If you’d like to see one of our doctors, please contact us here.
Tailbone Pain Can Make Sitting, Driving, and Daily Life Uncomfortable
Tailbone pain, also called coccydynia, can make everyday activities feel hard, including sitting at work, leaning back in a chair, and getting up from bed. It may start after a fall or childbirth, but it can also develop without a clear injury. Knowing the likely causes, symptoms, and care options can help you decide when home care may be enough and when a medical evaluation is needed.
The tailbone sits at the very bottom of your spine and supports your body when you sit and lean backward. When this small area gets irritated or injured, pain can feel intense because daily movement repeatedly puts pressure on it.
In many cases, treatment begins by reducing pressure on the area and allowing the inflammation to calm down. If pain lingers or keeps coming back, a specialist can help locate the source and guide the next steps that fit your situation.
Key Facts to Know About Tailbone Pain
What You Should Know
Tailbone pain is called coccydynia, which means pain in the coccyx, or tailbone.
Common causes include falls, direct impact, prolonged sitting on hard surfaces, and childbirth.
Pain is often worst when sitting, leaning back, or moving from sitting to standing.
Symptoms may improve with activity changes, cushions, heat or ice, and anti-inflammatory medication when appropriate.
Persistent pain may be related to joint inflammation, abnormal movement of the tailbone, or less commonly, another underlying condition.
Evaluation may include a physical exam and imaging if symptoms don’t improve or if the cause isn’t clear.
Treatment can include physical therapy, medication, activity modification, and in select cases, injections or surgery.
You should seek medical care if pain is severe, lasts for weeks, or is accompanied by fever, numbness, weakness, or bowel or bladder changes.
What Is the Tailbone?
The tailbone, or coccyx, is the small triangular bone at the base of the spine. It is made of several small segments and sits just below the sacrum, which is the broad bone between the hip bones.
Even though it is small, the tailbone has an important job. It serves as an attachment point for ligaments, tendons, and parts of the pelvic floor, and it helps bear weight when you sit and lean backward.
Because this area takes pressure during sitting, even mild irritation can make daily tasks feel difficult. That is why tailbone pain often affects work, travel, exercise, and sleep.
What Does Tailbone Pain Feel Like?
Tailbone pain usually feels like a deep ache or sharp soreness at the very bottom of the spine. Many people notice it most when sitting on a hard chair, leaning backward, or standing up after sitting for a while.
Pain centered at the tailbone
Worse discomfort with sitting or rising from a chair
Tenderness when touching the area
Pain during bowel movements or sexual activity in some cases
More discomfort with long drives or prolonged sitting
Some people feel pain most of the time, while others notice it mainly with pressure or in certain positions. Symptoms can range from mild irritation to more severe pain that disrupts daily routines.
Common Causes of Tailbone Pain
A direct injury is one of the most common reasons for tailbone pain. Slipping on ice, falling backward, or landing hard on a seated surface can bruise the tailbone or strain the surrounding tissues.
Childbirth can also put pressure on the coccyx and nearby ligaments. In some cases, repeated stress from sitting for long periods on a hard or narrow surface may help trigger symptoms.
Falls or direct trauma
Childbirth
Prolonged sitting
Inflammation of the tailbone joint or nearby soft tissue
Abnormal motion of the coccyx
Less commonly, infection or tumor
When Tailbone Pain Happens Without a Clear Injury
Not everyone with coccydynia can point to a single accident or event. Sometimes the pain comes on slowly, especially when the tailbone gets repeated pressure over time.
Extra strain on the coccyx can come from posture, body mechanics, or irritation in nearby joints and soft tissue. This is one reason a careful exam can matter when symptoms do not improve as expected.
How Tailbone Pain Is Evaluated
Your provider will usually start by asking when the pain began, what makes it worse, and whether there was a fall, childbirth, or other triggering event. A physical exam may include checking for tenderness and looking for other possible sources of pain from the lower back or pelvis.
Evaluation Step
What It Helps Identify
Medical history
Recent injury, childbirth, prolonged sitting, or symptom pattern
Physical exam
Tenderness, swelling, and whether pain is truly coming from the tailbone
X-rays or other imaging
Fracture, alignment problems, or unusual movement of the coccyx when needed
Further testing in selected cases
Possible infection, tumor, or another uncommon cause
Ways to Relieve Tailbone Pain at Home
Many people improve with simple steps that reduce pressure on the coccyx and help calm irritation. The aim is to give the area a chance to settle down while avoiding positions that keep it irritated. Small changes often make a big difference in comfort.
Use a cushion made to offload direct pressure from the coccyx, such as a coccyx-relief cushion or a wedge cushion with a rear cut-out
Lean forward slightly when sitting if that feels more comfortable
Avoid sitting for long stretches without standing up and moving around
Try ice or heat, depending on which feels better for your symptoms
Use anti-inflammatory medication only if it is appropriate for you and recommended by your doctor
These steps are often enough for mild cases, especially soon after an injury. If pain does not clearly improve, it is best to get evaluated rather than pushing through discomfort.
Medical Treatment for Lasting Tailbone Pain
If symptoms continue, treatment may go beyond home care. The best option depends on the cause of your pain, how long symptoms have been going on, and how much it affects daily function.
Physical therapy to improve posture, sitting mechanics, and surrounding muscle tension
Medication for pain and inflammation when appropriate
Targeted injections in select cases when pain remains significant
Surgery in rare cases when symptoms are severe, persistent, and caused by a problem unlikely to improve with other care
Most people do not need surgery. Conservative treatment is usually tried first, and many patients improve once pressure and inflammation are addressed.
When to See a Doctor
You should not ignore tailbone pain that is intense, keeps coming back, or makes it hard to sit, work, travel, or sleep comfortably.
Pain that lasts more than a few weeks
Severe pain after a fall or other injury
Fever, redness, or drainage near the area
Numbness, weakness, or pain that seems to involve the legs
Changes in bowel or bladder function
Pain that is getting worse, especially at night or when you are resting
Unexplained weight loss
A history of cancer
Immunosuppression, such as from certain medicines or conditions
Symptoms that do not improve with rest and pressure relief
These signs can mean you need more evaluation to rule out a fracture, infection, or another condition affecting the area.
What Recovery May Look Like
Recovery depends on the cause of the pain and how long symptoms have been present. A bruise or mild strain may improve with time and pressure relief, while ongoing irritation can take longer and may need more structured treatment.
Situation
General Recovery Pattern
Notes
Mild irritation or bruise
Often improves over weeks; some cases take longer
Pressure relief and activity changes are usually helpful
Ongoing inflammation
May last weeks to months
May need medical evaluation and physical therapy
Persistent or unusual symptoms
Varies depending on the cause
Further testing may be needed to guide treatment
Getting Help for Tailbone Pain
If tailbone pain limits your daily life, it is worth getting it checked. We can help determine whether pain is coming from the coccyx itself or from another nearby structure, and we can guide you toward treatments that reduce symptoms and improve comfort with sitting and movement.
If you have persistent pain at the base of the spine, schedule an exam for a clear diagnosis and a treatment plan that fits your symptoms.
This blog post is meant to be informative and should not act as a self-diagnosis tool. If you’d like to see one of our doctors, please contact us here.
Common Causes of Knee Pain and When to Get Care
Knee pain can come on suddenly after an injury or build gradually over time from wear, overuse, or an underlying condition. Because the knee is a complex joint that helps you walk, bend, climb stairs, and stay active, pain in this area can affect nearly every part of daily life.
Some knee problems improve with rest, activity changes, and guided rehabilitation. Others need prompt medical attention, especially if you have swelling, instability, trouble bearing weight, or pain that keeps coming back.
Understanding what may be causing your symptoms is an important first step toward the right treatment and a safer return to movement.
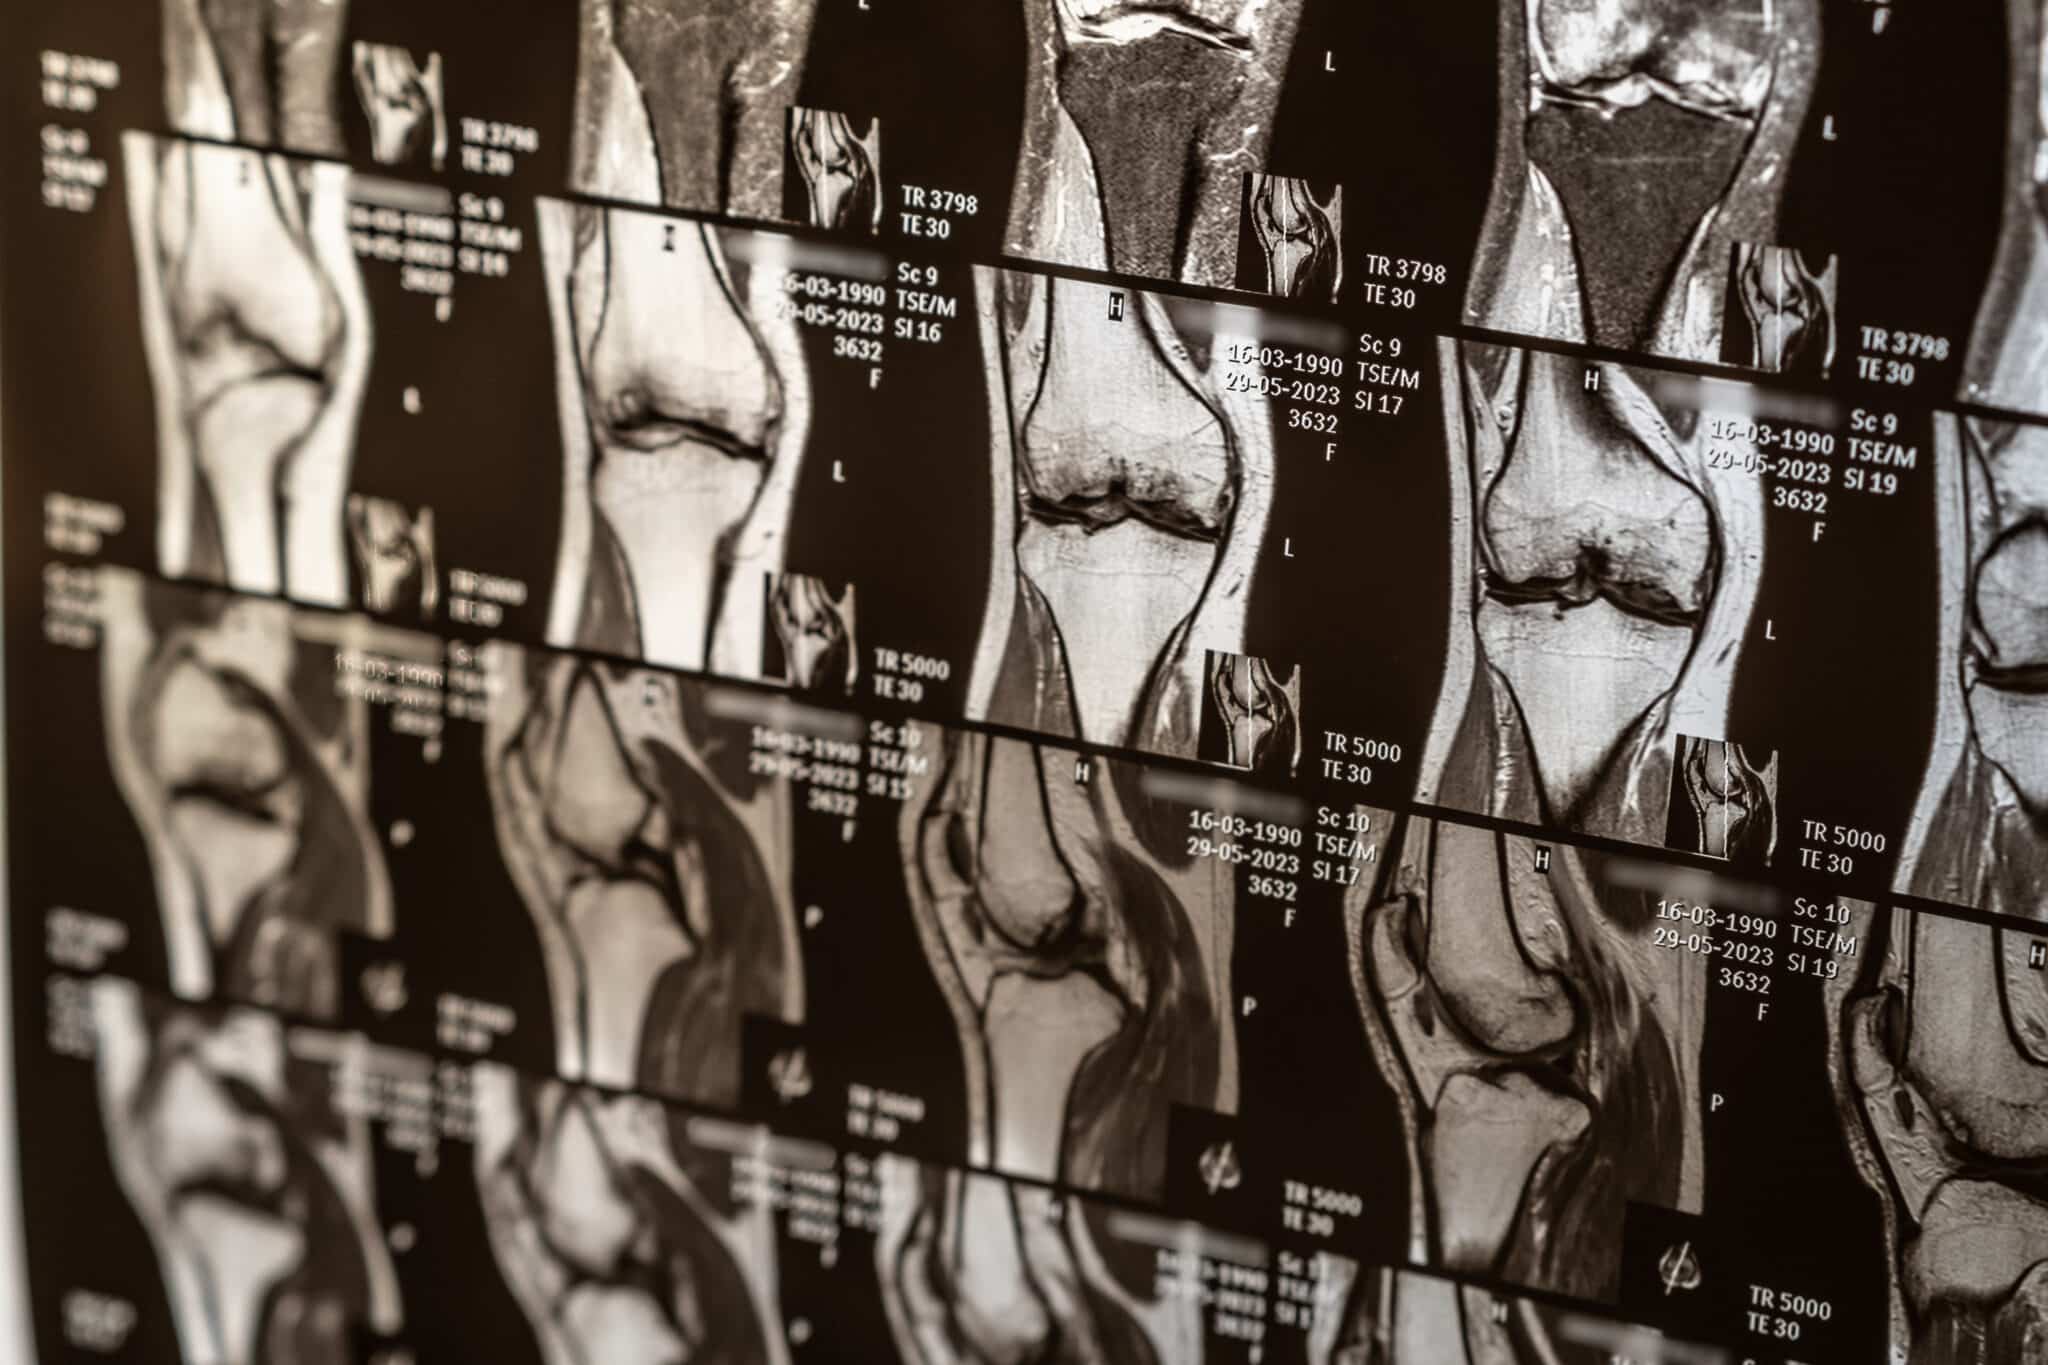
#image_title
Important Points About Knee Pain
Knee pain may be caused by an injury, overuse, arthritis, tendon problems, bursitis, or irritation in the kneecap joint.
Symptoms such as swelling, locking, catching, or the knee giving way can point to a more specific knee condition.
Pain in the front of the knee is often linked to the kneecap and can become worse with stairs, squatting, or sitting for long periods.
Sudden pain after twisting, pivoting, or a direct blow may suggest a ligament, cartilage, or meniscus injury.
Age, activity level, body mechanics, and prior injury all play a role in knee pain.
Many knee problems can be treated without surgery through physical therapy, anti-inflammatory treatment, bracing, and changes in activity.
Osteoarthritis becomes more common with age and can cause stiffness, swelling, and pain during activity.
Overuse injuries are common in both athletes and non-athletes, especially when movement patterns or muscle support are off balance.
You should seek medical care if pain is severe, your knee is unstable, or symptoms do not improve.
Early evaluation can help prevent minor knee issues from becoming long-term problems.
Why Knee Pain Is So Common
Your knee is one of the largest joints in the body, and it absorbs a great deal of force every day. It relies on bones, cartilage, ligaments, tendons, muscles, and cushioning sacs called bursae to work smoothly.
When any of these structures are injured, inflamed, worn down, or overloaded, pain can develop. The location of the pain, how it started, and what activities make it worse can offer useful clues about the cause.
How Doctors Think About Knee Pain
Knee pain is often grouped by where it hurts and whether it began with an injury or developed gradually. For example, front-of-knee pain may suggest patellofemoral problems, while pain along the joint line may raise concern for a meniscus tear or arthritis.
Swelling that appears quickly after an injury can point to damage inside the joint. Pain that worsens over months may be more consistent with overuse, degeneration, or arthritis.
Frequent Causes of Knee Pain
There are many possible reasons for knee pain. Some are related to sports and trauma, while others are tied to wear and tear, biomechanics, or inflammation.
Condition
What It Means
Common Symptoms
Sprain or strain
Stretching or tearing of a ligament, tendon, or muscle
Pain, swelling, tenderness, limited motion
Meniscus tear
Injury to the cartilage that cushions the knee joint
Joint line pain, swelling, catching, locking
Ligament injury
Damage to structures such as the ACL, PCL, MCL, or LCL
Instability, swelling, pain after a twist or impact
Patellofemoral pain
Irritation involving the kneecap and the groove it moves through
Front knee pain, pain with stairs, squatting, and sitting
Tendinitis
Inflammation or irritation of a tendon
Pain with activity, tenderness, soreness near tendon
Bursitis
Inflammation of a small fluid-filled sac near the joint
Localized swelling, warmth, pain with pressure or movement
Osteoarthritis
Breakdown of joint cartilage over time
Stiffness, swelling, aching, reduced mobility
Fracture
A broken bone around the knee
Severe pain, swelling, inability to bear weight
Injuries That Can Trigger Sudden Knee Pain
Acute knee pain often starts after a specific event. A fall, collision, twist, awkward landing, or sudden stop can injure soft tissue or bone in and around the knee.
Ligament injuries: These include injuries to the ACL, PCL, MCL, and LCL. They may cause a pop, rapid swelling, or a feeling of knee instability.
Meniscus tears: The meniscus is a C-shaped piece of cartilage that helps cushion the joint. A tear can happen with twisting and may cause pain, swelling, or locking.
Tendon injuries: Tendons connect muscle to bone. Sudden force can strain or tear them, leading to pain and weakness.
Fractures: A direct blow or fall can lead to a broken kneecap or fracture of the bones around the joint.
Conditions That Cause Knee Pain Over Time
Not all knee pain starts with an injury. In many cases, symptoms develop gradually due to repetitive stress, joint aging, muscle imbalances, or inflammation.
Osteoarthritis: This is one of the most common causes of chronic knee pain. It happens when joint cartilage wears down, often leading to aching, stiffness, and swelling.
Patellofemoral pain syndrome: This refers to pain around or behind the kneecap. It can be linked to overuse, muscle imbalance, alignment issues, or cartilage irritation.
Tendinitis: Repeated strain can irritate the patellar tendon or quadriceps tendon, especially in people who jump, run, kneel, or climb often.
Bursitis: Kneeling for long periods or repeated pressure on the front of the knee can inflame a bursa and cause visible swelling and soreness.
Iliotibial band-related pain: Irritation along the outer side of the knee may develop with repetitive movement, especially in runners and cyclists.
What the Symptoms May Feel Like
Knee pain can feel very different depending on the cause. The symptoms may be sharp or dull, constant or only present during certain activities.
Aching or stiffness, especially in the morning or after sitting
Swelling around the joint
Pain with stairs, squatting, kneeling, or getting up from a chair
Clicking, catching, or locking
A sense that the knee may buckle or give way
Tenderness in one small area or pain deep inside the knee
Difficulty fully straightening or bending the knee
If you have significant swelling after an injury, a visible deformity, inability to bear weight, fever, or a hot or red, swollen knee, you should seek urgent or emergency medical evaluation rather than routine care. A hot, red, very swollen knee with fever or feeling ill could indicate infection and should be evaluated urgently.
How Knee Pain Is Diagnosed
A thorough evaluation usually begins with your story. We want to know when the pain started, whether there was an injury, where the pain is located, and what movements make it worse or better.
Your exam may include checking swelling, tenderness, strength, range of motion, alignment, and joint stability. Depending on your symptoms, imaging such as X-rays or MRI may be used to look more closely at bone, cartilage, or soft tissue.
What Your Evaluation May Include
Review of when symptoms began and how they have changed
Physical exam of the knee and nearby joints
Assessment of walking, strength, flexibility, and stability
X-rays when arthritis or fracture is a concern
MRI when soft tissue injury, cartilage damage, or meniscus tears are suspected
Treatment Options for Knee Pain
Treatment depends on the cause of your knee pain, its severity, and how much it affects your daily life. Many patients improve with non-surgical care, especially when treatment starts early.
Treatment
How It Helps
When It May Be Used
Rest and activity changes
Reduces strain on the knee
Overuse pain, early flare-ups, and minor injuries
Ice and anti-inflammatory treatment
Helps calm pain and swelling. Anti-inflammatory medicines such as NSAIDs may help some patients, but they are not safe for everyone.
Acute injuries and inflamed conditions. People with kidney disease, stomach ulcers or bleeding risk, use of blood thinners, significant heart disease, uncontrolled high blood pressure, or pregnancy should ask a clinician before using NSAIDs.
Physical therapy
Improves strength, flexibility, and movement patterns
Many knee conditions, including arthritis and overuse injuries
Bracing or support
Adds stability or unloads part of the joint
Instability, arthritis, or return to activity
Injections
May reduce inflammation or pain in selected cases
Certain arthritic or inflammatory conditions
Surgery
Repairs or reconstructs damaged structures when needed
Some fractures, ligament tears, meniscus tears, or advanced joint damage
Non-Surgical Care Often Starts Here
Reduce or pause activities that clearly worsen the pain
Use ice after activity if swelling is present
Begin guided exercises to restore motion and support around the knee
Address hip, core, and leg strength if mechanics are contributing
Consider footwear, surfaces, training load, and work demands
When Knee Surgery May Be Considered
Some knee conditions do not improve enough with conservative treatment alone. Surgery may be recommended when there is significant structural damage, persistent instability, severe arthritis, or ongoing pain that limits quality of life.
The right procedure depends on the diagnosis and may range from arthroscopic treatment to ligament reconstruction or joint replacement in advanced arthritis. Your care plan should match both the condition and your activity goals.
When You Should See a Knee Specialist
You should schedule an evaluation if your knee pain is severe, keeps returning, or affects your ability to move normally. Even if symptoms seem manageable at first, ongoing pain can lead to compensation and additional strain elsewhere.
Pain lasts more than several days or continues to worsen
You notice swelling, warmth, or reduced range of motion
Your knee feels unstable, locks, or gives way
You cannot return to exercise, work, or daily activity comfortably
Useful for non-surgical management and rehabilitation planning
Getting Back to Comfortable Movement
Knee pain can interfere with walking, exercise, work, sleep, and your overall confidence in movement. The good news is that many causes of knee pain can be identified and treated effectively with the right evaluation and care plan.
If your symptoms are not improving, it may be time to schedule an exam and find out what is really causing your knee pain.
This blog post is meant to be informative and should not act as a self-diagnosis tool. If you’d like to see one of our doctors, please contact us here.
Welcome Dr. Shenoy: Board-Certified Orthopaedic Spine Surgeon
Dr. Kartik Shenoy, a board-certified orthopaedic spine surgeon who treats all conditions of the spine. With a distinguished career that spans military service, academic research, and advanced surgical training, Dr. Shenoy brings exceptional expertise to our practice. Whether you are dealing with chronic back pain, a disc condition, or a complex spinal disorder, Dr. Shenoy is here to restore your movement, relieve your pain, and help you get back to living fully.
A Distinguished Career in Service
Prior to joining Princeton Orthopaedic Associates, Dr. Shenoy served as a Lieutenant Colonel in the United States Air Force. He held the role of Chief of Spine Surgery and Orthopaedic Medical Director at Nellis Air Force Base in Las Vegas, Nevada, and deployed to the Middle East during his service. This experience reflects his commitment to providing the highest level of care under any circumstances, a dedication he now brings to every patient he treats.
Educational Excellence
Dr. Shenoy earned his Bachelor of Science from Cornell University before completing his Doctor of Medicine degree at Albert Einstein College of Medicine. He went on to complete his orthopaedic surgery residency at NYU Hospital for Joint Diseases and Langone Orthopedic Hospital in New York City.
He then completed his orthopaedic spine surgery fellowship at the renowned Rothman Orthopaedic Institute in Philadelphia, where he trained under internationally recognized leaders in spine surgery, Drs. Alex Vaccaro and Alan Hilibrand.
An Accomplished Academic Surgeon
Dr. Shenoy has authored numerous peer-reviewed publications, book chapters, and presentations focusing on spinal disorders, surgical techniques, and outcomes research. His work has appeared in leading journals such as The Spine Journal, Clinical Spine Surgery, and World Neurosurgery. He also serves as Deputy Editor of Surgical Techniques for the Clinical Spine Surgery journal and is a board member of the Clinical Orthopaedic Society.
Comprehensive Spine Care
Dr. Shenoy performs all spine procedures, including disc replacement, minimally invasive surgery, laminectomy, microdiscectomy, and cervical and lumbar fusions. He has a particular interest in cervical and endoscopic spine surgery, using the latest technology and individualized treatment plans to deliver the best possible outcomes for his patients.
Your Path to Recovery
"Your spine is central to your life. My goal is to restore your movement, relieve your pain, and help you get back to living fully using the latest technology and individualized treatment plans." Outside of the clinic, Dr. Shenoy was born and raised in Long Island, New York, and enjoys spending time with his family, skiing, and playing golf.
You can learn more about Dr. Shenoy here. Don't hesitate to contact our office today to schedule your appointment with Dr. Shenoy. We look forward to helping you achieve optimal health and recovery.
Pectoralis Major Tendon Injuries: What You Need to Know
A pectoralis major tendon injury affects the large chest muscle that helps you push, lift, and rotate your arm inward. These injuries often happen during weightlifting, especially the bench press. They can start as a mild strain or progress to a complete tendon tear that pulls away from the bone.
If you felt a sudden pop in your chest or shoulder and then developed pain, bruising, or weakness, it is important to be checked. Early diagnosis helps your care team decide whether rest and rehab are enough or whether surgery may be needed to restore function.
Many people notice trouble with pushing, lifting, or returning to sports and workouts. Learning common signs can help you seek care sooner and make a treatment plan that fits your needs and activity level.
Key Points About Pectoralis Major Tendon Tears
What You Should Know:
The pectoralis major is the large chest muscle that helps move and stabilize your shoulder and arm.
These injuries often happen during heavy weightlifting, especially while lowering the bar during a bench press.
A sudden pop, pain, swelling, bruising, or weakness can be signs of a tendon tear.
Some injuries are partial tears, while others are complete tears where the tendon separates from its attachment.
Prompt evaluation is important because treatment choices can be time-sensitive.
Mild injuries may improve with rest, activity changes, and physical therapy.
Complete tears may require surgery, especially for active people seeking to regain strength.
Doctors often use a physical exam and an MRI to confirm the injury. Ultrasound may help in some cases.
Without proper care, some patients are left with ongoing weakness or a chest shape change.
Recovery often includes protecting the area first, then guided rehabilitation.
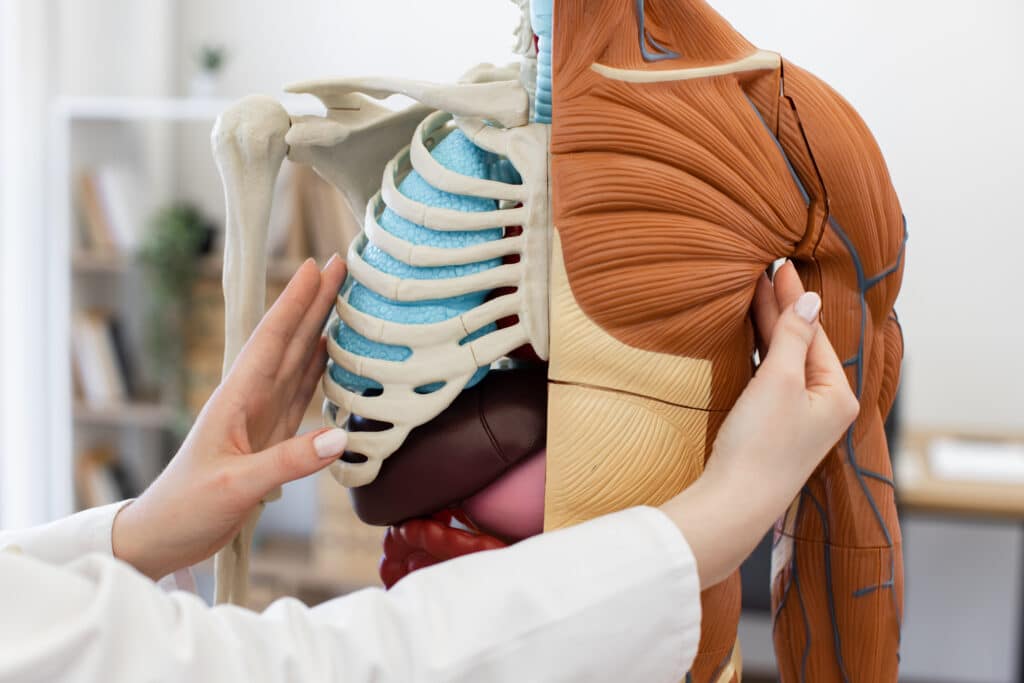
#image_title
What Is the Pectoralis Major Tendon?
The pectoralis major is the broad muscle across the front of your chest. It helps bring your arm toward your body, rotate it inward, and generate power during pushing motions.
This muscle narrows into a tendon as it approaches the upper arm bone, called the humerus. Pectoralis major tears can happen at the tendon insertion, at the musculotendinous junction, or within the muscle belly. Tendon avulsions near the humerus are common.
How These Injuries Usually Happen
Pectoralis major tendon tears are often linked to forceful activity. The classic situation is a heavy bench press, especially during the lowering phase when the muscle is stretched while still under load.
They can also happen during contact sports, wrestling, football, or other activities that place sudden stress across the chest and shoulder. Many people describe sharp pain and an immediate sense that something tore.
Common Signs and Symptoms
Symptoms can vary depending on whether the injury is a strain, a partial tear, or a full rupture. A complete tear often causes stronger pain and noticeable weakness right away, but some partial injuries may look less dramatic at first.
A sudden pop or tearing feeling in the chest or shoulder
Pain in the chest, front of the shoulder, or upper arm
Swelling and bruising, sometimes spreading down the arm
Weakness with pushing, lifting, or bringing the arm inward
A change in the contour of the chest or armpit area
Tenderness where the tendon normally attaches near the upper arm
Some patients notice one side of the chest looks flatter or uneven compared with the other side. This visible change can suggest the tendon has separated or the muscle is not working the way it should.
Who Is Most at Risk?
These injuries often occur in active adults, especially men between the ages of 20 and 40 who do strength training. Heavy bench pressing is a well-known risk factor, particularly when form breaks down under heavy load.
That said, the injury is not limited to competitive lifters. Anyone who puts a sudden, strong force across the chest and shoulder can develop a pectoralis major tendon tear.
How We Diagnose a Pectoralis Major Tear
Diagnosis starts with your story of how the injury happened and a careful physical exam. Your clinician checks for bruising, weakness, tenderness, and shape changes in the chest muscle.
MRI is commonly used to confirm the tear and tell whether it is partial or complete. It can also show where the tendon is injured and how much tissue is involved. Ultrasound may sometimes be helpful, depending on the situation.
Types of Pectoralis Major Injuries
Injury Type
What It Means
Typical Effect
Strain
The muscle or tendon is overstretched but not fully torn.
Pain and soreness, but strength may still be fairly good.
Partial tear
Only part of the tendon or muscle is torn.
Pain, weakness, and some loss of function.
Complete tear
The tendon fully separates, often near the upper arm bone.
More significant weakness, bruising, and chest contour change.
When Non-Surgical Treatment May Help
Non-surgical care may be reasonable for some partial tears, injuries in the muscle belly, or for people who do not need full strength for sports or heavy lifting. Treatment usually focuses on protecting the area, managing pain, and slowly restoring motion with physical therapy.
Short period of rest and activity modification
Sling use when recommended for comfort
Ice and other pain-control strategies
Physical therapy to improve motion and rebuild strength
Even when surgery is not needed, evaluation still matters. Some problems that feel like a strain turn out to be a tendon tear, and the treatment plan may change based on what is actually injured.
When Surgery Is More Likely to Be Recommended
Surgery may be considered for complete tendon tears, especially in active patients who want to regain strength and return to sports, weight training, or physically demanding work. The goal is to repair the tendon when it is separated, when that is appropriate for the case.
Treatment depends on tear severity, location, timing, and your activity level and goals. In many cases, repair is easier to do when evaluation happens relatively soon after the injury, before the tendon retracts and scar tissue develops. Your care team can explain what is realistic for your situation.
You should be evaluated promptly if you notice:
A pop during bench press or another forceful movement
Rapid bruising across the chest or upper arm
Visible asymmetry of the chest muscle
Sudden weakness with pushing or lifting
Early assessment helps confirm the injury and guides the treatment plan. Getting care sooner can give you more options, especially when a tear is suspected.
What Recovery Usually Involves
Recovery depends on the severity of the injury and whether surgery is performed. Healing takes time because the chest and shoulder work together for pushing, lifting, and many daily movements.
Rehabilitation often moves in stages. Early care protects the repair or allows the tear to settle. Later phases work to restore shoulder motion, rebuild strength, and gradually bring you back to sports or lifting based on guidance from your care team.
General Recovery Overview
Stage
What to Expect
Early phase
Rest, protection, pain control, and limited use of the arm.
Rehabilitation phase
Gradual return of shoulder motion and supervised strengthening.
Return to activity
Progressive increase in daily activity, gym exercises, and sports as advised by your care team.
Why Early Care Matters
A delayed diagnosis can make treatment more difficult. Over time, a torn tendon may retract, and the muscle can lose some of its normal function and look.
If you still have weakness, chest deformity, or pain after a lifting injury, do not assume it will fix itself. The right diagnosis early can help protect long-term strength and shoulder function.
When to See an Orthopaedic Specialist
You should schedule an evaluation if you had a sudden chest or shoulder injury and now have pain, bruising, weakness, or a change in chest shape. This is especially important if the injury happened during weightlifting or contact sports.
You heard or felt a pop during exercise
Your chest or upper arm bruised quickly after the injury
You have lost strength with pressing or pushing
One side of your chest looks different than the other
You are having trouble returning to work, sports, or lifting
At Princeton Orthopaedic Associates, we can examine the injury, review imaging if needed, and discuss whether non-surgical treatment or repair is the best fit for your goals. If you are worried about a possible chest tendon tear, schedule an exam so you can move forward with a clear plan.
This blog post is meant to be informative and should not act as a self-diagnosis tool. If you’d like to see one of our doctors, please contact us here.
PLEASE NOTE: This is provided for your general information only. If you are concerned about a Torn ACL or suspect you've sustained an ACL injury, consult a doctor immediately. Misunderstanding or misusing this information can cause harm. This information is provided only as general information about Torn ACLs and ACL injuries.
Torn ACL: Symptoms, Treatment Options, and Recovery
A torn anterior cruciate ligament, or ACL, can make your knee feel unstable and limit daily activities as well as sports. Below you will find what an ACL does, how tears happen, the signs to watch for, how we diagnose the injury, and the nonsurgical and surgical treatments that can help you return to what you love.
Experiencing a knee that suddenly pops, swells quickly, or feels unstable after an injury can be scary and confusing. You are not alone in this experience. People of many ages and from different athletic backgrounds come to our clinic with one shared goal: to move well again. We listen to each person, learn about their daily life and the demands of sport, and then create a plan that fits how they move, what they want to do, and what is safest for their knee as it heals. This plan can adapt over time as symptoms change, goals shift, and strength improves, always aiming for a safe return to the activities that matter most.
Key Points About ACL Tears
The ACL is a stabilizing ligament inside the knee that helps control twisting and sudden changes in direction.
ACL tears often occur during cutting, pivoting, or awkward landings. They can also occur during contact plays.
Common signs include a popping sensation, rapid swelling, and a feeling that the knee may buckle.
Diagnosis involves a careful exam and often an MRI to assess the ACL and look for related injuries like meniscus tears.
Treatment ranges from bracing and physical therapy to ACL reconstruction. The choice depends on your symptoms, activity demands, and goals.
Return to cutting and pivoting sports usually requires several months of structured rehabilitation and meeting strength and movement milestones.
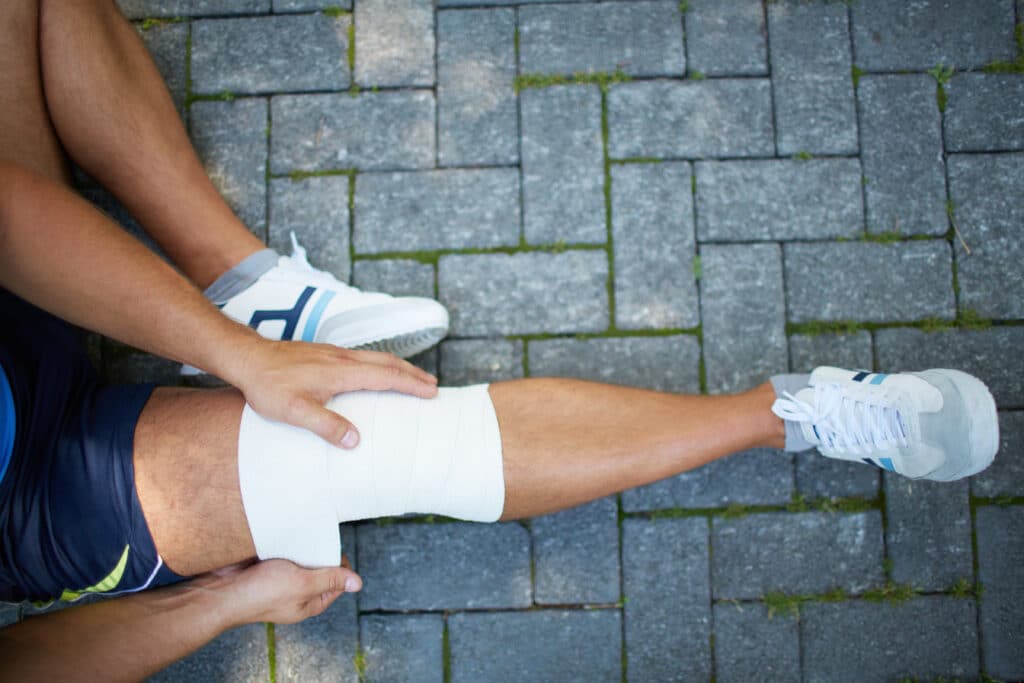
#image_title
What Is the ACL and Why Does It Matters
The ACL is one of four major ligaments that connect the thigh bone to the shin bone. It runs diagonally through the center of the knee, preventing the shin bone from sliding forward and the knee from twisting too far.
When the ACL is torn, the knee can feel loose or unstable, especially during sudden stops, pivots, or side-to-side movements. This instability can limit both everyday activities and sports.
How ACL Tears Happen
Many ACL injuries are noncontact. A quick cut, a sudden stop, or a landing where the knee collapses inward can overload the ligament. Direct blows to the knee can also cause tears, especially in contact sports.
ACL tears are common in sports that involve jumping, cutting, and pivoting such as soccer, basketball, football, lacrosse, and skiing. Certain factors can raise risk.
Sudden changes in direction or awkward landings
Playing on uneven or slick surfaces
Muscle strength or control imbalances around the hip and knee
Limited flexibility and poor landing mechanics
Higher risk among female athletes due to a combination of anatomical and neuromuscular factors
Common Signs and Symptoms
Symptoms can vary, but many people report several of the following right after injury or when returning to activity.
A popping sound or sensation at the moment of injury
Rapid swelling that develops within a few hours
Pain and difficulty putting weight on the leg
A feeling that the knee may give way with turning or pivoting
Limited range of motion because of pain or swelling
Seek care promptly if your knee swells quickly or feels unstable. Early evaluation can reduce complications and speed recovery.
Diagnosing an ACL Tear
We start with a detailed history and a focused knee exam. Specific tests like the Lachman test and pivot shift help assess ACL stability.
X-rays can check for fractures or other bone injuries. An MRI is often ordered to confirm an ACL tear and evaluate the meniscus, cartilage, and other ligaments. This full picture guides the best treatment plan for you.
Immediate Care After Injury
In the first few days, simple steps can help control pain and swelling and protect the knee.
Rest from painful activities and use crutches if weight bearing hurts
Ice for 15 to 20 minutes several times per day
Compression with an elastic bandage or sleeve
Elevation to reduce swelling
Over-the-counter anti-inflammatory medication if approved by your clinician
Early gentle range-of-motion and quadriceps activation as guided by your care team
Treatment Paths: Nonsurgical and Surgical
Some people can do well without surgery, especially if their knee feels stable during daily life and they do not plan to return to cutting or pivoting sports. Others benefit from ACL reconstruction to restore stability and protect the knee during higher-demand activities. The decision is based on your symptoms, goals, activity level, knee stability, and any associated injuries.
Approach
Who It May Suit
What It Includes
Pros
Considerations
Nonsurgical Management
Lower-demand lifestyles, no significant instability, ability to avoid pivoting sports
Recurrent instability, desire to return to cutting and pivoting sports or high-demand work, combined with injuries
Avoids surgery and graft harvest
May not prevent giving way during cutting or pivoting activities
ACL Reconstruction
Recurrent instability, desire to return to cutting and pivoting sports or high-demand work, combined injuries
Arthroscopic reconstruction with a graft, followed by structured rehabilitation
Restores knee stability for higher-demand tasks
Requires surgery and several months of rehabilitation
For skeletally immature patients, surgeons use growth-friendly techniques to protect growth plates and allow ongoing bone development as the knee heals.
Who Often Benefits From ACL Reconstruction
Athletes in sports that require cutting, pivoting, or rapid deceleration
People who experience repeated giving way in daily life
Those with associated injuries such as significant meniscus tears
Workers whose jobs require rapid directional changes or ladder work
Graft Options for ACL Reconstruction
Reconstruction uses a tendon graft to create a new ACL. Grafts come from your own body, called an autograft, or from a donor, called an allograft. Your surgeon will discuss the options based on your age, sport, and personal preferences.
Graft Type
Source
Advantages
Considerations
Patellar Tendon Autograft
Middle third of the patellar tendon with bone plugs
Strong fixation, commonly used in high-demand athletes
Possible front-of-knee discomfort and kneeling sensitivity
Hamstring Tendon Autograft
Semitendinosus and sometimes gracilis tendons
Semitendinosus and sometimes the gracilis tendons
Possible hamstring weakness during early recovery
Quadriceps Tendon Autograft
Portion of the quadriceps tendon, with or without bone plug
Thick graft size and reliable strength
Possible tenderness above the kneecap during early healing
Allograft
Donor tendon
No graft harvest site, shorter operative time
Higher retear rates reported in young, high-demand patients
What to Expect From Surgery
ACL reconstruction is typically performed arthroscopically through small incisions. The surgeon prepares tunnels in the thigh bone and shin bone, places the graft, and secures it so it can heal in place. Most patients go home the same day with a brace and crutches. It’s important to know that ACL reconstruction does not eliminate the risk of knee arthritis later in life.
Early rehabilitation focuses on reducing swelling, restoring gentle motion, and activating the quadriceps. Your care team will guide you step by step and progress your plan based on healing and testable milestones.
Recovery and Return to Sport
Time is only one part of recovery. Safe return to sport depends on strength, balance, hop testing, and movement quality. In most cases, return to cutting or pivoting sports should be based on clear milestones, not just how many weeks have passed. Your surgeon and physical therapist will assess these criteria and only clear higher-level activity after you meet them.
Phase
Typical Timing
Primary Goals
Protection and Early Motion
Weeks 0 to 2
Control pain and swelling, regain gentle extension and flexion, activate quadriceps
Foundation Strength
Weeks 2 to 6
Normalize gait, improve range of motion, begin closed-chain strengthening and balance
Progressive Strength and Control
Weeks 6 to 12
Advance lower extremity strength, balance, and movement mechanics
Running and Agility Preparation
Months 3 to 6
Introduce light jogging, agility drills, and plyometrics when cleared
Return to Cutting and Pivoting Sports
Around 9 to 12 months or later
Meet strength and functional testing criteria and demonstrate safe movement patterns
Possible Risks and How We Reduce Them
Stiffness or loss of motion which is addressed with early, guided range-of-motion work
Graft retear, which we help reduce through progressive strengthening and movement training
Front-of-knee discomfort which is managed with targeted rehabilitation and activity modification
Blood clots or infection which are uncommon and monitored closely after surgery
Prevention Strategies
Not all ACL tears can be prevented, but careful training can lower your chances. Programs that improve how your muscles work, along with good form, help protect the knee during fast movements. Focus on strong hips and legs, balance, and flexible calves and thighs. This is especially helpful in sports that involve quick cuts and jumps.
Structured warm-up programs that teach safe jumping and landing
Strengthening of the hips, hamstrings, and core for better knee control
Balance and single-leg control drills
Consistent flexibility work for the calves, quads, and hamstrings
Appropriate footwear and sport-specific technique coaching
When to See a Knee Specialist
Schedule an evaluation if your knee swells quickly after injury, feels unstable, or keeps giving way during daily life or sports. Prompt diagnosis and a clear plan can protect your knee and support a confident return to activity.
We will help you understand your options, choose a treatment path that fits your goals, and guide you through each stage of recovery. To get started, schedule an exam with our team.
This blog post is meant to be informative and should not act as a self-diagnosis tool. If you’d like to see one of our doctors, please contact us here.
Heart Rate Variability and What It Can Tell You About Recovery
Heart rate variability, often called HRV, looks at the small changes in time between heartbeats. Those beat-to-beat changes can offer helpful insight into how your body is handling stress, exercise, sleep, and recovery. HRV can be a useful tool if you want to train with more awareness and notice how your body responds day to day.
The idea is simple even if the word sounds technical. Your heart does not beat exactly like a metronome. In a healthy system, the spacing between beats shifts a little from moment to moment as your nervous system adjusts to what your body needs.
#image_title
Key Points About HRV
What You Should Know
HRV measures the variation in time between one heartbeat and the next.
It reflects how your autonomic nervous system is responding to stress and recovery.
A higher HRV is often linked with better recovery and more flexibility in the nervous system, within your own normal pattern.
A lower HRV can suggest your body is under more strain from illness, poor sleep, hard training, or emotional stress.
Your own trend over time matters more than comparing your number to someone else’s.
HRV naturally changes from day to day and can be influenced by age, fitness level, hydration, and medications.
Wearables and fitness trackers estimate HRV, and results can vary by device, software algorithm, time of day, sensor quality, and body position.
HRV readings should be used as one piece of the picture, not as a diagnosis by itself.
For active people, HRV can help guide recovery days, training intensity, and return to activity.
If you have symptoms such as chest pain, fainting, or trouble breathing, medical care matters more than any wearable reading.
What Does Heart Rate Variability Mean?
HRV describes the natural variation in timing between heartbeats. Even if your pulse is 60 beats per minute, those beats are not always exactly one second apart. That small variation is normal.
This pattern is influenced by the autonomic nervous system, which helps control body functions you do not have to think about, such as heart rate, breathing, and digestion. The sympathetic system is often linked to stress or action. The parasympathetic system is often linked to rest and recovery.
When these systems are balanced and responsive, HRV often trends higher. When your body is under more strain, HRV may drop.
Why HRV Matters for Active People
If you exercise regularly, recover from orthopedic injury, or train for sports, HRV may add another way to understand how your body is doing. It will not replace how you feel, your physical exam, or your care team’s guidance. Instead, it can provide additional context for the decisions you make each day.
For example, a lower-than-usual HRV may suggest you need more sleep, more recovery time, or a lighter workout. If your trend looks steadier or is gradually improving, that may fit with good adaptation to training.
What Can Affect Your HRV?
Many factors can influence HRV, sometimes in ways that align with real recovery changes and sometimes in ways that reflect measurement limitations. HRV readings from smartwatches and fitness trackers are estimates. Device type, the algorithm used, and even small setup differences can shift readings.
HRV can also be unreliable if your heart rhythm is irregular, if you have frequent ectopic beats, if you use a pacemaker, or if a sensor is not making good contact. If you have concerning symptoms, get medical care even if HRV looks normal or improved.
Sleep quality and sleep duration
Physical training load and recovery time
Emotional stress
Illness or infection
Hydration and nutrition
Alcohol use
Age and overall fitness
Certain medications and medical conditions
Because so many factors affect HRV, one isolated reading usually does not mean much on its own. Looking at patterns over time is more useful than focusing on a single number.
Common reasons HRV may be lower than usual
A poor night of sleep
A very intense workout or competition
Dehydration
Travel, especially across time zones
Increased life stress
Feeling run-down or getting sick
Seeing a short-term drop does not always mean something is wrong. It may simply be a sign that your body needs more time to recover.
Is Higher HRV Always Better?
In general, a higher HRV is often associated with a more adaptable nervous system and better recovery. Still, HRV is personal. A higher number is usually favorable when it matches your normal pattern and is steady for you.
Unusually high, erratic, or sudden changes are not automatically good. They can reflect measurement artifact, illness, overreaching, or rhythm irregularity. When HRV changes fast, pay extra attention to how you feel and what is going on in your training and sleep.
HRV varies widely from person to person. Age, genetics, conditioning, and overall health can affect what is typical for you. That is why it is usually more helpful to know your normal range and watch for meaningful changes from your own usual pattern.
How to Measure HRV
HRV can be measured using electrocardiograms and certain wearable devices, such as chest straps, smartwatches, and fitness trackers. Different devices may estimate HRV differently, so it helps to use the same device and a similar routine when you are looking for trends.
Many people measure HRV first thing in the morning, before caffeine, exercise, or a busy day changes the picture. What matters most is consistency. Small changes in time, activity, or body position can affect readings from some wearables.
Ways to Make HRV Tracking More Useful
Tip
Why It Helps
Measure at the same time each day
Improves consistency and makes trends easier to compare.
Use the same device
Different tools may calculate HRV differently.
Track trends, not single readings
Day to day values can fluctuate for many reasons.
Pair HRV with symptoms and recovery habits
Sleep, soreness, stress, and energy level help give context.
Do not use HRV by itself to make medical decisions
It is a helpful marker, but not a diagnosis.
How HRV Connects to Recovery and Orthopaedic Care
For people recovering from musculoskeletal injuries, surgery, or periods of overtraining, HRV may be one way to watch how your body is handling stress. It can support day to day pacing during rehabilitation. It should be used alongside pain, swelling, strength, range of motion, fatigue, sleep, and functional progress, plus advice from your clinician or physical therapist.
For example, if your HRV looks lower than usual and you also feel unusually sore or worn out, scaling back may help. If your overall trend looks steadier and you tolerate therapy well, it can fit with a gradual increase in activity. HRV alone should not decide when to return to sport or how far to progress after surgery.
What HRV Cannot Do
HRV can be helpful, but it has limits. It cannot tell you exactly why your body is stressed. It also cannot diagnose a heart condition, an injury problem, or another medical issue on its own.
It does not replace a medical evaluation.
It should not be used alone to push through warning signs or through pain.
It is only one part of understanding your health and recovery.
When to Pay Closer Attention
If your HRV stays lower than usual for days and you also feel unwell, overly fatigued, dizzy, or unable to bounce back from normal activity, it is wise to speak with a healthcare professional. This is especially important if you have an underlying heart condition or symptoms that worry you.
Seek medical care right away if you have
Chest pain
Fainting
Trouble breathing
A racing or irregular heartbeat with symptoms
Severe weakness or dizziness
#image_title
A Practical Way to Use HRV
Think of HRV as a daily check in rather than a number you have to chase. If readings fit your normal range and you feel well, your body may be ready for regular activity. If your numbers drop and you also feel tired, stressed, or sore, focus on basics like sleep, hydration, and recovery.
For athletes and active adults, the goal is not perfection. The goal is learning how your body responds so you can make better decisions. That approach can help lower the chance of burnout or setbacks.
Need Help Returning to Activity Safely?
If pain, injury, overtraining, or slow recovery is making it harder to stay active, our orthopaedic specialists can help. We work with patients and athletes to review movement, guide treatment, and build a recovery plan that matches your goals.
Schedule an evaluation with Princeton Orthopaedic Associates if you want support returning to exercise, sports, or daily activity with more confidence.
This blog post is meant to be informative and should not act as a self-diagnosis tool. If you’d like to see one of our doctors, please contact us here.
Sequence rules uses cookies to track the order of requests a user has made and the time between requests and makes them available via Cloudflare Rules. This allows you to write rules that match valid or invalid sequences. The specific cookies used to validate sequences are called sequence cookies.
session
cf_ob_info
The cf_ob_info cookie provides information on: The HTTP Status Code returned by the origin web server. The Ray ID of the original failed request. The data center serving the traffic
session
cf_use_ob
The cf_use_ob cookie informs Cloudflare to fetch the requested resource from the Always Online cache on the designated port. Applicable values are: 0, 80, and 443. The cf_ob_info and cf_use_ob cookies are persistent cookies that expire after 30 seconds.
session
__cfwaitingroom
The __cfwaitingroom cookie is only used to track visitors that access a waiting room enabled host and path combination for a zone. Visitors using a browser that does not accept cookies cannot visit the host and path combination while the waiting room is active.
session
cf_chl_rc_i
These cookies are for internal use which allows Cloudflare to identify production issues on clients.
session
cf_chl_rc_ni
These cookies are for internal use which allows Cloudflare to identify production issues on clients.
session
cf_chl_rc_m
These cookies are for internal use which allows Cloudflare to identify production issues on clients.
session
__cfruid
Used by the content network, Cloudflare, to identify trusted web traffic.
session
__cf_bm
Cloudflare's bot products identify and mitigate automated traffic to protect your site from bad bots. Cloudflare places the __cf_bm cookie on End User devices that access Customer sites that are protected by Bot Management or Bot Fight Mode. The __cf_bm cookie is necessary for the proper functioning of these bot solutions.
session
__cflb
When enabling session affinity with Cloudflare Load Balancer, Cloudflare sets a __cflb cookie with a unique value on the first response to the requesting client. Cloudflare routes future requests to the same origin, optimizing network resource usage. In the event of a failover, Cloudflare sets a new __cflb cookie to direct future requests to the failover pool.
session
_cfuvid
The _cfuvid cookie is only set when a site uses this option in a Rate Limiting Rule, and is only used to allow the Cloudflare WAF to distinguish individual users who share the same IP address.
session
cf_clearance
Whether a CAPTCHA or Javascript challenge has been solved.
session
Google reCAPTCHA helps protect websites from spam and abuse by verifying user interactions through challenges.
Name
Description
Duration
_GRECAPTCHA
Google reCAPTCHA sets a necessary cookie (_GRECAPTCHA) when executed for the purpose of providing its risk analysis.
179 days
Google Tag Manager simplifies the management of marketing tags on your website without code changes.
Name
Description
Duration
cookiePreferences
Registers cookie preferences of a user
2 years
td
Registers statistical data on users' behaviour on the website. Used for internal analytics by the website operator.
session
These cookies are used for managing login functionality on this website.
Name
Description
Duration
wordpress_logged_in
Used to store logged-in users.
Persistent
wordpress_sec
Used to track the user across multiple sessions.
15 days
wordpress_test_cookie
Used to determine if cookies are enabled.
Session
WPForms is a user-friendly WordPress plugin for creating custom forms with drag-and-drop functionality.
Name
Description
Duration
wpfuuid
Used to track user interactions with forms.
11 years
Statistics cookies collect information anonymously. This information helps us understand how visitors use our website.
Google Analytics is a powerful tool that tracks and analyzes website traffic for informed marketing decisions.
Used to distinguish new sessions and visits. This cookie is set when the GA.js javascript library is loaded and there is no existing __utmb cookie. The cookie is updated every time data is sent to the Google Analytics server.
30 minutes after last activity
__utmc
Used only with old Urchin versions of Google Analytics and not with GA.js. Was used to distinguish between new sessions and visits at the end of a session.
End of session (browser)
__utmz
Contains information about the traffic source or campaign that directed user to the website. The cookie is set when the GA.js javascript is loaded and updated when data is sent to the Google Anaytics server
6 months after last activity
__utmv
Contains custom information set by the web developer via the _setCustomVar method in Google Analytics. This cookie is updated every time new data is sent to the Google Analytics server.
2 years after last activity
__utmx
Used to determine whether a user is included in an A / B or Multivariate test.
18 months
_ga
ID used to identify users
2 years
_gali
Used by Google Analytics to determine which links on a page are being clicked
30 seconds
_ga_
ID used to identify users
2 years
_gid
ID used to identify users for 24 hours after last activity
24 hours
_gat
Used to monitor number of Google Analytics server requests when using Google Tag Manager
1 minute
_gac_
Contains information related to marketing campaigns of the user. These are shared with Google AdWords / Google Ads when the Google Ads and Google Analytics accounts are linked together.
90 days
__utma
ID used to identify users and sessions
2 years after last activity
__utmt
Used to monitor number of Google Analytics server requests
10 minutes
These cookies help us measure the effectiveness of our website content and understand how visitors find and use our site. This allows us to improve the experience and provide more helpful resources.
Facebook Pixel is a web analytics service that tracks and reports website traffic.