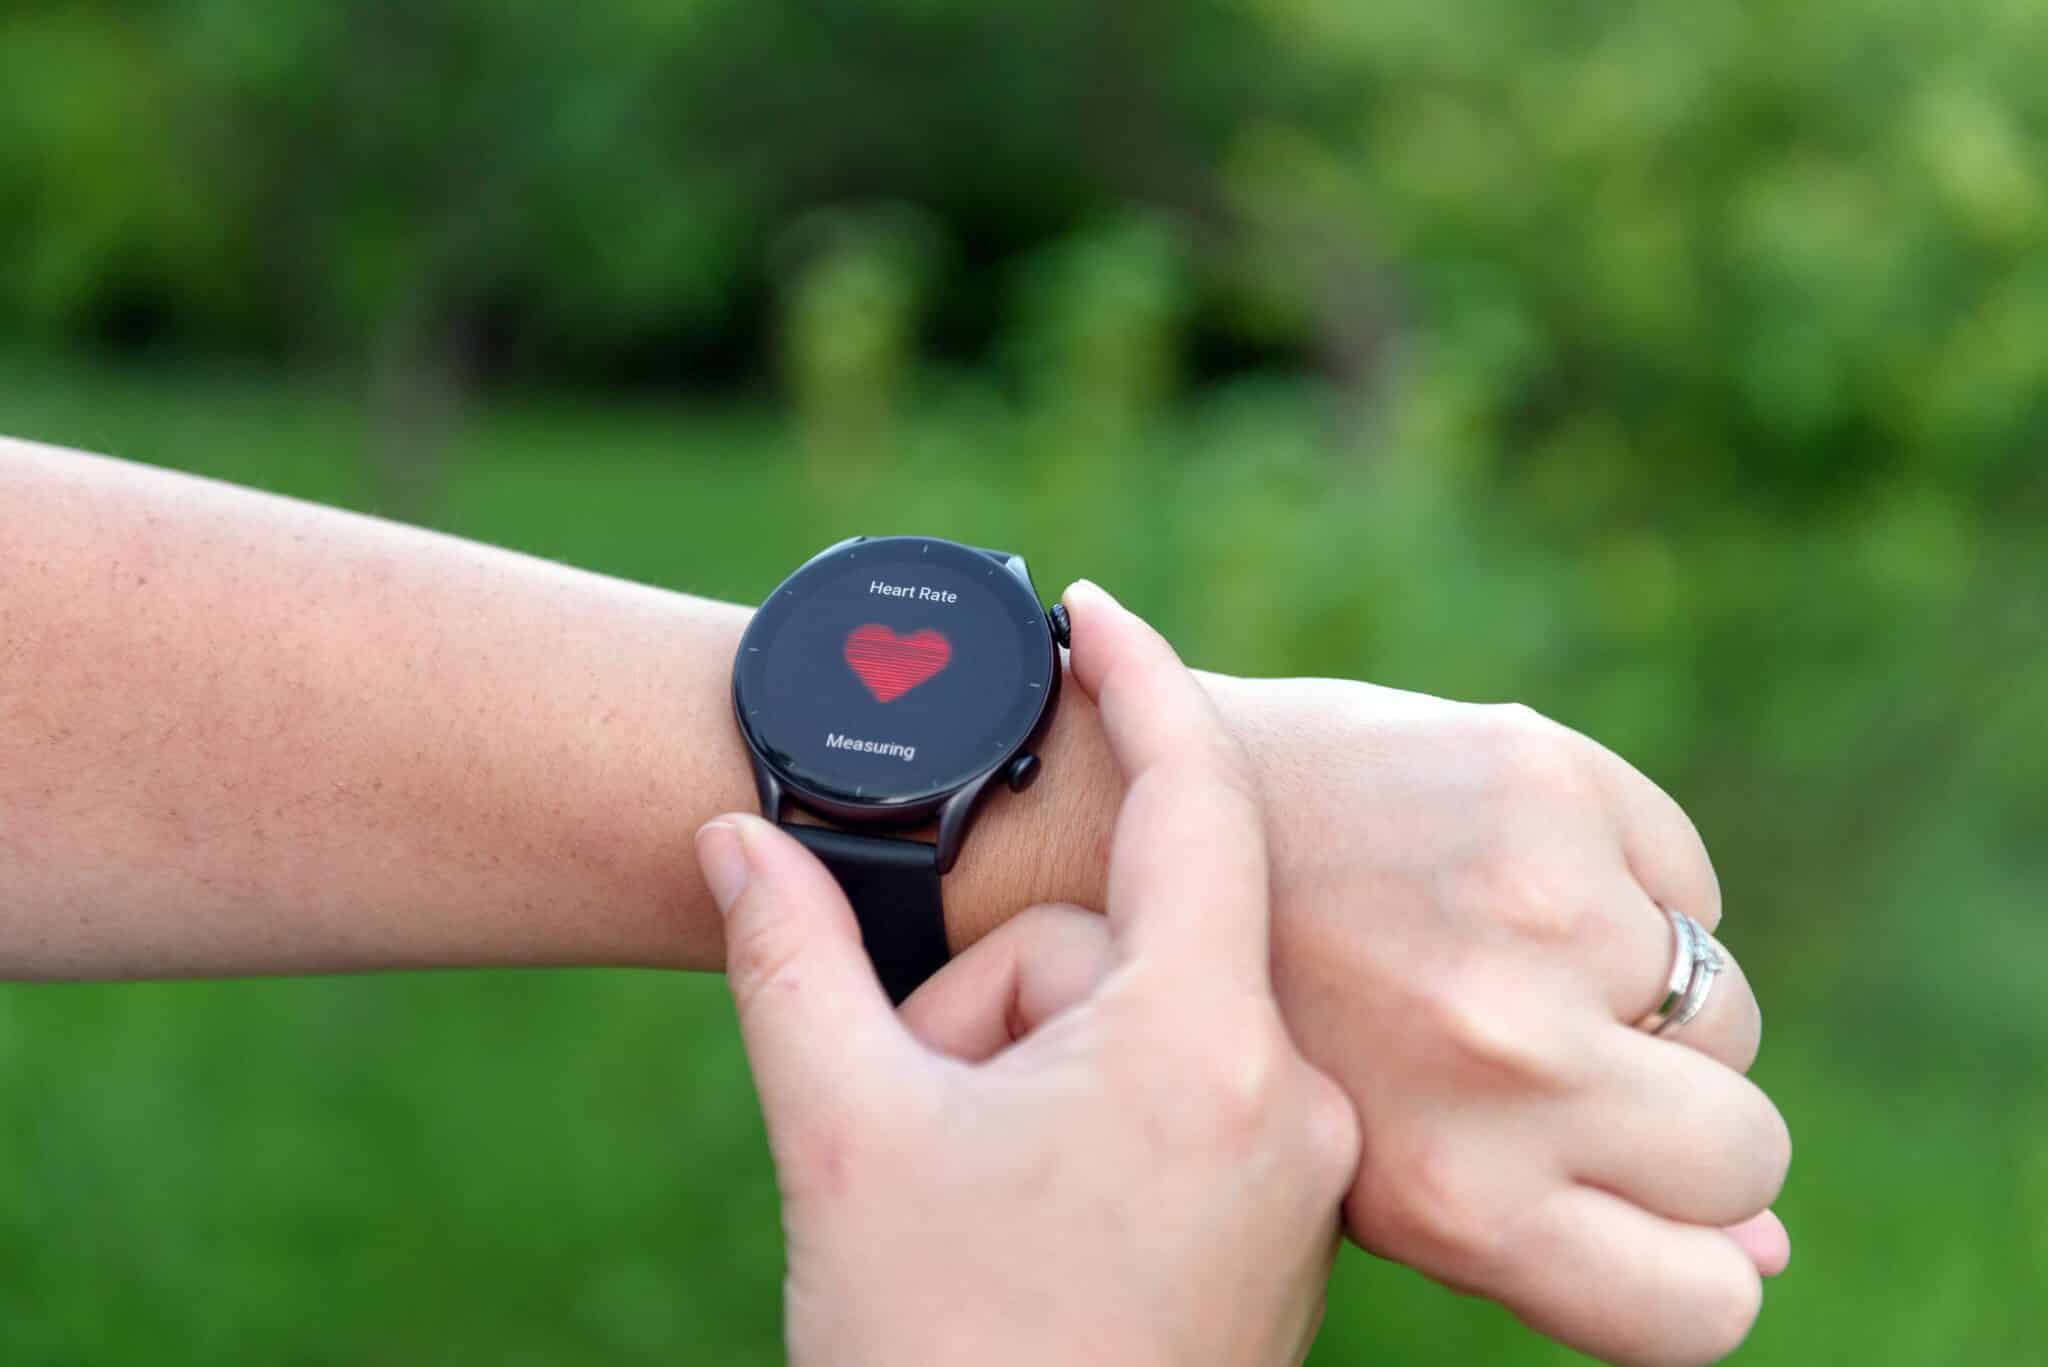
Heart Rate Variability and What It Can Tell You About Recovery
There is a certain simplicity to HRV, or heart rate variability, despite the technical ring of the term. It is a matter of observing the minute time differences from one heartbeat to the next. A healthy system is not as regular as a metronome; rather, the nervous system will make its own adjustments and the spacing between beats will vary in response to what the body requires at any given moment.
By way of those small changes, you can gain some valuable perspective on how the body is coping with everything from exercise and sleep to stress and recovery. For anyone looking to be more attuned to their training and see how they are responding on a daily basis, HRV serves as a handy instrument.
#image_title
Key Points About HRV
What You Should Know
HRV measures the variation in time between one heartbeat and the next.
It reflects how your autonomic nervous system is responding to stress and recovery.
A higher HRV is often linked with better recovery and more flexibility in the nervous system, within your own normal pattern.
A lower HRV can suggest your body is under more strain from illness, poor sleep, hard training, or emotional stress.
Your own trend over time matters more than comparing your number to someone else’s.
HRV naturally changes from day to day and can be influenced by age, fitness level, hydration, and medications.
Wearables and fitness trackers estimate HRV, and results can vary by device, software algorithm, time of day, sensor quality, and body position.
HRV readings should be used as one piece of the picture, not as a diagnosis by itself.
For active people, HRV can help guide recovery days, training intensity, and return to activity.
If you have symptoms such as chest pain, fainting, or trouble breathing, medical care matters more than any wearable reading.
What Does Heart Rate Variability Mean?
HRV describes the natural variation in timing between heartbeats. Even if your pulse is 60 beats per minute, those beats are not always exactly one second apart. That small variation is normal.
The autonomic nervous system is what drives this pattern, seeing to the body’s functions that require no conscious effort like digestion, breathing and heart rate. There are two sides to it: the sympathetic, which has a way of being associated with action or stress, and the parasympathetic for rest and recovery.
As a rule, if these systems are in balance and responsive you will see HRV run higher. Put the body under some strain, however, and it is not uncommon for HRV to fall.
Why HRV Matters for Active People
Those who put in the work with regular exercise, are in the process of an orthopedic recovery or putting in the hours for sports training might find HRV to be a useful measure of how the body is faring. It is not meant to supersede the advice of one’s care team, a physical exam or what you feel on any given day; rather it offers some further context for your daily decisions.
Take a dip in HRV below the norm as a possible sign that a lighter session is in order, or that more time for rest and sleep is called for. On the other hand, a trend that is improving or holding steady could be taken as evidence of sound adaptation to the training.
What Can Affect Your HRV?
There are a number of things that can put an influence on HRV. In some cases the variation is in keeping with actual changes in recovery, but at other times it is merely an artefact of the measurement. You should bear in mind that what a smartwatch or fitness tracker puts out is only an estimate; the make of the device and its algorithm, to say nothing of minor setup variations, will all have an effect on the numbers.
Then there is the matter of reliability. An irregular heart, frequent ectopic beats or a pacemaker can throw off thse readings. So can a bad sensor, or bad sensor contact And if symptoms are of concern, do not be swayed by an HRV figure that appears normal or better; seek medical attention.
Sleep quality and sleep duration
Physical training load and recovery time
Emotional stress
Illness or infection
Hydration and nutrition
Alcohol use
Age and overall fitness
Certain medications and medical conditions
Because so many factors affect HRV, one isolated reading usually does not mean much on its own. Looking at patterns over time is more useful than focusing on a single number.
Common reasons HRV may be lower than usual
A poor night of sleep
A very intense workout or competition
Dehydration
Travel, especially across time zones
Increased life stress
Feeling run-down or getting sick
Seeing a short-term drop does not always mean something is wrong. It may simply be a sign that your body needs more time to recover.
Is Higher HRV Always Better?
Generally speaking, a higher HRV tends to point to a nervous system in good shape, one that is more adaptable and recovers well. But then again, HRV is an individual matter. A high figure is only as good as it is consistent with your own normal way of being.
Unusually high, erratic, or sudden changes are not automatically good. Such anomalies can be nothing more than an artifact of the measurement, or they may be indicative of an illness, rhythm irregularity, or simply overreaching. If you see the numbers change quickly it is worth taking a closer look at how you are feeling.
Since age, genetics, conditioning and overall health all play a part, there is considerable variation from one person to the next. Because of that you will find it more useful to have a handle on your own typical range and to be on the lookout for any changes.
How to Measure HRV
There are a number of ways to put HRV in numbers, from an electrocardiogram to the sort of wearables you might have on hand: a chest strap, smartwatch or fitness tracker will do. Remember that not all devices estimate HRV in the same way; for the sake of spotting trends it is best to stick with a particular device and routine.
Consistency is what really counts. Some will find their readings altered by even minor variations in body position or activity, depending on the wearable. Many people make a point of taking their HRV first thing in the morning to get a baseline reading.
Ways to Make HRV Tracking More Useful
Tip
Why It Helps
Measure at the same time each day
Improves consistency and makes trends easier to compare.
Use the same device
Different tools may calculate HRV differently.
Track trends, not single readings
Day to day values can fluctuate for many reasons.
Pair HRV with symptoms and recovery habits
Sleep, soreness, stress, and energy level help give context.
Do not use HRV by itself to make medical decisions
It is a helpful marker, but not a diagnosis.
How HRV Connects to Recovery and Orthopaedic Care
Those in the process of healing from an overtraining spell, a musculoskeletal injury or surgery can turn to HRV as a means of gauging how well the body is coping with stress. In the course of rehabilitation it is useful for keeping a proper day to day pace. Of course, it is best employed in conjunction with other indicators such as pain levels, swelling, strength and range of motion, as well as fatigue and sleep quality and functional gains, not to mention the input of one’s physical therapist or clinician.
Take the case where your HRV is running below normal and you are feeling more sore or run down than is typical; in that instance it makes sense to scale back. On the other hand, a steadier trend and good tolerance of therapy would be consistent with building up your activity a bit. But do not let HRV be the sole arbiter on when to get back to sport or the extent of post surgical progress.
What HRV Cannot Do
HRV can be helpful, but it has limits. It cannot tell you exactly why your body is stressed. It also cannot diagnose a heart condition, an injury problem, or another medical issue on its own.
It does not replace a medical evaluation.
It should not be used alone to push through warning signs or through pain.
It is only one part of understanding your health and recovery.
When to Pay Closer Attention
If your HRV stays lower than usual for several days and you also feel unwell, overly fatigued, dizzy, or unable to bounce back from the day's activities, speak with a healthcare professional. This matters more if you have a pre-existing heart condition or are concerned about any other symptoms.
Seek medical care right away if you have
Chest pain
Fainting
Trouble breathing
A racing or irregular heartbeat with symptoms
Severe weakness or dizziness
#image_title
A Practical Way to Use HRV
Do not view HRV as a figure to be put on a pedestal; treat it more like a daily check in. When the readings are within your usual range and you are in good form, the body is likely primed for its normal routine. But should the numbers dip and you find yourself feeling sore or under stress, it is time to turn your attention to the fundamentals of recovery, sleep and hydration.
Active adults and athletes need not strive for perfection with these metrics. It is about understanding how one
can make sounder choices. That can help lower the chance of burnout or setbacks.
Need Help Returning to Activity Safely?
When you find that staying active is a struggle due to pain, an injury, overtraining or simply a slow recovery, the orthopaedic specialists on our team are here to assist. We put in the time with our patients and athletes to assess how they move and determine the right course of treatment, all while formulating a plan for recovery in line with their objectives.
For those looking to put more confidence back into their exercise, sports or day to day routine, we invite you to set up an evaluation at Princeton Orthopaedic Associates.
This blog post is meant to be informative and should not act as a self-diagnosis tool. If you’d like to see one of our doctors, please contact us here.
Common Reasons Your Back Hurts
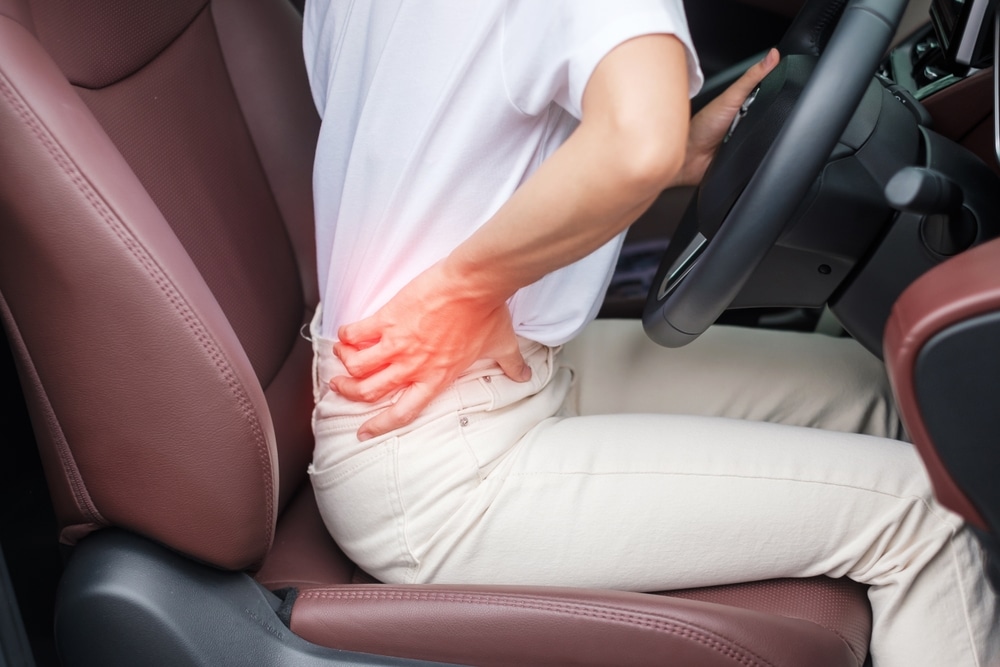
Most back pain comes from tired muscles, stiff joints, or irritated nerves. A clinician will consider many possible reasons for your symptoms. The most common causes include muscle or tendon strains from overuse, a herniated or bulging disc that presses on a nerve, and spinal changes that cause pain with movement. This information aligns with the ACP 2017 guidelines, NICE NG59, the ACR Low Back Pain criteria, and the NASS guidelines for radiculopathy and stenosis.
Muscle or ligament strain from lifting, twisting, or prolonged sitting
A herniated or bulging disc that can press on a nerve and cause sciatica
Degenerative disc changes that can contribute to stiffness and discomfort
Spinal stenosis, which is a narrowing of the nerves
Facet joint arthritis or irritation
Sacroiliac (SI) joint dysfunction near the back of the pelvis
Spondylolisthesis, where one vertebra slips relative to another
Osteoporosis-related compression fractures
Inflammatory conditions that cause morning stiffness and improve with movement
What to Expect at Your First Visit
Your clinician will review your symptoms, medical history, daily activities, and goals. A focused exam assesses posture, range of motion, tender areas, reflexes, strength, and sensation to determine whether the pain is muscular, joint-related, or nerve-related.
Imaging is not always needed at the first visit. X-rays or MRI may be recommended if symptoms last, if there are signs of nerve compression or structural problems, or if red flags are present.
Radicular pain, facet or SI joint pain, when targeted injections may help
Physical Therapist
Exercise-based recovery, posture and lifting mechanics, core and hip strength
Most cases of back pain once serious causes are ruled out
Chiropractor
Manual care for uncomplicated mechanical back pain
Short-term relief for acute episodes when no red flags are present
Rheumatologist
Inflammatory back conditions and autoimmune disorders
Back pain with prolonged morning stiffness, eye or skin inflammation, or other systemic signs
Emergency Medicine
Critical evaluation and stabilization
Red flag symptoms such as bowel or bladder changes, saddle numbness, high fever, severe trauma
Signs You May Need a Surgical Opinion
Worsening weakness, trouble lifting the foot, or difficulty walking
Back or leg pain that remains severe after several weeks of appropriate non-surgical treatment
Findings of significant nerve compression, spinal instability, fracture, infection, or tumor
When surgery is appropriate, procedures may include relieving pressure on nerves (decompression) or stabilizing a spinal segment (fusion). Your surgeon will review options, risks, and expected recovery so you can make an informed choice.
Treatments That Often Help First
Most people begin with non-surgical care that fits the exact type of back pain. A doctor or therapist creates a plan based on your diagnosis, daily activities, and goals. That plan may include gradual movement, medicines if appropriate, heat or cold, and physical therapy. This approach follows ACP 2017 guidelines, NICE NG59, ACR Low Back Pain criteria, and NASS guidelines.
Activity changes, short rest as needed, and a gradual return to movement
Over-the-counter pain relievers or anti-inflammatory medicines if appropriate for you
Heat or ice for symptom relief
Physical therapy focused on mobility, core and hip strength, and posture
Image-guided injections, such as an epidural steroid injection or facet/SI joint injection, when nerve or joint inflammation is the main driver
How We Help at Princeton Orthopedic Associates
Whether you want to return to work, play sports, or end a recurring flare, the team will identify the source of the pain and guide you to the right care. Begin with a thorough exam, then build a plan that fits your daily life and your diagnosis. This approach aligns with ACP 2017 guidelines and NICE NG59, and with ACR Low Back Pain criteria and NASS guidelines for radiculopathy and stenosis.
Schedule an appointment with our spine team to get clear answers and a treatment plan you can trust.
This blog post is meant to be informative and should not act as a self-diagnosis tool. If you’d like to see one of our doctors, please contact us here.
Primary care or urgent care can assess common strains and guide initial treatment.
Physiatrists focus on non-surgical spine care, functional movement, and targeted rehabilitation.
Physical therapists design exercise programs that reduce pain and improve mechanics.
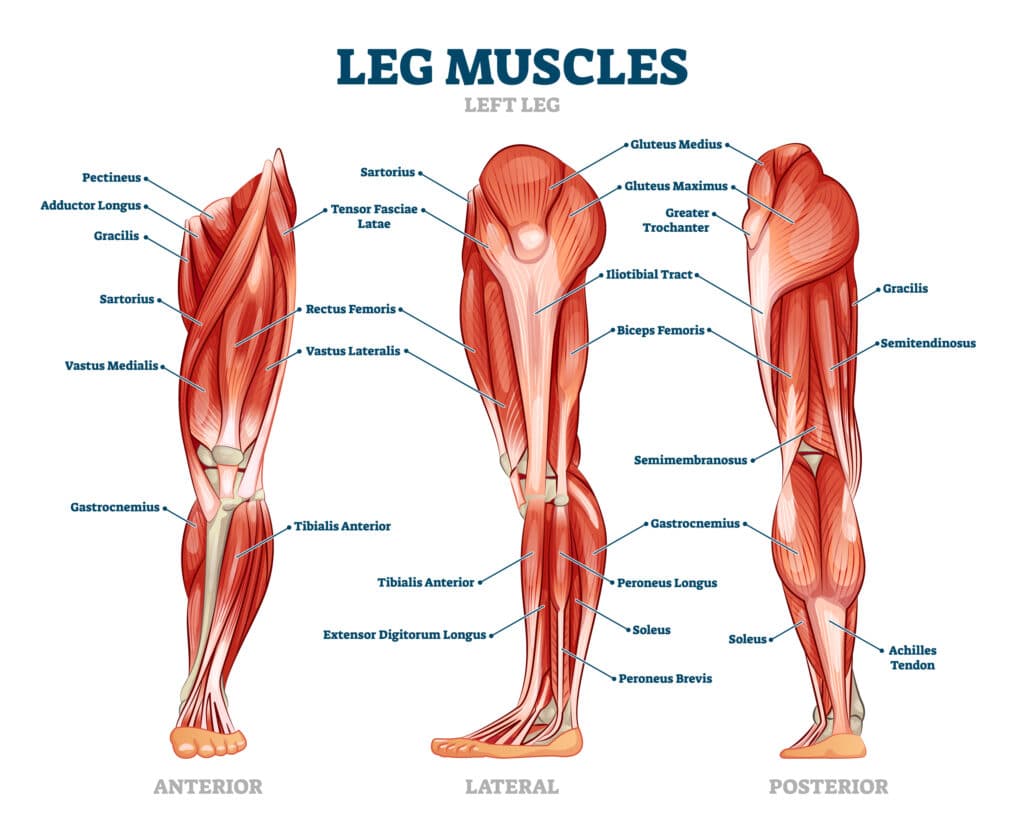
Leg Muscles: How They Work
Your legs rely on a powerful team of muscles to stand, walk, climb stairs, and stay balanced. Below, we explain the major muscle groups of the thigh and lower leg, what they do, common conditions that affect them, and practical steps you can take to prevent injury and recover safely.
How Your Leg Muscles Are Organized
Leg muscles are organized into groups based on their location and function. Each group has a specific job, and they work together with the other groups to move your hips, knees, ankles, and feet. This teamwork keeps your steps smooth and balanced during daily activities.
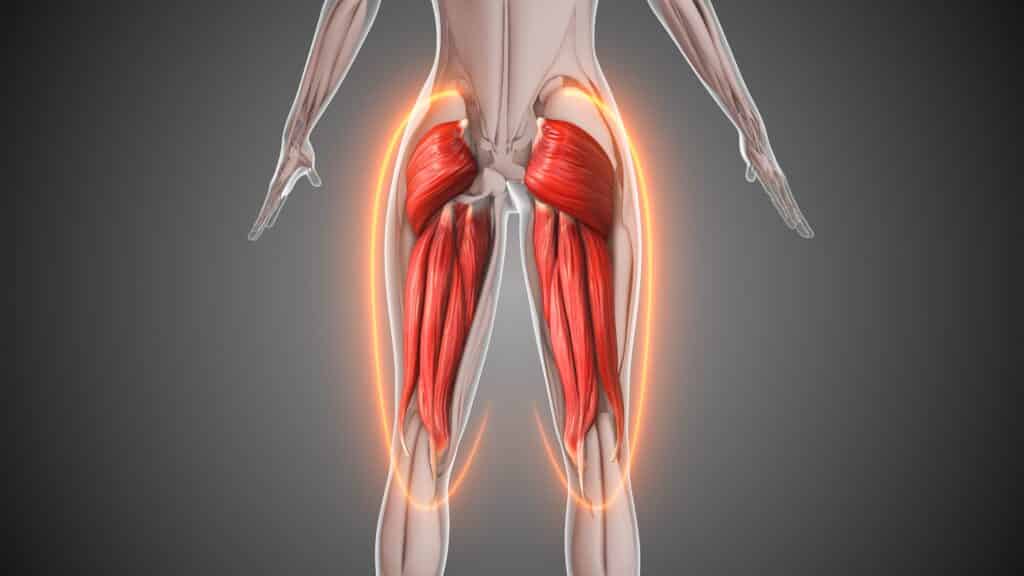
The gluteal region at the hip: gluteus maximus, medius, and minimus help control hip movement and stabilize the pelvis while you walk.
Front of the thigh (anterior compartment): quadriceps straighten the knee, and one of them, the rectus femoris, also helps flex the hip.
Back of the thigh (posterior compartment): hamstrings bend the knee and extend the hip.
Inner thigh (medial compartment): adductor muscles pull the legs toward the midline and help steady the pelvis.
Front of the lower leg (anterior compartment): tibialis anterior and toe extensors lift the foot and toes to clear the ground when you walk.
Outer lower leg (lateral compartment): peroneal muscles (also called fibularis longus and brevis in current anatomical terminology) evert the foot and help control side-to-side ankle stability.
Deep posterior compartment: tibialis posterior (with flexor hallucis longus and flexor digitorum longus) supports the arch, contributes to inversion, and aids dynamic ankle stability.
Back of the lower leg (posterior compartment): gastrocnemius and soleus form the calf and point the foot downward for push-off, working through the Achilles tendon.
Major Leg Muscles and What They Do
Region
Muscle Group
Key Muscles
Primary Actions
Everyday Role
Hip
Gluteals
Gluteus maximus, medius, minimus
Hip extension, abduction, rotation
Stand up from a chair, steady pelvis during walking
Clear toes during swing, controlled foot placement
Lower leg (outer)
Peroneals
Peroneus longus, peroneus brevis
Foot eversion, plantarflex assist
Stabilize the ankle on uneven ground
Lower leg (back)
Calf
Gastrocnemius, soleus; Achilles tendon
Plantarflexion assists knee flexion via the gastrocnemius
Push-off for walking, running, jumping
How These Muscles Work Together
Leg movement is a team effort. The glutes stabilize the pelvis, allowing the hamstrings and quadriceps to move the hip and knee smoothly, while the lower leg muscles guide ankle and foot position for balance and push-off.
Efficient walking and running require controlled hip motion, steady knee tracking, and a stable ankle.
Muscle imbalances, fatigue, or restricted flexibility can shift loads to the wrong areas and raise injury risk.
Common Leg Muscle Problems
We diagnose and treat a wide range of leg muscle injuries and overuse conditions. Here are some of the most common:
Hamstring strain: sudden pain in the back of the thigh, often during sprinting or quick starts.
Quadriceps strain or tendinopathy: pain in the front of the thigh or just above the kneecap, worse with squatting or stairs. Pain below the kneecap more commonly points to patellar tendinopathy (jumper’s knee).
Groin pull involving the adductors: inner thigh pain with cutting, kicking, or side-to-side movements.
Calf strain: sharp pain or tightness in the calf, sometimes with difficulty pushing off.
Achilles tendinopathy or tear: pain or stiffness at the back of the heel or a sudden pop with loss of push-off strength.
Medial tibial stress syndrome (shin splints): aching along the inner shin with running or walking volume increases.
Muscle cramps: sudden, involuntary contractions that can follow fatigue, heat, or dehydration.
Prevention Tips You Can Start Today
Small, steady habits can lower your chance of strains and overuse injuries, and they can help you recover more quickly if symptoms appear. By incorporating simple home routines, you may improve your strength, flexibility, and balance over time, thereby supporting safer movement during daily activities and sports.
Warm up for 5 to 10 minutes, then include dynamic movements that match your activity.
Gradually increase training volume or intensity to give muscles and tendons time to adapt.
Strengthen all major groups: glutes, quadriceps, hamstrings, calves, and core for balanced support.
Maintain flexibility in hip flexors, hamstrings, quads, and calves to allow healthy joint motion.
Rotate activities to vary stress on tissues and schedule regular recovery days.
Wear supportive, well-fitting footwear suited to your activity and replace worn shoes.
Stay hydrated and fuel activity with adequate nutrition.
Self-Care for Mild Symptoms
Relative rest from painful activities while staying gently active as tolerated.
Ice for 15-20 minutes several times per day, especially after activity.
Compression and elevation for swelling, if present.
Your clinician recommends over-the-counter pain relief.
Gradual return to activity with a focus on form and strength balance.
When to Seek Medical Evaluation
Situation
What It May Indicate
What to Do
A sudden pop with immediate pain or swelling
Possible muscle or tendon tear
Seek a same-day medical evaluation
Inability to bear weight or a visible deformity
Significant injury that needs prompt care
Seek same-day medical evaluation
Calf swelling, warmth, and tenderness, especially with shortness of breath
Concerning for a blood clot
Seek emergency or urgent medical care
Pain that persists or keeps returning despite rest
Overuse injury or biomechanical issue
Schedule an orthopaedic assessment
How Princeton Orthopaedic Associates Can Help
We begin by listening to your history and watching how you move. We assess strength, flexibility, and joint function across various movements. If imaging is helpful, imaging tests can clarify which muscle, tendon, or joint is involved and guide the appropriate treatment plan.
Targeted activity modification to calm irritation while keeping you moving.
Physical therapy focused on strength, balance, flexibility, and gait (movement) retraining.
Bracing, taping, or assistive devices when appropriate.
Medications or injections when clinically indicated for pain and inflammation.
Surgical consultation for significant tears or injuries that don’t respond to conservative care.
Our goal is to treat the problem and its cause so you can return to the activities you enjoy with confidence.
Next Steps
If leg pain is limiting your daily routine or training, we’re here to help. Schedule an evaluation to obtain a precise diagnosis and a plan that aligns with your goals.
This blog post is meant to be informative and should not act as a self-diagnosis tool. If you’d like to see one of our doctors, please contact us here.
Trigger Finger: Symptoms, Causes, and Treatment Options
Trigger finger, also called stenosing tenosynovitis, happens when a finger or thumb catches, clicks, or locks as you try to bend or straighten it. We explain why it occurs, the most common symptoms, how doctors diagnose it, and the treatment options that help you get back to comfortable hand use.
If you feel a pop in your palm or need to use your other hand to straighten a finger, you are not alone. This condition is common, often treatable without surgery, and very responsive to early care.
What Is Trigger Finger?
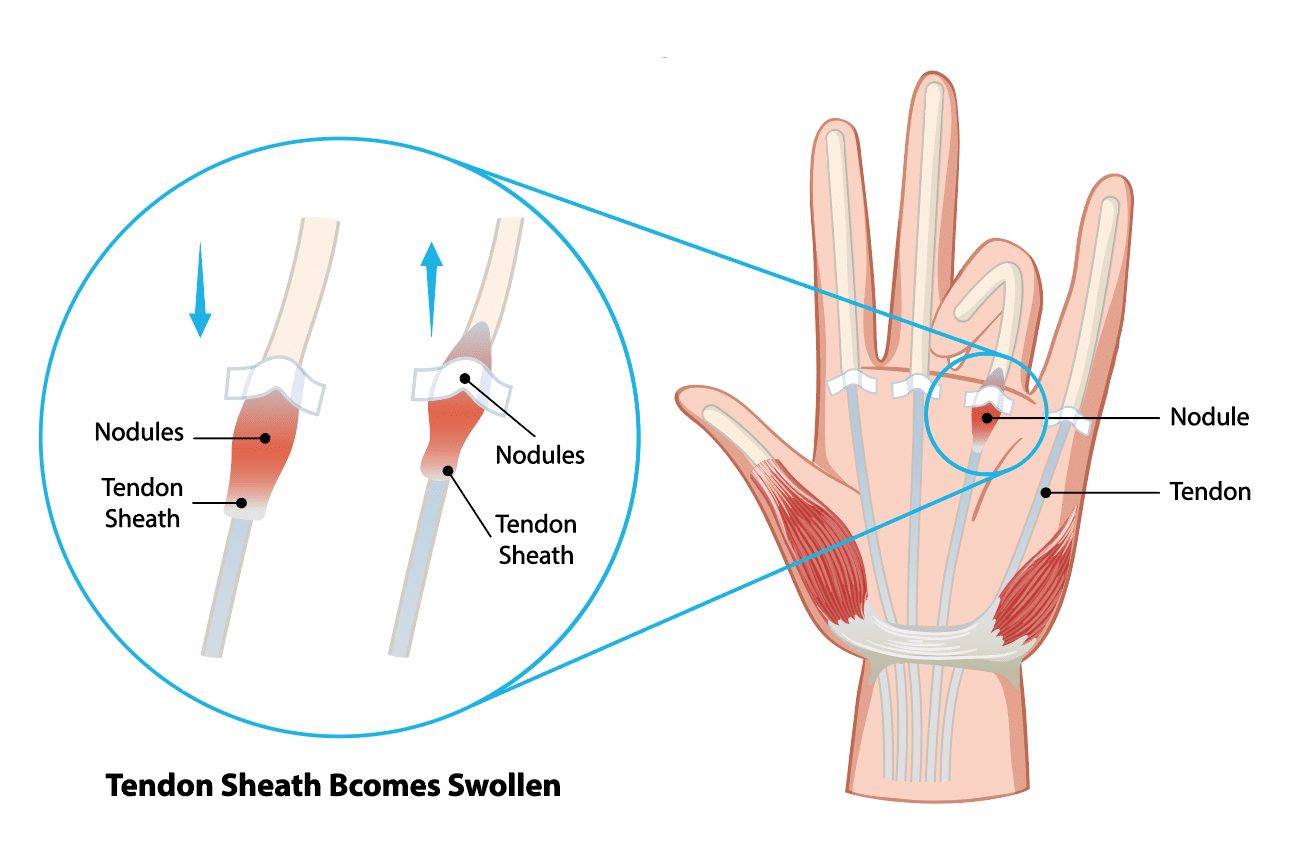
Your flexor tendons glide through tunnels in the palm called pulleys. With trigger finger, the tendon lining and the A1 pulley at the base of the affected finger or thumb become irritated and thickened. That narrowing makes the tendon catch as it moves, which creates clicking or locking.
Medical term: stenosing tenosynovitis, which means a tight tendon tunnel that limits smooth motion.
Most often involves the ring finger, middle finger, or thumb, but any digit can be affected.
The problem sits at the palm-side base of the finger where the tendon first enters the sheath.
Common Signs and Symptoms
Most people notice symptoms gradually, developing over days or weeks rather than all at once. At first, you may feel stiffness when you wake up, which improves as you use your hand. You might also notice a dull ache at the base of the finger near the palm, and a tendency for the finger to catch or click as you move it.
Clicking, catching, or popping when bending or straightening the finger or thumb
Pain or tenderness at the base of the finger on the palm side
Stiffness, especially in the morning
A small, tender bump in the palm that moves with the finger
Locking in a bent position that may suddenly release or require the other hand to straighten
Why Does Trigger Finger Happen?
Several factors can irritate or swell the tendon and its sheath, which tightens the space the tendon needs to glide.
Repetitive gripping or tool use that stresses the palm
Inflammatory conditions, such as rheumatoid arthritis
Diabetes, which can affect tendon health and healing
Coexisting hand issues like carpal tunnel syndrome or De Quervain’s tendinopathy
A prior hand injury or local swelling around the tendon sheath
How Trigger Finger Is Diagnosed
Diagnosis relies on what you tell the clinician and a careful examination of the hand. The doctor checks for tenderness over the A1 pulley, watches how the finger moves, and may feel a small lump along the tendon. Imaging tests are not usually needed unless the exam is unclear.
Tenderness over the A1 pulley at the base of the affected digit
Clicking, catching, or locking is observed with active motion
A small, moving nodule in the tendon may be felt
Ultrasound can be used in select cases to assess the tendon sheath
Doctors differentiate trigger finger from conditions like Dupuytren’s contracture, which pulls the finger down but does not cause tendon catching
Nonsurgical Treatment Options
Many people improve without surgery, especially when care starts early. The goals are to calm irritation, help the tendon glide smoothly, and reduce stress on the pulley. You may change how you use your hand, rest the affected finger with a removable splint, and work with a therapist. In some cases, a corticosteroid injection helps reduce swelling and catching.
Activity changes: limit prolonged gripping, take breaks, and use tools with larger, cushioned handles
Splinting: a removable splint, often worn at night, can rest the tendon and reduce morning stiffness
Anti-inflammatory strategies: ice and over-the-counter medications as directed by your clinician
Hand therapy: guided stretching, gentle tendon gliding, and education on joint protection
Corticosteroid injection: a targeted injection into the tendon sheath can reduce swelling and catching. Possible side effects include temporary soreness, skin lightening or thinning near the site, and a short-term rise in blood sugar in people with diabetes.
Helpful Daily Habits
Switch tasks or hands to limit repeated gripping
Use pens, kitchen tools, and garden tools with wider handles
Warm up the hand with a gentle motion before heavier use
Practice tendon-gliding exercises from your care team
What To Avoid For Now
Forceful or prolonged squeezing, like heavy pruning or weight handles without padding
Repeating the same grip task without breaks
Sleeping with the finger curled tightly
Pushing through painful locking episodes
Surgical Treatment When Needed
If symptoms persist, the finger locks frequently, or injections and splinting do not help, surgery can be a good option. The procedure is called an A1 pulley release. The surgeon widens the tight opening at the base of the finger so the tendon can glide smoothly again.
Typically performed with local anesthesia as an outpatient
Open or percutaneous techniques are used based on your anatomy and the surgeon's preference
Finger motion usually begins the same day to limit stiffness
Expected recovery includes temporary tenderness in the palm and progressive return to daily tasks
Risks include infection, stiffness, scar tenderness, and nerve irritation, which are uncommon
Choosing a Treatment Path
Your care plan is tailored to how your hand feels, your medical history, and what you want to return to doing. The plan explains options from less invasive treatments to surgery and describes what to expect at different stages. You and your clinician work together to choose the best path for you.
Situation
First Steps
If Symptoms Persist
Mild clicking and morning stiffness
Activity changes, splinting, ice, hand therapy
Consider corticosteroid injection
Frequent triggering that interferes with work or self-care
Corticosteroid injection and targeted therapy
Discuss surgical release
Locked finger or long-standing symptoms
Prompt evaluation by a hand specialist
Surgical release is often recommended
Recovery and Returning to Activity
After treatment, moving the hand in a steady, gentle way helps the tendon glide smoothly and reduces stiffness. Whether you had nonsurgical care or surgery, follow the recommended exercises and gradually return to daily tasks. Protect the palm from heavy pressure until it feels comfortable and strong again.
Follow your home exercise program and protect the palm from heavy pressure until it is comfortable
Ease back into gripping tasks with larger-handled tools and frequent rest breaks
Let your care team know if locking returns or if stiffness limits progress
When To See a Hand Specialist
Schedule an evaluation if any of the following apply:
Triggering lasts more than a few weeks or is getting worse
You need your other hand to unlock the finger
Pain or stiffness interferes with work, sports, or daily tasks
You have diabetes or rheumatoid arthritis, and the symptoms are persistent
Care at Princeton Orthopaedic Associates
Princeton Orthopaedic Associates treats trigger finger with careful evaluation and a plan that fits your goals. The team offers nonoperative options first and uses precise surgical release when needed. If your finger catches, clicks, or locks, you can regain comfortable hand use. Call to schedule an appointment to begin.
This blog post is meant to be informative and should not act as a self-diagnosis tool. If you’d like to see one of our doctors, please contact us here.
Shoulder Labrum Tears: Symptoms, Diagnosis, and Treatment Options
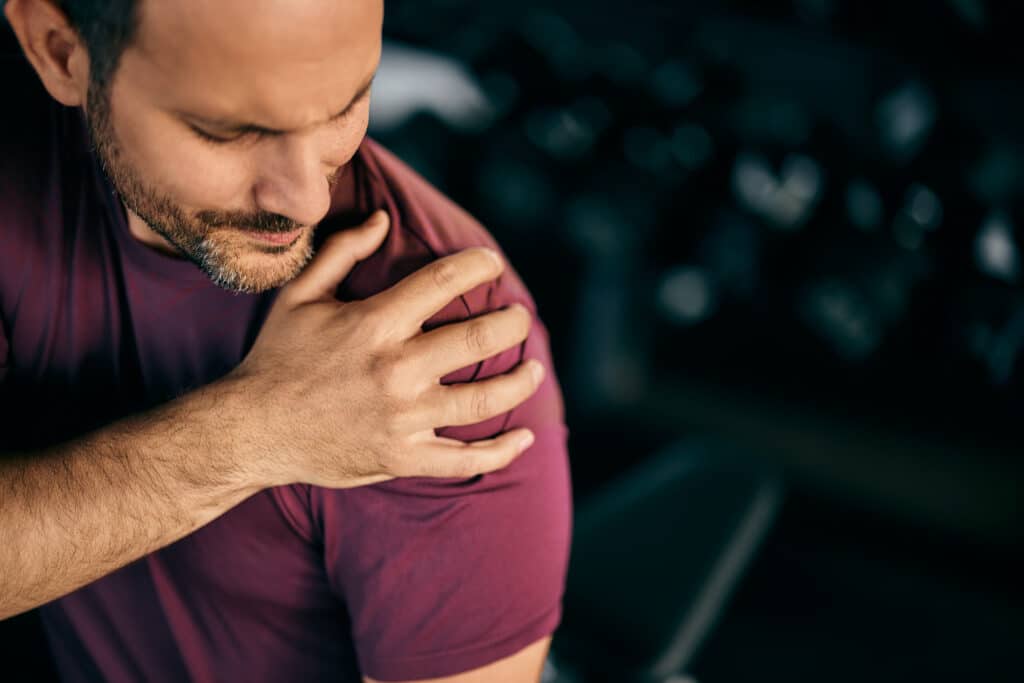
Shoulder labrum tears can cause deep shoulder pain, clicking, or a sense that the joint might slip. You'll learn what the labrum does, how tears happen, the most common symptoms, how we diagnose the problem, and which treatments can help you return to daily activities and sports safely. By understanding what causes labrum tears and the steps involved in evaluation and treatment, you can ask informed questions, set realistic goals, and participate actively in recovery with your care team.
What Is the Shoulder Labrum?
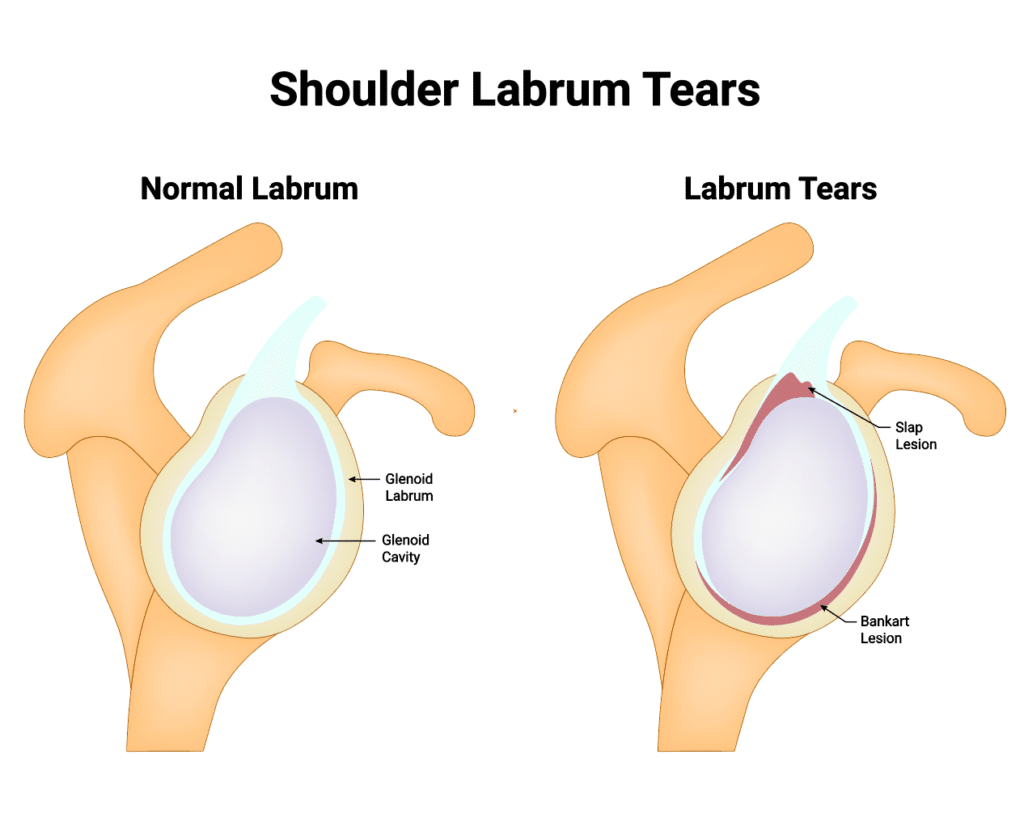
The shoulder labrum is a rim of cartilage that lines the shallow socket of the shoulder joint, called the glenoid. It deepens the socket, cushions the joint, and helps your ligaments and biceps tendon keep the ball of the shoulder centered.
When the labrum tears, the joint can feel painful or unstable. Some people notice catching, clicking, or a drop in strength when lifting, pushing, or reaching overhead.
Common Types of Labrum Tears
Several patterns of tearing can occur depending on where the labrum is injured and how the injury happened.
Type
Location
Typical Cause
Common Symptoms
Typical Treatment Approach
SLAP Tear (Superior Labrum Anterior to Posterior)
Top of the socket where the biceps tendon attaches
Overhead sports, falls on an outstretched arm, wear-and-tear
Pain with overhead use, clicking, reduced throwing power
Physical therapy, activity modification; arthroscopic repair or biceps procedures when needed
Bankart Tear
Front-lower portion of the labrum
Shoulder dislocation or subluxation
Instability, repeated dislocations, apprehension with abduction/external rotation
Rehab to restore control; arthroscopic Bankart repair for recurrent instability
Posterior Labral Tear
Back portion of the labrum
Forceful pushing, blocking, falls, repetitive loading
Deep posterior pain, clicking, pain with pushing or bench press
Rehab focused on scapular/rotator cuff control; arthroscopic repair if instability persists
Symptoms You Might Notice
Symptoms can vary depending on the type of labrum tear and your level of activity, but several signs are common across many cases. People may notice deep shoulder pain during lifting or overhead work, a sensation of catching or grinding within the joint, and reduced strength when pushing or throwing. Some experience night pain or reduced range of motion compared with the other shoulder. These patterns help guide evaluation and treatment choices.
Deep, hard-to-point-to shoulder pain, often with overhead use
Sensation of catching, grinding, or clicking inside the joint
Weakness when lifting, pushing, or throwing
Feeling that the shoulder could slip out or is less stable than usual
Pain at night or when lying on the affected side
Decreased range of motion compared with your other shoulder
Common Types of Labrum Tears
How Labrum Tears Happen
Trauma, such as a fall on an outstretched hand or a direct blow
Shoulder dislocation or partial dislocation
Repetitive overhead motion in activities like baseball, tennis, swimming, or weightlifting
Gradual wear related to age and everyday use
Shoulder laxity or poor shoulder blade and rotator cuff control
When to See a Shoulder Specialist
Pain or instability that lasts more than a few days after an injury
Recurring popping, catching, or a sense of slipping in the joint
Weakness that limits work, exercise, or sport
Night pain that interrupts sleep
How We Diagnose a Labrum Tear
Diagnosis starts with a detailed history and a hands-on exam that includes specific tests to stress different parts of the labrum and shoulder. We assess shoulder blade position, rotator cuff strength, and signs of instability.
Imaging often includes X-rays to evaluate the bones and joint alignment. An MRI, sometimes with a small amount of contrast dye in the joint, can help show the labrum and associated soft-tissue injuries.
Nonsurgical Treatment
Many labrum tears improve without surgery, especially when pain is the main issue and the shoulder is stable.
Activity modification to reduce painful overhead or heavy pushing motions
Pain and inflammation control with ice and medications as advised
Targeted physical therapy to restore shoulder blade control and rotator cuff balance
Gradual strengthening and return-to-sport progression guided by symptoms
In some cases, a guided corticosteroid injection may help with pain to allow better participation in therapy
Surgical Options
If pain or instability persists despite focused rehab, arthroscopic surgery may be recommended. Through small incisions, your surgeon can evaluate the labrum and repair or trim damaged tissue as appropriate.
Bankart repair to restore stability when the front of the labrum is torn with a dislocation
SLAP repair or procedures involving the biceps tendon, chosen based on age, activity, and tear pattern
Posterior labral repair for recurrent symptoms at the back of the joint
Recovery Timeline and Return to Activity
Recovery depends on the type of tear, the procedure performed, and your sport or job demands. The general ranges below are common starting points that your surgeon and therapist will personalize.
Phase
Typical Timeframe
Focus
Sling/Protection
2-4 weeks after debridement; 4-6 weeks after repair
Protect healing tissue, gentle hand/elbow motion, pain control
Early Motion
Weeks 2-8 after debridement; Weeks 4-10 after repair
Restore range of motion under guidance, avoid provocative positions
Strength & Control
Months 2-4
Scapular and rotator cuff strength, posture, gradual load
Return to Sports/Work
3-4 months for non-contact after debridement; 4-6+ months after repair
Progressive sport-specific drills; throwing programs may take longer
Protecting Your Shoulder Going Forward
Keep the shoulder blade stable during overhead work and lifting
Build balanced strength in the rotator cuff and core
Ease into new training volumes and avoid sudden spikes
Use proper technique for throwing, pressing, and pull-ups
Stop and seek guidance if you feel joint slipping, catching, or sharp pain
Get the Right Diagnosis and a Clear Plan
If shoulder pain, clicking, or instability is limiting you, we’ll examine your shoulder, review imaging when needed, and create a plan that fits your goals. Most people start with focused rehab, and when surgery is the best path, your team will guide you each step of the way.
Schedule an evaluation with Princeton Orthopaedic Associates to get moving comfortably again.
This blog post is meant to be informative and should not act as a self-diagnosis tool. If you’d like to see one of our doctors, please contact us here.
Iliotibial Band Syndrome: Outer Knee Pain You Can Treat
The iliotibial band, or IT Band for short, is a frequent cause of the ache one might feel on the outer thigh or knee. What follows is an explanation of the iliotibial band itself and the reasons it becomes irritated, as well as how its symptoms can be felt in the course of everyday activities or sport. We also cover the kind of treatment that will put you back in comfortable motion.
It is a condition that can get in the way of how the hip and knee function, regardless of whether your routine involves running, cycling, walking or even long periods of sitting. Fortunately, there is a way to improve the situation; with a plan to take the edge off the irritation and build up strength and mobility in the hip and knee, most see a turn for the better.
Quick Facts
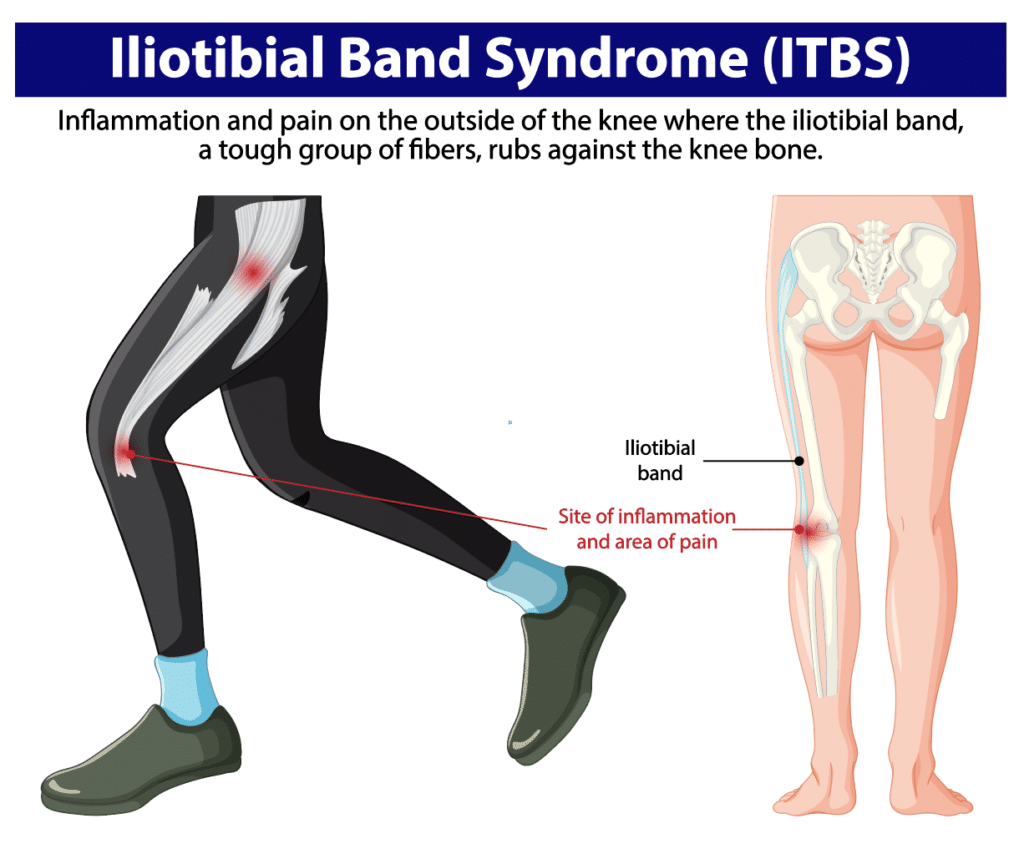
The iliotibial band, or IT band, is a strong band of connective tissue that runs from the outer hip to just below the knee.
Irritation develops where the band moves over the outer knee, often from repetitive bending and straightening of the leg.
People notice pain during runs, walks, stair use, or after sitting for a long time.
Weak or tight hip and thigh muscles, training errors, and unsupportive footwear commonly contribute.
Most cases improve without surgery through changes in activity, targeted strengthening, stretching, and physical therapy.
What Is the IT Band and IT Band Syndrome?
Running the length of the outer thigh, the IT band is a thick, fibrous structure that serves to support the leg. Its function is to link the muscles in the hip region with the shinbone and provide the knee with stability whether one is on foot or standing still.
Problems tend to surface when there is repetitive flexion and extension of the knee. The motion can put pressure on the tissues beneath the IT band, like a bursa or fat pad, forcing them up against the lateral femoral epicondyle. The resulting irritation will manifest as pain on the outside of the knee, though it is not uncommon for the discomfort to be felt further up into the thigh or even the hip.
Common Symptoms
One will find that symptoms set in of a gradual nature, only to be aggravated by the kind of repetitive knee flexion and extension involved in running or cycling, for instance, or in climbing stairs. A typical description from patients is one of mixed feelings: pain on the outside of the knee and tightness in the outer thigh, with some tenderness to the touch and an unease that varies with how they move. The pain can flare with activity, but it may ease with rest. And there is no need to have occasional stiffness after a period of sitting to make the diagnosis.
Symptoms often begin gradually and tend to worsen with repetitive activities. People describe:
Aching, burning, or sharp pain on the outer side of the knee
Tightness or pulling along the outside of the thigh
Discomfort with running, prolonged walking, or going down stairs
Tenderness when pressing on the outer knee
Occasional stiffness after sitting that may ease with gentle movement (more common in other knee conditions)
If you notice snapping at the outer hip, this may reflect a related but different condition (external snapping hip/greater trochanteric pain), not classic IT band syndrome at the knee
Why It Happens
IT band irritation usually stems from how the leg moves and how much load it is asked to handle. Multiple factors can combine to create friction near the outer knee.
Everyday Contributors
Long periods of sitting that tighten the hips and thighs
Weak gluteal and hip stabilizer muscles
Standing or walking with the weight shifted to one side
Footwear that matches your needs may help some people; orthotics can be considered when alignment or support is an issue after a professional assessment
Repetitive daily movement without strength or mobility balance
Athletic Contributors
Rapid increases in running or cycling volume or intensity
Downhill running or training on banked or sloped surfaces
Stride mechanics that stress the outer knee
Weakness in hip abductors and core stabilizers
Insufficient recovery between high-load sessions
How IT Band Syndrome Is Diagnosed
In the case of IT band syndrome, a sports medicine or orthopaedic clinician will make the diagnosis on the basis of a patient’s history and a thorough examination. Part of that involves testing for tenderness around the outside of the hip and knee, as well as an evaluation of core and hip strength and any muscle tightness in the vicinity.
There is no need to resort to imaging in every instance. An X-ray or MRI might be put in order, however, if the symptoms are particularly severe or do not fit the usual pattern. It also serves to put to rest other possibilities for pain on the outer knee, be it a stress injury, an issue with the meniscus or arthritis.
Treatment That Works
Most people recover with a stepwise approach that calms irritation and corrects the movement issues that caused it.
Reduce Pain and Calm Irritation
Modify or pause aggravating activities such as hills, speed work, or long runs and walks
Apply ice to the outer knee or thigh for 15 to 20 minutes as needed
Use anti-inflammatory medication if recommended by your doctor
Consider a brief period of cross-training that avoids repetitive knee bending
Improve Mobility in Tight Areas
Gentle stretching for the hips, hip flexors, quadriceps, hamstrings, and the tensor fasciae latae near the outer hip
Directly stretching the IT band itself is limited by its dense structure; focus on the surrounding muscles
Soft tissue work or foam rolling for the glutes and thigh muscles to reduce tension
Avoid high-pressure foam rolling directly over the outer knee in the early painful phase; instead, target the hips, glutes, and thigh muscles
Gradual return to the full range of motion without provoking pain
Strengthen and Retrain Movement
Targeted strengthening for gluteus medius and other hip stabilizers
Core and pelvic control exercises to support proper knee alignment
Gait or running form adjustments with guidance from a clinician or physical therapist
Footwear review, and orthotics when alignment or support is an issue after a professional assessment
For persistent pain, a clinician may consider a carefully selected corticosteroid injection in the area of irritation (often image-guided). Injections should be used judiciously as part of a broader rehab plan. Surgery is rarely needed and is considered only when symptoms fail to improve after a thorough course of nonoperative care.
Recovery Timeline
Healing time varies based on how long symptoms have been present, training demands, and how consistently you follow your plan. These general ranges are common:
Stage
Typical Timeframe
What to Expect
Early
Several weeks
Pain reduces with activity changes, icing, and basic mobility work.
Established
1 to 3 months
Strength and movement retraining restore tolerance for daily life and sport.
Recurrent or Chronic
Longer than 3 months
More comprehensive rehab and training plan adjustments are needed.
Prevention Tips
Prevention means keeping movement balanced and building strength around the hip and knee. A simple plan can help avoid flare-ups: gradually increase activity, vary routes, stretch key muscles, and choose footwear that fits your needs. Regular rest breaks and listening to your body are important to prevent irritation from returning.
Increase running or cycling volume gradually, especially after time off
Vary routes to avoid repeated downhill or sloped surfaces
Maintain hip and core strengthening year-round
Replace worn shoes and use footwear that matches your needs
Take movement breaks during long periods of sitting
When to See a Specialist
Schedule an evaluation if pain lasts more than a week, returns when you resume activity, or changes how you walk or run. Early guidance helps you recover faster and reduces the risk of the problem becoming chronic.
Guides a graded return to activity and long-term prevention
Get Back to Comfortable Movement
IT band syndrome can interrupt training and make everyday tasks frustrating, but it is highly treatable. With the right mix of activity changes, targeted strengthening, mobility work, and expert guidance, you can ease pain and return to the activities you enjoy.
Foot Pain: Common Causes, Symptoms, and Treatment Options
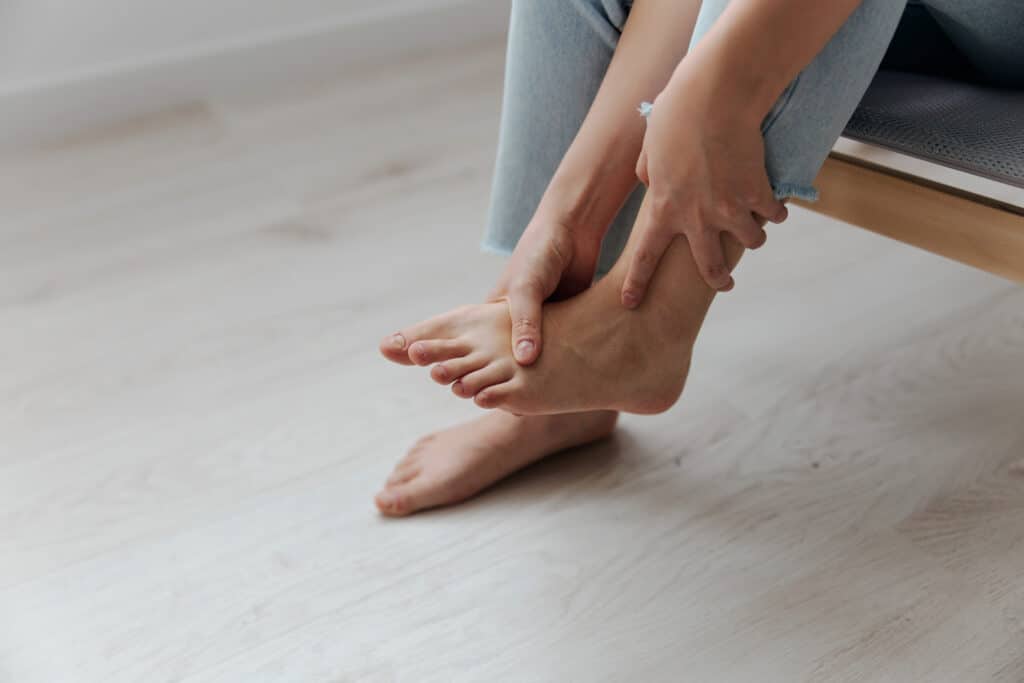
There are a number of things that can cause foot pain, be it an arthritic joint or nerve irritation, or perhaps tight fascia and inflamed tendons. We put together this overview to give you some clarity on the reasons for the discomfort and how we go about helping our patients get better and remain active.
It is useful to understand what is happening with your feet, whether the pain is a recent development or something that has been with you for months. Take note of where it is and how it is affected by standing or walking; such awareness will put you on the path to quicker relief. From there, one can take some practical measures right away, or turn to the kind of medical treatment we provide if home remedies prove insufficient.
Foot Pain at a Glance: What to Know
Location matters. Heel, arch, forefoot, toes, top of foot, or ankle pain often points to different causes.
Common culprits include plantar fasciitis, tendon irritation, stress fractures, arthritis, and nerve problems.
Training errors, worn shoes, long days on your feet, or sudden changes in activity can trigger pain.
Early care helps. Activity changes, ice, supportive footwear, and guided exercises often ease symptoms.
See a specialist if pain is severe, you can’t bear weight, there’s deformity, or symptoms persist despite rest.
Imaging, such as X-rays, ultrasound, or MRI, may be used when a fracture, tendon tear, or arthritis is suspected.
Most cases improve without surgery through physical therapy, orthotics, and targeted treatments.
Persistent bunions, neuromas, severe arthritis, or unstable injuries sometimes need surgical care.
Good shoes, gradual training, and strengthening reduce the odds of recurring pain.
Your plan should match your specific diagnosis, goals, and activity demands.
#image_title
How Your Foot Works and Why It Can Hurt
Your foot has 26 bones, numerous joints, strong ligaments, and powerful tendons. This complex design allows it to absorb shock, stabilize the body, and push you forward with every step.
Problems arise when tissues are overworked, inflamed, worn by arthritis, or irritated by pressure or footwear. The plantar fascia, Achilles tendon, and small nerves between the toes are frequent sources of symptoms.
Where It Hurts Can Point to the Cause
Use this guide to match common pain locations with frequent causes and typical clues. A precise diagnosis still requires an exam.
Pain with lacing shoes tightly, swelling on top, pain with push-off
Outer Foot / Ankle
Ankle sprain, peroneal tendinitis
Tenderness along outer ankle or foot, pain on uneven ground
Big Toe Joint
Bunion, hallux rigidus, turf toe, gout
Prominent bunion, stiffness or grinding, sudden redness and swelling with gout
Common Causes by Area
Heel Pain
Plantar fasciitis: Irritation of the band of tissue under the foot that supports the arch. Often worse with the first steps in the morning.
Achilles tendinitis: Overuse irritation of the tendon connecting the calf to the heel. Common with increased training or tight calves.
Heel spur: A bony growth at the heel that may accompany plantar fasciitis. Pain usually comes from the irritated soft tissues, not the spur itself.
Bursitis or retrocalcaneal irritation: Inflammation of cushioning sacs near the Achilles insertion at the back of the heel.
Stress fracture: Tiny crack in the heel bone from repetitive load. Tender to touch, often worse with weight bearing.
Arch and Bottom of the Foot
Plantar fasciitis: The most common cause of arch pain, related to overload of the plantar fascia.
Posterior tibial tendon problems: This tendon supports the arch. Irritation or insufficiency can cause aching along the inside of the ankle and arch, sometimes with a flattening of the foot.
Flatfoot strain: Flexible flat feet may ache after prolonged standing or walking, especially on hard surfaces.
Ball of the Foot and Toes
Metatarsalgia: Pain under the ball of the foot from overload or footwear pressure.
Morton neuroma: Thickening of a small nerve between the toes, causing burning, tingling, or a sock-bunched-up feeling.
Sesamoiditis: Irritation of the small bones under the big toe joint, often in push-off athletes or with flexible forefeet.
Hammertoe irritation: A toe deformity that rubs in shoes and can cause corns or calluses.
Stress fractures: Small cracks in the metatarsal bones from repetitive impact.
Top of Foot and Midfoot
Extensor tendinitis: Irritation of the tendons on top of the foot, sometimes from tight laces or increased activity.
Midfoot arthritis: Wear of the joints in the middle of the foot, causing stiffness and aching, often worse with push-off.
Lisfranc sprain: Injury to the midfoot ligaments that needs careful evaluation if pain and swelling persist. Persistent midfoot pain, inability to bear weight, or bruising on the bottom of the foot warrants prompt evaluation.
Stress fracture: Overuse injury of the midfoot bones, common with training spikes or sudden activity changes.
Outer Foot and Ankle
Ankle sprain: Ligament injury after rolling the ankle. Pain, swelling, and tenderness on the outside are typical.
Peroneal tendinitis: Irritation of the tendons that run behind the outer ankle bone, often aggravated by uneven ground.
Big Toe Joint
Bunion (hallux valgus): A bony prominence and angulation at the base of the big toe that can cause shoe pressure and pain.
Hallux rigidus: Arthritis and stiffness of the big toe joint that makes push-off painful.
Turf toe: Sprain of the big toe joint from a hyperextension injury.
Gout: Sudden, intense pain, redness, and swelling at the big toe joint due to crystal inflammation.
When to Seek Care Urgently
Severe pain or swelling after an injury, or visible deformity
Inability to bear weight or take four steps
Numbness, tingling, or weakness in the foot
Fever, redness, warmth, or an open wound near a painful area
Pain that persists beyond a couple of weeks despite rest and home care
How To Diagnose Foot Pain
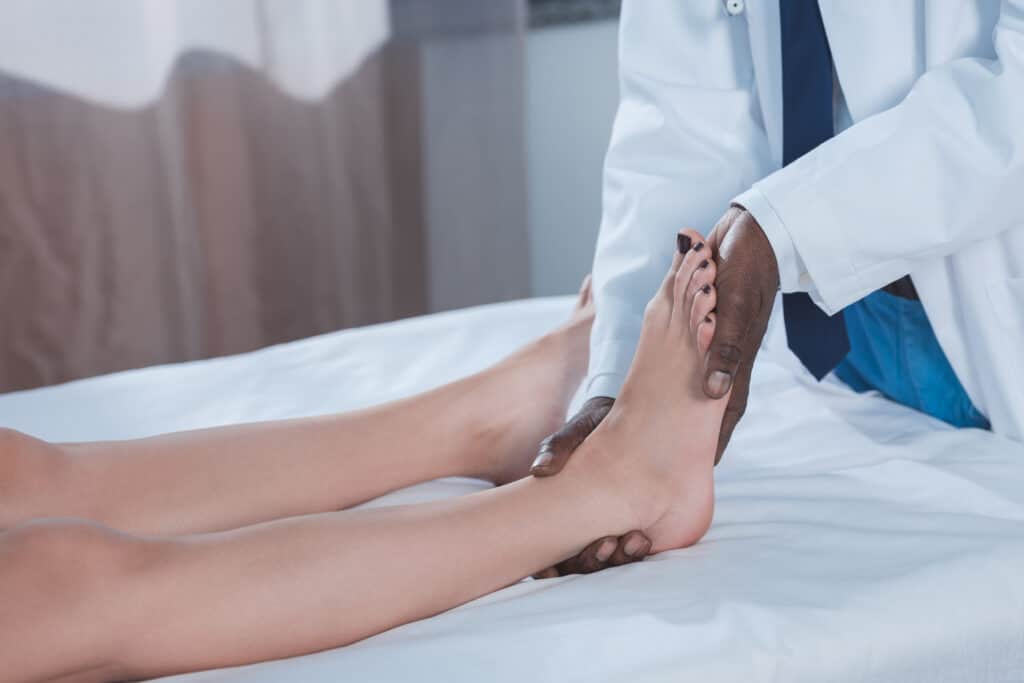
Your specialist begins with a careful history and hands-on exam. We look at where it hurts, when it hurts, your footwear, and how you walk.
Physical exam: Tender points, flexibility, strength, alignment, and gait
Imaging as needed: X-rays for bones and joints, ultrasound for soft tissues, MRI for complex or persistent problems
Nerve testing in select cases when symptoms suggest nerve entrapment
The goal is a clear diagnosis, so your treatment targets the true source of pain.
Treatment Options That Help
Most foot pain improves with a combination of activity changes, shoe adjustments, focused exercises, and targeted medical care. Your plan will be tailored to your diagnosis and goals.
Self-Care and Rehabilitation
Activity changes: Reduce high-impact activities while symptoms settle
Ice and elevation for swelling or after activity as needed. Avoid prolonged direct skin contact. If you have diabetes with neuropathy or peripheral vascular disease, consult a clinician before icing.
Supportive footwear and, when appropriate, cushioned insoles or custom orthotics
Stretching tight calves and plantar fascia, plus strengthening foot and ankle stabilizers
Physical therapy to correct mechanics, restore mobility, and build resilience
Medical Treatments
Medications such as anti-inflammatories, when appropriate
Cushioning pads or offloading for pressure points under the forefoot or heel
Immobilization or a walking boot for stress fractures or significant sprains
Image-guided corticosteroid injections for select conditions, such as plantar fasciitis or a neuroma. They are typically reserved for cases that do not respond to conservative care and carry small risks, such as plantar fascia rupture or fat pad atrophy, so they should be used judiciously.
Surgery is considered when pain persists despite comprehensive nonoperative care, or when structural problems require correction
Prevention Tips to Protect Your Feet
Wear supportive shoes that match your activity and replace them when worn
Increase training volume gradually and vary your activities
Warm up, stretch calves and hamstrings, and maintain ankle and foot strength
Use orthotics or padding if your provider recommends them for alignment or offloading
Address new pain early to prevent chronic irritation
Getting Back on Your Feet
If foot pain is limiting your day, we’re here to help you find the cause and create a clear plan forward. Schedule an exam with a Princeton Orthopaedic Associates specialist to start moving comfortably again.
This blog post is meant to be informative and should not act as a self-diagnosis tool. If you’d like to see one of our doctors, please contact us here.
Strengthen Your Posterior Chain to Move Better and Hurt Less
A strong back line, called the posterior chain, helps you stand tall and move well. It may help protect your spine, and it supports everyday tasks like lifting, climbing stairs, and getting up from a chair. It covers what the posterior chain includes, why it matters for back and knee comfort, easy form cues, and safe exercises you can start today.
We’ll also outline how often to train, common mistakes to avoid, and when it may be helpful to see a clinician at Princeton Orthopaedic Associates for personalized care and safer progress.
Disclaimer
Please note that these exercises are listed here as examples. You will absolutely need to consult with a qualified doctor, trainer, or medical professional to decide if this information is right for you. You can cause harm to yourself by doing exercises incorrectly or those that do not align with your body or desired outcomes. Please be careful!
Quick highlights
The posterior chain includes the glutes, hamstrings, calves, and the muscles that support your spine.
Training these muscles improves posture, balance, and lifting mechanics while reducing strain on the knees and lower back.
Start with hip-hinge patterns and bodyweight exercises, then progress to resistance as control improves.
What Is the Posterior Chain?
The posterior chain runs along the back of the body and is made of muscles that help keep the spine steady and allow the hips to extend. These muscles work together with many daily activities, such as standing, walking, lifting, and climbing stairs, so keeping them strong can support good posture and ease movement. Keeping this area strong supports your posture and reduces strain during daily activities.
The gluteal muscles in the hips generate power and control hip alignment
Hamstrings are in the back of the thigh, which assist hip extension and bend the knee
Calves, which help you push off the ground and keep the ankle stable
Spinal and core stabilizers, which keep the trunk steady so the hips can do their job
Why Building These Muscles Matters
Supports healthy posture and reduces stress on the lower back
Improves hip control to help reduce knees collapsing inward during squats, steps, or runs
Enhances balance and reduces the chance of slips during daily activities
Makes lifting, carrying, and stair climbing feel easier and safer
Master the Hip Hinge First
The hip hinge is the foundation of many posterior chain moves. Instead of bending your back, shift your hips back while keeping your spine in a comfortable neutral range so the glutes and hamstrings do the work.
Hinge cues
Stand tall, unlock your knees, and keep your chest lifted
Push your hips back toward a wall while maintaining a comfortable neutral range in your spine
Feel a stretch in the hamstrings; stop before the back rounds
Drive through your heels and squeeze the glutes to return to standing
Practice by lightly touching your hips to a wall behind you or sliding your palms down your thighs to learn the pattern.
Posterior Chain Exercises You Can Start Today
Choose 3 to 5 movements that feel comfortable and fit your body. Do each with slow, controlled reps and steady breathing. Focus on keeping good muscle control rather than rushing to finish. This careful approach helps you learn the pattern and build strength safely.
Exercise
Main Muscles
How to Do It
Reps
Glute Bridge
Glutes, hamstrings
Lie on your back, knees bent, feet hip-width. Exhale and lift hips until shoulders, hips, and knees line up. Pause, then lower with control.
8 to 12
Hip Hinge to Wall
Glutes, hamstrings
Stand a foot from a wall. Push hips back to tap the wall while maintaining a comfortable neutral range in your spine, then stand tall.
8 to 12
Romanian Deadlift (light dumbbells)
Glutes, hamstrings, back stabilizers
Hold weights by your thighs. Hinge at the hips with soft knees until you feel hamstring tension, then press through heels to stand.
6 to 10
Hamstring Curl (exercise ball or sliders)
Hamstrings, glutes
Bridge hips, then bend knees to roll the ball or sliders toward you. Keep hips lifted and trunk steady.
8 to 12
Bird Dog
Spinal stabilizers, glutes
On hands and knees, brace your core. Reach opposite arm and leg long without arching the back. Pause, switch sides.
6 to 10 each side
Step-up
Glutes, calves
Stand a foot from a wall. Push your hips back to tap the wall while maintaining a comfortable neutral spine, then stand tall.
8 to 12 each side
How Often Should You Train?
Most people benefit from training the posterior chain on nonconsecutive days so the muscles have time to rest and recover. Spacing workouts helps you keep good form and avoid overload. Consistent practice slowly builds strength and control while protecting your knees and back.
Level
Frequency
Sets x Reps
Notes
Beginner
2 days per week
1 to 2 sets of 8 to 12 reps
Prioritize form and slow tempo; stop a rep or two before fatigue changes your form.
Intermediate
2 to 3 days per week
2 to 3 sets of 6 to 12 reps
Increase load gradually when all reps feel steady and controlled.
Common Mistakes to Avoid
Rounding or overextending your lower back during hinges and deadlifts
Letting knees collapse inward during squats, step-ups, or bridges
Moving too fast and using momentum instead of muscle control
Loading heavy before you can keep a neutral range and steady knee alignment
Safety Tips
Warm up with 5 minutes of light cardio and dynamic movements like leg swings
Brace your midsection as if preparing for a gentle cough to protect the spine
Stop if you feel sharp pain, tingling, or symptoms traveling down a leg
Progress weight slowly and give your body at least 24 to 48 hours between sessions
Safety note: Individuals with osteoporosis, acute low back or radicular pain, or recent postoperative status should consult a clinician before hip hinging or deadlifting.
Who Benefits From Posterior Chain Training?
Desk workers looking to counteract long hours of sitting
Walkers, runners, and cyclists who want better hip control and stride efficiency
Parents and caregivers who lift and carry throughout the day
Adults seeking better balance and confidence with daily activities
When to See an Orthopaedic Specialist
If pain limits your daily activities, you’re unsure about your form, or you have had a recent injury, consider seeing an orthopaedic specialist. Getting advice early can help you avoid delays, keep your movement safe, and build strength steadily. A clinician can check your technique and tailor exercises to your needs.
At Princeton Orthopaedic Associates, we evaluate the way you move, identify which muscles need attention, and create a clear plan to reach your goals. If needed, we coordinate care with physical therapy to help you progress step by step.
This blog post is meant to be informative and should not act as a self-diagnosis tool. If you’d like to see one of our doctors, please contact us here.
Knee Pain After Running: Causes, Relief, and When to See a Specialist
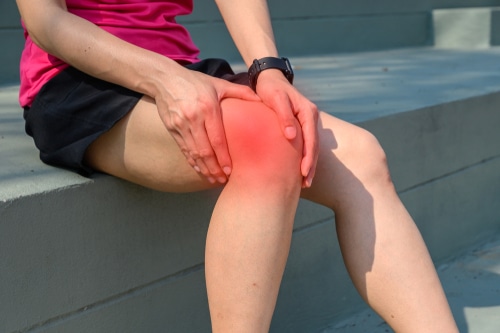
Knee pain after a run is common, whether you are new to running or building mileage. Below you will find the most frequent causes, how to tell what is driving your pain, simple steps to feel better, and when it is time to schedule an exam with our team at Princeton Orthopaedic Associates.
Quick Takeaways
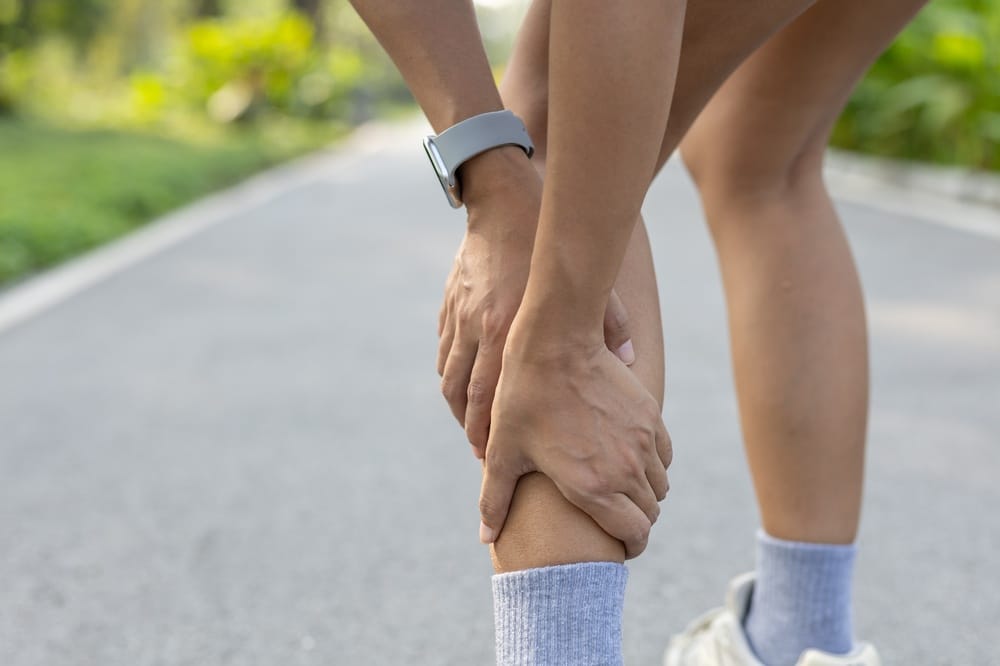
The location of pain often points to the cause. Pain behind or around the kneecap is usually patellofemoral pain. Pain on the outside of the knee is often associated with iliotibial band irritation. Pain just below the kneecap can be patellar tendinopathy.
Training errors, poor mechanics, and worn shoes are common triggers. Hills, downhills, sudden increases in mileage, and slanted roads can exacerbate symptoms.
Early care focuses on reducing irritation, improving hip and leg strength, and adjusting running mechanics.
See a specialist if pain limits walking, if the knee locks or gives way, or if symptoms last more than one to two weeks despite rest.
Where It Hurts Can Help Identify the Cause
Use this guide to match your pain pattern with likely sources. An exam is the best way to confirm the diagnosis.
Location of Pain
Possible Cause
Common Triggers
Front of the knee or behind the kneecap
Patellofemoral pain syndrome (runner’s knee)
High-impact mileage, prior injuries, and age-related changes
Hills, stairs, prolonged sitting, weakness of the hips or quads
Repetitive kneeling, direct pressure, and overuse
Meniscal irritation or tear
Twisting, deep knee bends, uneven terrain
Stiffness and swelling after activity
Knee osteoarthritis
Inside line of the knee or catching sensation
Warmth or tenderness near the kneecap
Bursitis
Repetitive kneeling, direct pressure, overuse
Why Knee Pain Flares With Running
Running multiplies the force through your knees with every step. Small issues in strength, flexibility, or form can add up over thousands of strides.
Training load: Rapid changes in mileage or intensity do not allow tissues time to adapt.
Surface and terrain: Downhills and slanted roads increase stress on the kneecap and IT band.
Footwear: Worn-out shoes reduce shock absorption and support.
Strength and control: Weak hips and core allow the knee to collapse inward, which stresses the kneecap and outer knee.
Mobility: Tight quads, hamstrings, calves, or hip flexors change how the knee tracks and loads.
What You Can Try Now
These steps are safe for most runners and are intended to reduce irritation while protecting the knee. Start by reducing hard miles and hills, then gradually resume activity as comfort returns. If pain persists for more than a week despite rest, or if you notice swelling, catching, or weakness, consult a clinician promptly.
Calm Irritation
Relative rest: Reduce mileage and hills until walking and daily activities are comfortable.
Apply ice for 15 to 20 minutes after activity to reduce soreness and swelling.
Use anti-inflammatory medication only if recommended by your doctor.
Adjust Training
Shorten your stride and increase cadence by about 5 to 10 percent to reduce knee load.
Avoid downhills and slanted road shoulders until pain settles.
Use run-walk intervals and add mileage gradually, usually no more than 10 percent per week.
Cross-train with low-impact activities such as cycling, swimming, or the elliptical trainer.
Strength and Mobility
Strengthen hips, glutes, and core to control knee position.
Build quad and hamstring strength with controlled, pain-free ranges.
Stretch quads, hamstrings, calves, and hip flexors to improve tracking.
Foam roll surrounding muscles such as quads, glutes, and the tensor fasciae latae near the hip.
Footwear and Support
Replace running shoes regularly, often every 300 to 500 miles.
Choose shoes that match your foot type and training surfaces.
Consider orthotics if advised after an exam and gait assessment.
Common Running-Related Knee Conditions
These conditions often respond well to targeted rehab and training changes.
Condition
What It Is
Helpful Strategies
Patellofemoral pain
Irritation where the kneecap tracks over the femur
Hip and quad strengthening, taping or bracing, cadence work, hill modification
Iliotibial band syndrome
Compression/impingement of tissues over the lateral femoral epicondyle and adjacent fat pad (commonly referred to as IT band syndrome).
Gradual loading, eccentric and isometric quad exercises, and manage jumping volume
Patellar tendinopathy
Overload of the tendon below the kneecap
Reduce twisting and deep knee bends, progressive strengthening, and imaging if persistent
Gradual loading, eccentric and isometric quad exercises, and managing jumping volume
When to Pause Running and See a Specialist
Severe pain, swelling, or inability to bear weight.
Knee catching, locking, or giving way.
Numbness or tingling in the legs.
Pain that interferes with sleep or daily activities.
Symptoms lasting longer than one to two weeks despite rest and activity changes.
How We Diagnose Knee Pain
History and exam to pinpoint the irritated structures and movement patterns.
Gait and running form are reviewed as needed.
Imaging, such as X-rays or MRI, should be used only when findings suggest structural injury or if symptoms do not improve.
Treatment Options at Princeton Orthopaedic Associates
Targeted physical therapy to restore strength, mobility, and control.
Training and form guidance, including cadence, stride, and hill management.
Taping or bracing for short-term support when appropriate.
Medications as directed to manage pain and inflammation.
Injections are not used for a kneecap tendon problem because steroids can weaken tendons and raise the chance of tearing. If they are clearly needed, image-guided injections may be used for joint arthritis or for certain bursitis near the tendon or IT band inflammation, as decided by your specialist.
Returning to Running Safely
Start with pain-free walking, then use short run-walk intervals.
Increase total weekly running time gradually, often by 10 percent or less.
Run on level, predictable surfaces at first. Add hills later.
Perform strength training two to three days per week to maintain progress.
Use a simple pain rule: discomfort during a run should be mild and should settle within 24 hours. If it lingers or worsens, scale back.
If knee pain is keeping you from the miles you love, we can help you identify the cause and build a clear plan back to comfortable running.
This blog post is meant to be informative and should not act as a self-diagnosis tool. If you’d like to see one of our doctors, please contact us here.
Sciatica Stretches That Gently Ease Nerve Pain
Pain that starts in the lower back or buttocks and travels down one leg is often linked to irritation or pressure on the sciatic nerve. Gentle stretching can help ease tight muscles, calm nerve sensitivity, and support a gradual return to everyday activities.
These stretches are designed to be gentle and accessible. Move slowly, stay within a comfortable range of motion, and focus on steady breathing. If any movement increases pain, tingling, or numbness, it's best to ease off or skip that stretch. Knowing when and how to stretch, along with what to avoid during flareups, can make a big difference in your recovery. If symptoms persist or worsen, it’s important to consult a medical professional.
What You Should Know
Sciatica refers to symptoms from irritation or compression of the sciatic nerve, often causing pain down the back of the leg.
Common causes include a lumbar disc herniation, spinal stenosis, or tight deep hip muscles like the piriformis.
Gentle stretching can reduce muscle guarding and help calm nerve sensitivity.
Avoid stretches that trigger sharp pain, increasing numbness, or leg weakness.
Hold most stretches 20 to 30 seconds, repeat 2 to 3 times, and practice 1 to 2 times daily as tolerated.
Seek care urgently for bowel or bladder changes, progressive weakness, or saddle numbness.
What Is Sciatica and Why Does It Hurt?
The sciatic nerve is the largest nerve in your body. It forms in the lower spine, travels through the buttock, and runs down the back of each leg. When structures around the nerve get irritated or compressed, pain can spread from the low back or hip into the thigh, calf, or foot.
Causes vary. A lumbar disc can bulge and press on the nerve root. Spinal stenosis narrows the canal that the nerves pass through. Sometimes the deep hip muscles tighten and create local nerve irritation. Your plan should match your diagnosis, which is why an exam is helpful before starting a new routine.
Before You Begin: Safe Stretching Basics
Warm up with a short walk or gentle march in place for 2 to 3 minutes.
Move slowly, breathe, and keep pain below a mild, tolerable level.
Stop immediately if pain shoots down the leg or numbness increases.
Use a towel, yoga strap, or chair for support as needed. Avoid bouncing.
Check with your clinician if you are pregnant, have osteoporosis, or recent spine surgery.
Five Gentle Stretches, Step by Step
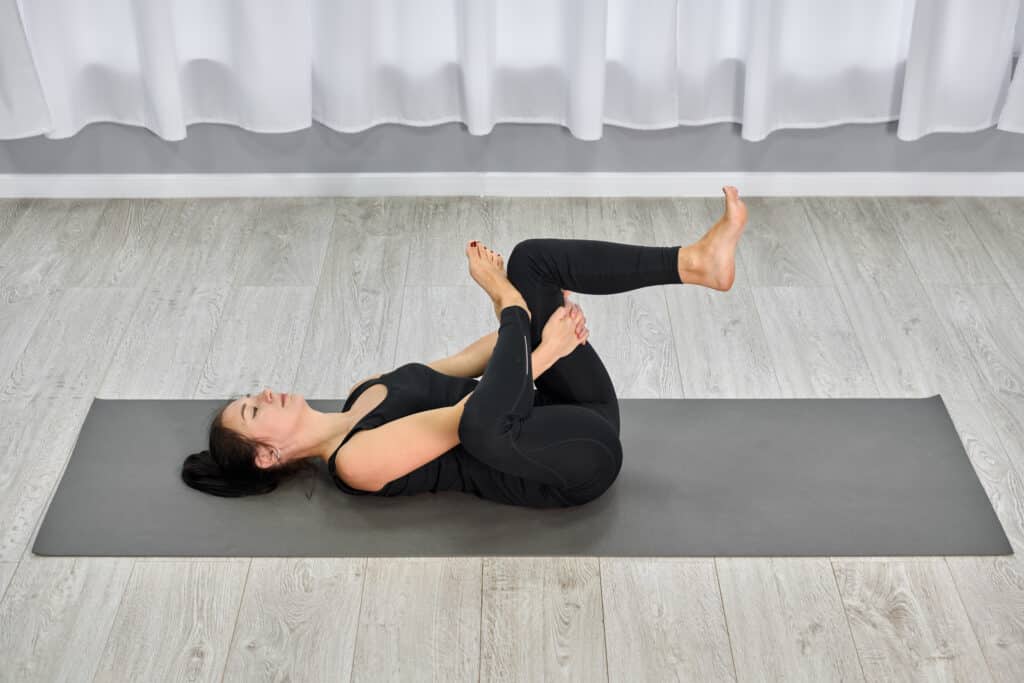
1) Figure-4 Stretch on Back
Lie on your back with knees bent and feet on the floor. Cross the ankle of your painful side over the opposite thigh.
Gently pull the uncrossed thigh toward you until you feel a stretch in the buttock.
Hold 20 to 30 seconds. Repeat 2 to 3 times.
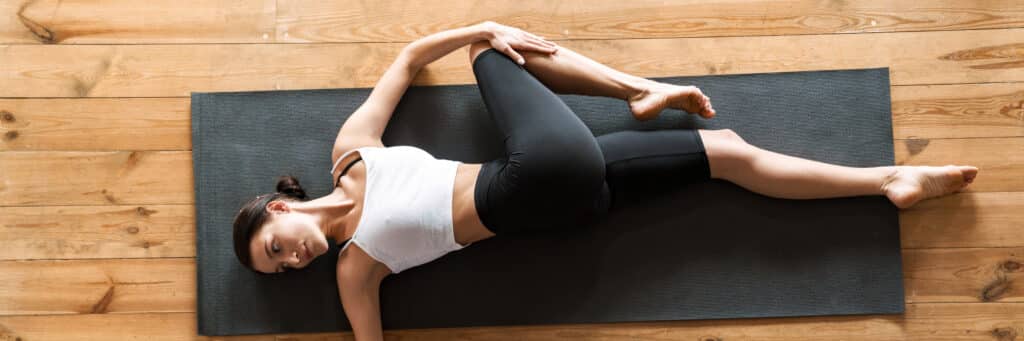
2) Knee to Opposite Shoulder
Lie on your back. Bend the knee on the painful side.
Use both hands to draw the knee across your body toward the opposite shoulder.
Stop at a comfortable stretch in the outer hip. Hold 20 to 30 seconds. Repeat 2 to 3 times.
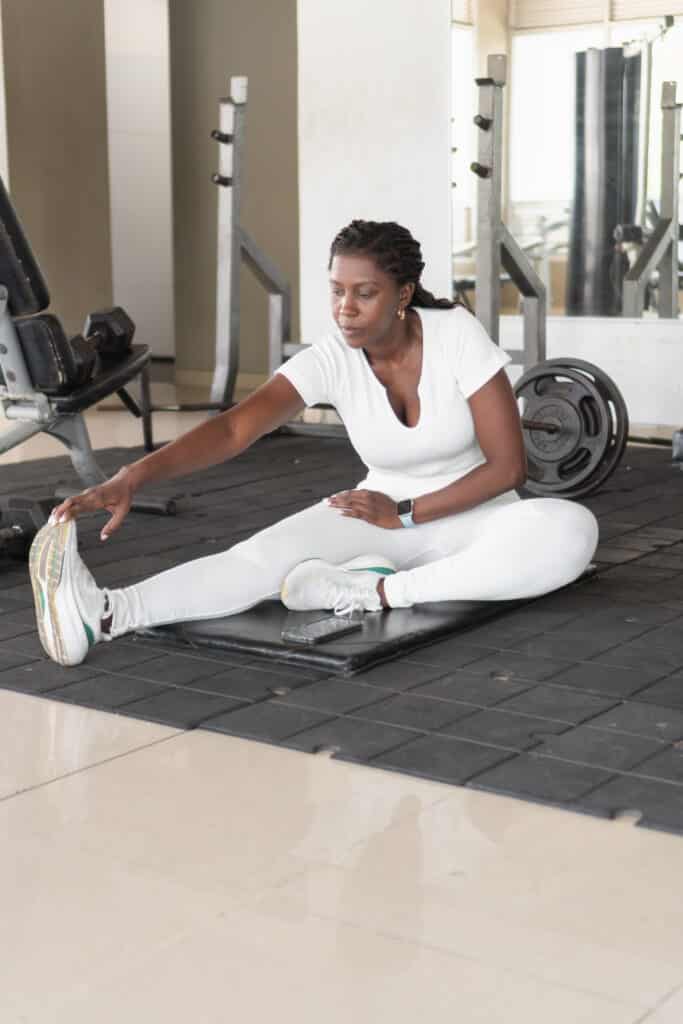
3) Seated Hamstring Stretch
Sit on the floor with one leg extended straight and the other leg bent, with the sole of the foot resting against the inner thigh of the extended leg. Keep your back straight and shoulders relaxed.
Gently lean forward from your hips, reaching toward your shin, ankle, or foot. Stop when you feel a mild stretch in the back of your thigh. Hold for 15–30 seconds, breathing steadily. Return to upright and switch legs. Repeat 2–3 times on each side.
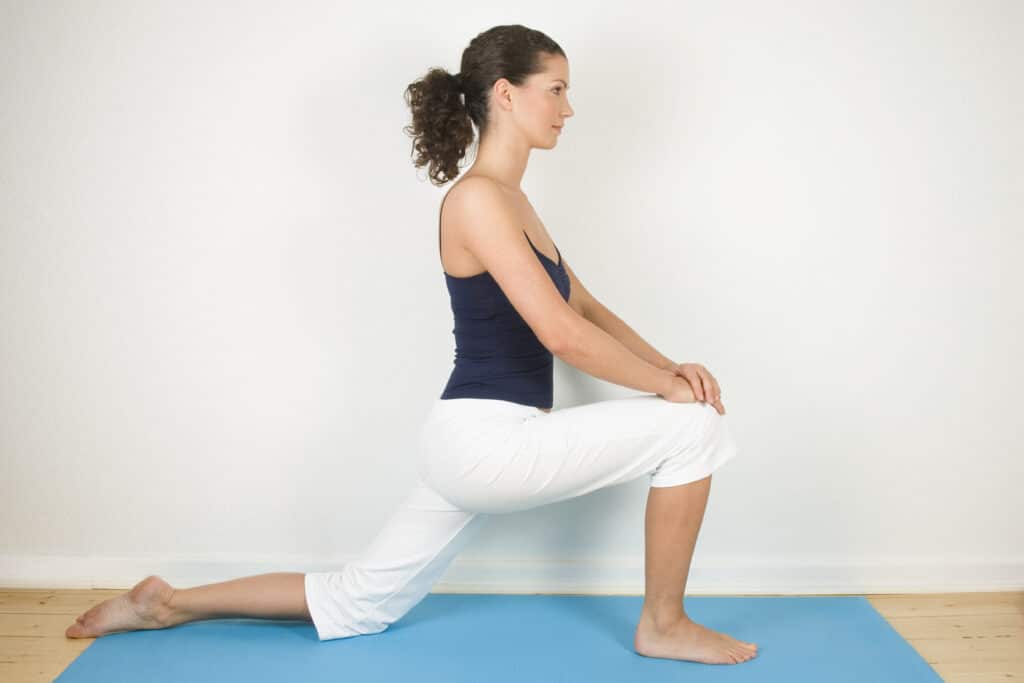
4) Half-Kneeling Hip Flexor Stretch
Kneel on one knee with the other foot in front. Tuck your tailbone slightly and gently shift your weight forward.
You should feel a stretch in the front of the hip on the kneeling side. Keep your trunk upright.
Hold 20 to 30 seconds. Repeat 2 to 3 times each side.
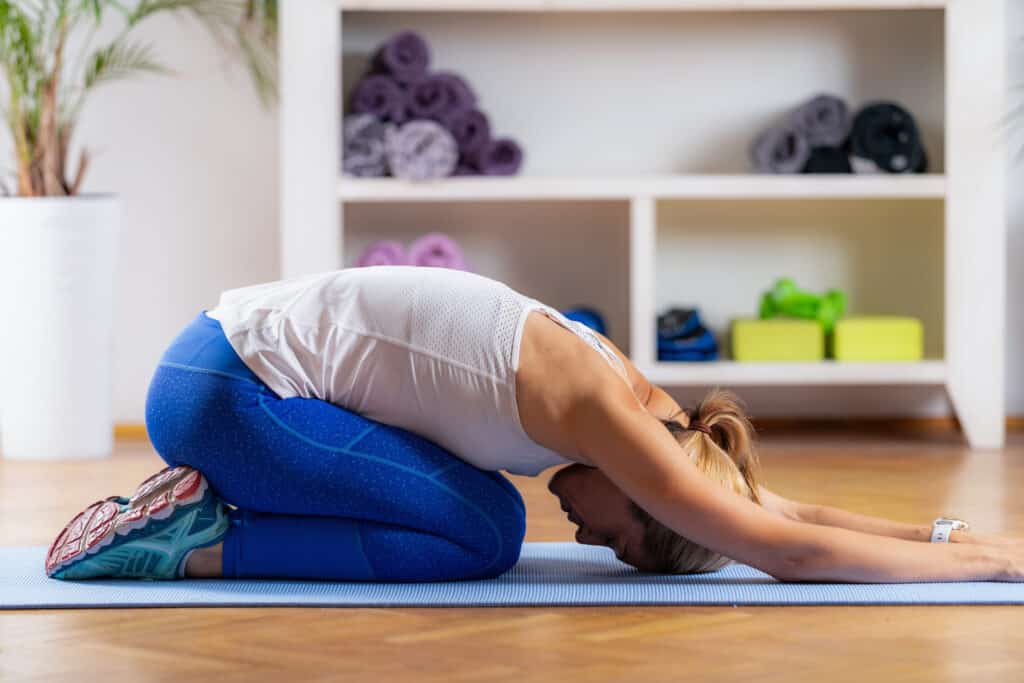
5) Child's Pose, Comfortable Range
Start on hands and knees. Sit your hips back toward your heels while reaching your arms forward.
Stay where it feels easy to breathe. If you notice leg pain or tingling increases with spinal flexion, reduce the depth or skip this position.
Hold 20 to 30 seconds. Repeat 2 to 3 times.
More Mobility Moves That Help
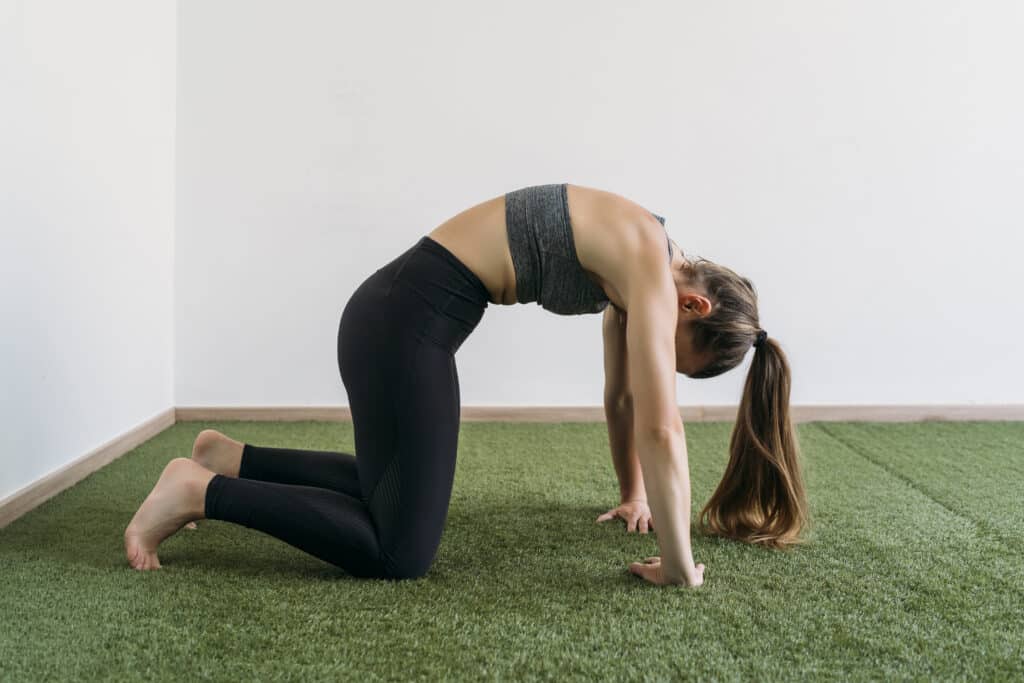
6) Cat–Cow
On hands and knees, gently arch your back toward the ceiling, then lower your belly toward the floor.
Move slowly with your breath for 30 to 60 seconds. Stop if leg pain increases.
7) Seated Piriformis Stretch
Sit tall. Cross the painful-side ankle over the opposite knee.
Lean forward slightly until you feel a stretch in the buttock. Hold 20 to 30 seconds, repeat 2 to 3 times.
How Often Should You Stretch?
Consistency helps calm sensitive tissues. Use this simple guide to pace your recovery.
Stage
Frequency
Holds/Reps
Notes
Early pain
1 to 2 times daily
20 to 30 second holds, 2 to 3 sets
Stay gentle, avoid positions that trigger leg pain
Improving
Daily or every other day
Progress range as comfort allows
Add short walks and easy core work
Maintenance
3 to 5 days per week
Brief routine after activity
Keep flexibility in hips, hamstrings, and low back
What To Avoid During a Flare
Movements that sharply increase leg pain, tingling, or numbness
Heavy lifting with a rounded back
Prolonged sitting without breaks
Bouncing or forcing deeper stretches
Deep spinal flexion or sustained forward bending if it increases leg symptoms.
When To See a Doctor
Get medical care promptly if any of the following occur:
New or worsening leg weakness
Loss of bowel or bladder control
Numbness in the groin or inner thighs
Severe pain after a fall or injury
Pain that does not improve over several weeks despite rest and gentle care
Common Triggers and Risk Factors
Prolonged sitting or long commutes
Repetitive bending or lifting without proper mechanics
Sudden increase in activity or deconditioning
Tight hips and hamstrings that limit normal movement
Age-related spinal changes such as stenosis
Beyond Stretching: What Else Helps
Short, frequent walks to keep joints and nerves moving
Ice or heat for comfort based on your preference
Over-the-counter anti-inflammatory medication if your doctor approves
Physical therapy for targeted mobility, core and hip strength, and body mechanics
Ergonomic changes at work and frequent position changes
Care With Princeton Orthopaedic Associates
If sciatic pain is limiting your day, we can help you find the cause and build a plan that fits your life. Our clinicians guide you on safe exercises, posture, and next steps if additional treatment is needed. Schedule an evaluation to get moving comfortably again.
This blog post is meant to be informative and should not act as a self-diagnosis tool. If you’d like to see one of our doctors, please contact us here.
Sequence rules uses cookies to track the order of requests a user has made and the time between requests and makes them available via Cloudflare Rules. This allows you to write rules that match valid or invalid sequences. The specific cookies used to validate sequences are called sequence cookies.
session
cf_ob_info
The cf_ob_info cookie provides information on: The HTTP Status Code returned by the origin web server. The Ray ID of the original failed request. The data center serving the traffic
session
cf_use_ob
The cf_use_ob cookie informs Cloudflare to fetch the requested resource from the Always Online cache on the designated port. Applicable values are: 0, 80, and 443. The cf_ob_info and cf_use_ob cookies are persistent cookies that expire after 30 seconds.
session
__cfwaitingroom
The __cfwaitingroom cookie is only used to track visitors that access a waiting room enabled host and path combination for a zone. Visitors using a browser that does not accept cookies cannot visit the host and path combination while the waiting room is active.
session
cf_chl_rc_i
These cookies are for internal use which allows Cloudflare to identify production issues on clients.
session
cf_chl_rc_ni
These cookies are for internal use which allows Cloudflare to identify production issues on clients.
session
cf_chl_rc_m
These cookies are for internal use which allows Cloudflare to identify production issues on clients.
session
__cfruid
Used by the content network, Cloudflare, to identify trusted web traffic.
session
__cf_bm
Cloudflare's bot products identify and mitigate automated traffic to protect your site from bad bots. Cloudflare places the __cf_bm cookie on End User devices that access Customer sites that are protected by Bot Management or Bot Fight Mode. The __cf_bm cookie is necessary for the proper functioning of these bot solutions.
session
__cflb
When enabling session affinity with Cloudflare Load Balancer, Cloudflare sets a __cflb cookie with a unique value on the first response to the requesting client. Cloudflare routes future requests to the same origin, optimizing network resource usage. In the event of a failover, Cloudflare sets a new __cflb cookie to direct future requests to the failover pool.
session
_cfuvid
The _cfuvid cookie is only set when a site uses this option in a Rate Limiting Rule, and is only used to allow the Cloudflare WAF to distinguish individual users who share the same IP address.
session
cf_clearance
Whether a CAPTCHA or Javascript challenge has been solved.
session
Google reCAPTCHA helps protect websites from spam and abuse by verifying user interactions through challenges.
Name
Description
Duration
_GRECAPTCHA
Google reCAPTCHA sets a necessary cookie (_GRECAPTCHA) when executed for the purpose of providing its risk analysis.
179 days
Google Tag Manager simplifies the management of marketing tags on your website without code changes.
Name
Description
Duration
cookiePreferences
Registers cookie preferences of a user
2 years
td
Registers statistical data on users' behaviour on the website. Used for internal analytics by the website operator.
session
These cookies are used for managing login functionality on this website.
Name
Description
Duration
wordpress_logged_in
Used to store logged-in users.
Persistent
wordpress_sec
Used to track the user across multiple sessions.
15 days
wordpress_test_cookie
Used to determine if cookies are enabled.
Session
WPForms is a user-friendly WordPress plugin for creating custom forms with drag-and-drop functionality.
Name
Description
Duration
wpfuuid
Used to track user interactions with forms.
11 years
Statistics cookies collect information anonymously. This information helps us understand how visitors use our website.
Google Analytics is a powerful tool that tracks and analyzes website traffic for informed marketing decisions.
Used to distinguish new sessions and visits. This cookie is set when the GA.js javascript library is loaded and there is no existing __utmb cookie. The cookie is updated every time data is sent to the Google Analytics server.
30 minutes after last activity
__utmc
Used only with old Urchin versions of Google Analytics and not with GA.js. Was used to distinguish between new sessions and visits at the end of a session.
End of session (browser)
__utmz
Contains information about the traffic source or campaign that directed user to the website. The cookie is set when the GA.js javascript is loaded and updated when data is sent to the Google Analytics server
6 months after last activity
__utmv
Contains custom information set by the web developer via the _setCustomVar method in Google Analytics. This cookie is updated every time new data is sent to the Google Analytics server.
2 years after last activity
__utmx
Used to determine whether a user is included in an A / B or Multivariate test.
18 months
_ga
ID used to identify users
2 years
_gali
Used by Google Analytics to determine which links on a page are being clicked
30 seconds
_ga_
ID used to identify users
2 years
_gid
ID used to identify users for 24 hours after last activity
24 hours
_gat
Used to monitor number of Google Analytics server requests when using Google Tag Manager
1 minute
_gac_
Contains information related to marketing campaigns of the user. These are shared with Google AdWords / Google Ads when the Google Ads and Google Analytics accounts are linked together.
90 days
__utma
ID used to identify users and sessions
2 years after last activity
__utmt
Used to monitor number of Google Analytics server requests
10 minutes
These cookies help us measure the effectiveness of our website content and understand how visitors find and use our site. This allows us to improve the experience and provide more helpful resources.
Facebook Pixel is a web analytics service that tracks and reports website traffic.